

Timm Schleiff
The required 5/16-inch hole can be drilled with a gas- or batter…
I recently built a new shop for my custom woodworking business near Lewisburg, W.Va. The site I chose is not quite typical for a woodshop—it’s within an old limestone quarry—but the price was right, it’s within walking distance of our historic downtown, and the natural soundproofing of the quarry walls lets me run my chainsaw and band saw mill without bothering the neighbors.
The relatively flat bedrock floor also offered a solid base for a slab foundation. But before I could proceed with the formwork, I was faced with the challenge of removing about 10 cubic feet of limestone in a rear corner of what is now my shop, as well as taking out several ridges that ran through what would become my slab.
The John Deere 710B backhoe couldn’t budge them, so I turned to an approach that my family’s general contracting business has been using successfully for several years: A rock-breaking system called Micro-Blaster, manufactured by a Frankford, W.Va., company called Ezebreak.
The Micro-Blaster system is quite inexpensive, easy to use, and requires no license or special training. It’s very safe, and the force generated by the small explosive cartridges can be targeted so accurately that we’ve used it to break up concrete within the basement of an occupied home during a remodeling project.
Placing the Charges
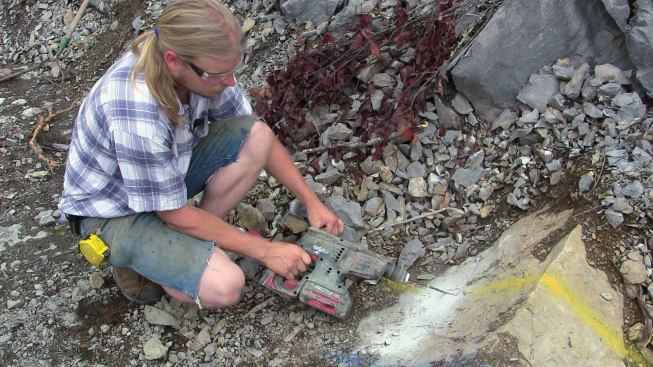
One of the best things about Micro-Blaster is that it requires only a 5/16-inch hole—easily within the capability of an electric rotary hammer with a carbide bit. Where there is no power on site, a gas- or-powered drill will work for this step.
Different types of rock fracture differently, but in general it’s best to drill at a fairly shallow angle, with the goal of breaking loose a 6- or 8-inch–thick section of rock with each charge. It’s important to drill the hole to the proper depth—a single charge requires a 10-inch–deep hole. If the hole is too deep, the firing pin won’t be able to engage the cartridge.
Also, the hole must be clean to prevent dust from gathering between the charge and the firing mechanism. Any stone dust in the completed hole has to be blown out with an air compressor or a bulb-type syringe provided by the manufacturer. Then a stiff small-bore wire brush with a long handle is worked up and down in the hole to loosen any remaining dust, after which it’s blown out one last time.
One or more paper-wrapped power cartridges—which look something like medium-size firecrackers—are then inserted into the hole, followed by the tubular section of the blasting unit, which holds the firing pin. Pushing with 10 to 15 pounds of pressure until you feel it bottom out ensures that the firing mechanism is firmly seated against the cartridges.
Three Heads are Better Than One
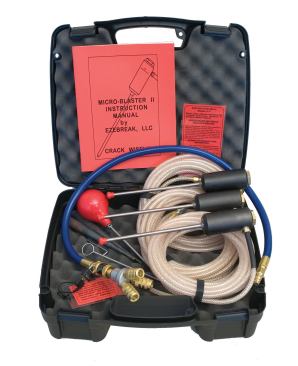
For smaller jobs, we sometimes use our original Micro-Blaster, a single-head version that is activated with a 25-foot pull cord, but we mainly use the newer Micro-Blaster IIx3 kit, which has three separate heads that can be detonated separately or simultaneously.
Rather than relying on a pull cord, though, the three-head version is activated by compressed air supplied to the heads through three 25-foot lengths of 1/8-inch air hose—a smaller-diameter version of the hose used to power pneumatic nailers. The individual hoses connect to a three-way quick coupler that incorporates a key-operated lockout valve. A short length of hose from the valve is coupled to an air compressor or a portable air tank.
Once hoses are connected and the area is secure, unlocking and opening the valve activates the firing pins and fires the charges. When three charges are ready to fire, you have the option of setting them off individually by connecting only one of the hoses to the valve at a time. In general, though, I find that it’s best to fire all three at once, since that seems to provide the most breaking power. A portable 10-gallon tank like the one I used on this project holds at least enough air for several dozen shots before it needs a refill.
Safety & Efficiency
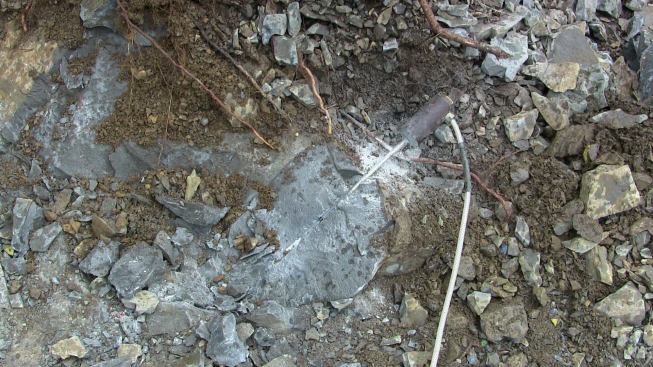
The explosive in the Micro-Blaster cartridges is active only at high pressures. Once the charge fractures the rock surrounding it, the pressure is relieved and the explosive reaction essentially comes to a stop. As a result, there’s not a lot of surplus energy to fling rock around. Setting off a charge from 25 feet away—the length of the air hoses—feels perfectly safe. I’ve occasionally seen golf-ball size rocks travel 10 or 15 feet, but with no more velocity than you’d get from a gentle underhand toss. If there are vehicles close by or we are working close to a house, we will drape a section of old household carpet over the area to prevent any damage.
Although it seems counterintuitive, hard rock such as limestone usually fractures more easily than sandstone or other softer materials. Depending on the rock and how much fracturing you want, you can insert as many as four cartridges in each hole. The secret is to find the minimum number that will give you a satisfactory result. Multi-cartridge shots require you to drill 2 inches deeper for each additional cartridge, which means more time and more wear and tear on bit, drill, and operator. Cartridges themselves cost about $2 apiece, which also adds up over time.
On the other hand, a charge that isn’t sufficiently powerful may fail to break the rock or concrete enough to free it from the surrounding material, leaving you with an area of cracked fragments that are so tightly interlocked that they can’t be removed.
Drilling another hole and placing an additional charge in the same area may not provide much additional fracturing because the cracks created from the first charge relieve the pressure produced by the later one.
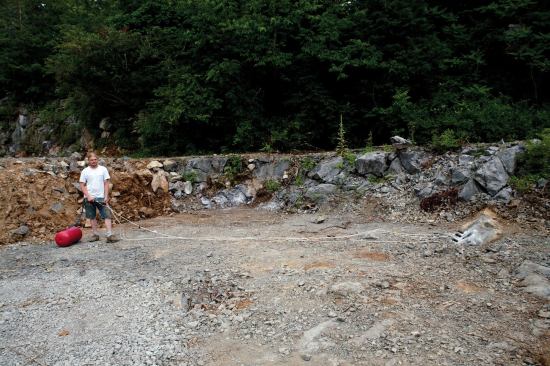
I found that double charges gave good results with the limestone under my shop. Breaking up and removing the problem outcroppings took me less than a day and cost much less than hiring a blasting contractor or renting a hammer attachment for the backhoe.
Once the problem rock was out of the way, I was ready to build the slab forms. Fitting them to the sloping surface so the tops were level throughout was the next challenge, but that’s a story for another day.
Timm Schleiff practices sustainable woodworking and cabinet and furniture making near Lewisburg, W.Va.


