Over time, I’ve watched impact drivers slowly filter in to what was a drill/driver world only. Early impacts were novelties on most jobsites. Soon, however, their power, speed, and efficiency started knocking drill/drivers (corded and cordless) back into the tool trailer. In lockstep, construction screws have also evolved and required more power to drive them. Tool manufacturers have done their part, delivering increasingly powerful tools. As a result, the category entered what I’d call a musclebound phase: high-umph tools that can bomb in fasteners at blistering speeds. But what about areas requiring more control and finesse?
For the work I’ve encountered in recent years—everything for new construction and remodeling from form work to custom stain-grade millwork to a steel-clad custom home—I’ve found myself reaching for smaller-capacity drill/drivers or screwdrivers for installing trim screws or hardware where the burly impact could result in overdrives or cammed-out screw holes or stripped heads. The impacts were too powerful and fast and risked damaging the more delicate assemblies, namely cabinet face-frame connections, interior trim assemblies, and door and window hardware.
Well, that’s over now with this Makita impact driver.
FOUR-SPEED VERSATILITY
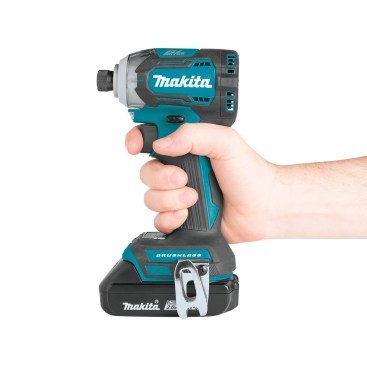
On the surface, the Makita XDT12Z four-speed impact driver is a standard 1/4-inch hex drive built on Makita’s full-size 18-volt battery platform. Its brushless motor delivers up to 1,550-inch-pounds of torque in a surprisingly compact shell. The real genius here, however, is Quickshift. This feature—which I use all the time—takes advantage of the brushless motor’s control circuitry to provide a 4-speed “transmission,” so to speak, and has a couple of other nifty tricks up its sleeve.
The base of the tool has a small LED panel with three buttons. One LED bar shows battery charge level. The other displays the speed/power selection as well as what’s called T Mode. We’ll get to T Mode in a minute. Pressing the power-adjustment button cycles you through the levels. For driving larger screws, like #10×3, in framing applications or structural screws for roof framing or deck ledgers or connections requiring maximum demand, Level 4 is the sweet spot. The driver delivers blistering speed and great torque, handling all but the largest structural fasteners you’re likely to encounter.
Still, it’s a 1/4-inch drive, so it does have an upper limit (which I don’t often reach). For reference, old-school 1/2-by-6-inch lags and 3/8-by-7 1/4-inch construction screws into white oak are beyond the tool’s scope. Really, it’s beyond the scope of the category. For these applications, you’re better served with a 3/8- or 1/2-inch impact wrench.
For the most part, the Makita has the guts for the big stuff I need it for, but that’s not all I do. Finer work is where this little giant begins to sing. I use a lot of trim screws, ranging from 1 1/4 inches to 5 inches. I also use cap-head screws and stainless steel exterior screws, and I want those screws to go in precisely and be set uniformly. On interior trim, I want the screw set deep enough to accept filler but not so deep that it deforms the surrounding material or risks cracking. In exterior trim where the fasteners will be left exposed, I want to be able to set all of them to a uniform depth for aesthetics, as we often do on removable screen panels and face-screwed decking.
On Level 2, the driver sends 3-inch trim screws nicely into poplar, Boral, pine, cedar, maple, and PVC. On this setting, the tool’s reaction torque at startup—which can result in parts shifting if the tool twists too much—disappears. Then, as the screw is just about set where I want it, I can let off the trigger and deliver a slow, methodical finish. This perfectly snugs parts up and enables me to set the heads at just the right depth—repeatedly.
For tasks like installing brass door hardware—expensive, soft metal where screws are easily damaged—I used to use a ratcheting screwdriver. Not anymore. I can dial the Makita down to Level 1 and install delicate finish hardware efficiently without concern.
Now for the nifty tricks up the Quickshift sleeve.
T MODE AND AUTO START
On the LED bar, there’s an additional “T” for self-tapper mode. If you’ve ever installed self-tapping sheet-metal screws, you know they require a high-speed start followed by a quick trigger release to set the screw without camming out the hole. I’ve done it plenty of times. In T Mode, there’s no guesswork or wasted time.
T Mode starts the driver at maximum rpm to pilot the hole. Then it senses the resistance change as the screw tip pierces the steel and quickly drops the rpm for cam-out-free fastening. No longer do you need cat-like reflexes for multiple trigger pulls in a single, tiny fastener.
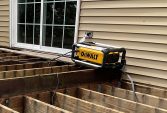
And while T Mode works well, there’s at least one limitation. It doesn’t function that well on thinner-gauge sheet metal (less than 30 gauge or aluminum). It doesn’t seem to slow down fast enough to avoid stripping. In medium- to heavy-gauge ductwork, I found the driver is sensitive enough to throttle back before camming the hole. In heavier-gauge metal—like the thousands of square feet of architectural metal siding and trim on a recent job—it performed reliably. For this heavier-gauge steel, I drove more than 3,500
1 1/2-inch gasketed screws. In T Mode, it was an absolute dream. Pull the trigger, the screw screams as it pilots a hole. Then, abraca-brushless-dabra, the tool downshifts as the fastener threads into the sheathing, finally slowing down to a nice, steady speed, enabling me to accurately set the gaskets.
Then there’s Auto Start. This feature is essentially the opposite of T Mode and is intended for large—longer than 3 inches or with a 5/16‑inch or better diameter—structural screws. Pull the trigger, the unit starts spinning slowly. This allows you to accurately guide the start path of long fasteners—which can be somewhat unruly at the tool’s maximum 3,800 rpm. As the fastener threads, the tool’s electronics sense increased resistance and deliver power and speed to match. This sends fasteners quickly to their final resting place while you move on to the next ones in line.
BOTTOM LINE
Hands down, this is my go-to driver. Of all the options we have in the tool trailer or in the shop, it’s the one I reach for at the start of my day and it’s always within arm’s reach. The power, compact size, and ergonomics alone are enough to put it at the top of my list. Add its serious versatility, and it’s a real darling.
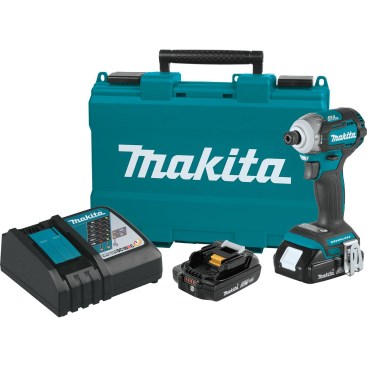
I haven’t had the tool long, so I can’t speak to its durability. However, I did own an early model released only in Japan. For more than three years, that has been absolutely punished with no ill effects. I have little doubt this newer one will perform just as well. The XDT12Z costs $180 (tool only); a two-pack battery kit costs $160.