It wasn’t that long ago that stone counters were an unusual item only wealthy people could afford. They’re still not cheap, but they have come down in price and are increasingly common in high-end kitchens and baths.
I’ve been in the stone-fabrication business for 20-plus years and counters are one of our bread-and-butter items. Although it’s possible to fabricate counters in the field, you can do much better work in a well-equipped shop. Mistakes are costly, so we don’t work from drawings or measurements. Instead, we make full-size templates of the cabinet top and take them back to the shop, where they are used to cut pieces from large slabs of stone. When the pieces are finished, we take them to the site and use epoxy to glue them on top of the cabinets.
Our work happens late in the job, and counters tie in to the work of many other trades. The tolerances are exacting, so it’s not uncommon to run into trouble because something isn’t ready or because the details are not fully worked out. This can cause delay at a critical point in the project, or lead to added costs because existing work has to be redone. The purpose of this article is to explain what contractors need to know about stone counters so they can avoid these problems and create a product the client will be happy with.
Materials
Granite is the most common stone used for counters, but there are many other slab materials to choose from. We often use marble, limestone, onyx, slate, and quartzite. Some of these materials are interchangeable, but others require special detailing, either in the stone counter itself or the cabinets below. My advice is to start talking to the fabricator early in the job. A knowledgeable fabricator can explain the pros and cons of various materials and tell you what it will take to do a successful installation.
Most slabs are imported, so they come in metric thicknesses. In the industry we talk about 2-centimeter and 3-centimeter stone. That converts to roughly 13/16-inch and 1 1/4-inch material, which is how I will refer to it in this article. In most of the U.S. the thinner, “dimensional” stone is the norm. However, there are areas on the East Coast and in the South where 1 1/4-inch stone is more common.
Templates
The clients can wait to select the particular piece of stone they want to use, but every other decision must be made before we arrive to make templates. The cabinets and subtop should be complete, and the sink, cooktop, and faucets should be on site and temporarily installed in their future positions. If there’s a freestanding stove, it too should be in place.
Some fabricators make templates by putting strips of plywood along the edges of the subtop and connecting them with hot-melt glue. We make them from full pieces of 1/8-inch plywood, because the glue joints could get knocked out of whack on the way to the shop. If the counter butts to an irregular surface, we scribe the template to fit.
Every detail of the installation is recorded on the template, including edge treatments, overhangs, and the size and location of penetrations. The counters will be identical to the templates, so changes are not allowed once the templates are made. If the client changes something, we have to come back and retemplate the job.
Structural Support
Stone is heavier than many of the materials traditionally used for counters. A 13/16-inch slab weighs 13 pounds per square foot and 1 1/4-inch material weighs 19 pounds per square foot. This is not an incredible amount of weight, but it does mean that base cabinets should be sturdily constructed.
I have visited projects where cabinets failed because they were not strong enough to support the load. In one case this happened because an island cabinet was made from MDF. A 1 1/4-inch slab was supported by an end panel that landed over a toe kick. The end panel was strong enough to support the stone, but the bottom broke where it cantilevered over the kick. It wouldn’t have happened if the bottom had been stronger or the panel had run straight to the floor.
Subtops. The biggest difference between using 13/16-inch and 1 1/4-inch stone is that the thicker material is structural. “Structural” stone is strong enough to be installed over open cabinets and can span openings without any additional support. The one rule for 13/16-inch stone is that it is only as strong as what you apply it to. Dimensional stone should be installed over a continuous plywood subtop that is solidly screwed to the cabinets.
The subtop should be made from 5/8-inch plywood, not particleboard or MDF. Plywood is stronger and resists moisture better. The last thing you want is for the subtop to swell or fall apart because it gets wet.
Overhangs. There’s a limit to how far an unsupported dimensional stone overhang can project. According to the Marble Institute of America (MIA), 13/16-inch material should not extend more than 4 inches without support. The thicker, 1 1/4-inch stone is allowed to have an 8-inch unsupported overhang. You could probably go further with the right kind of stone but you would be taking a chance, especially if the MIA installation guidelines are part of the contract.
Deep overhangs are common at breakfast bars but they need to be supported from below. I tell contractors to sit on the edge of the subtop, and if it deflects more than 1/8 inch it’s not sufficiently stiff. The easiest way to support the overhang is to put end panels or decorative brackets underneath. If the client doesn’t want brackets or panels, you will have to devise a less obvious means of support. In this case, we use concealed angles or plates. My favorite method is to route slots in the subtop and insert steel angles so they are flush with the surface. It will probably take several angles to sufficiently stiffen the overhang. The pieces will cantilever over the edge, so one-third should be in the overhang and two-thirds should land on the cabinets.
Edge Details
We typically double the front edge of dimensional stone counters to make the material look thicker. The added layer also forms a lip that is supposed to hide the edge of the subtop. However, lumps in the subtop and the thickness of the epoxy may prevent the stone from lying tight. That is why the subtop is made from 5/8-inch plywood: If it were any thicker the nosing might not hide the edge.
Some designs call for an even thicker edge treatment. It’s common to miter the front edge of the counter and glue on a strip of stone that is 2 or more inches wide. In that situation it’s okay to use a stronger, 3/4-inch subtop, because the lip will be tall enough to hide it.
Dimensional stone is sometimes installed with a single-thickness edge. There’s no lip, so the subtop will be visible unless you tuck it behind a face frame or edge it with trim. Structural stone is thick to begin with, so it’s almost always fabricated with a single-thickness edge. There’s no need for a subtop; the stone is applied directly to the cabinets.
Close tolerances. The tolerances for installing stone counters are very exacting, so it’s important for the cabinets to be perfectly level and for the subtops to form a single level plane. The reveal between the nosing and the cabinet fronts will not be even if there are lumps or bumps in the subtop. We can level the slab to some extent, but that means raising it and creating an oversize reveal.
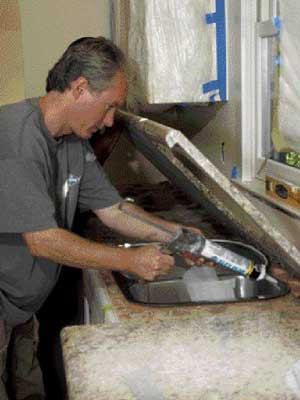
Undermount Sinks
It’s easy to cut openings for drop-in sinks because the flange hides the edge. It takes more work to finish the opening for an undermount sink. Even so, undermount sinks are the norm with slab stone counters.
The tricky part for the contractor is figuring out exactly how to support the sink. It needs to be supported by the cabinet and is much easier to install from above before the counters go in. The lip of the sink is typically rabbeted into the subtop and supported from below with cleats or hardware designed for that purpose.


