While building a deck near salt water always presents challenges, Massachusetts remodeler Mike Horgan had an additional problem: The foundation of the deck he had been hired to tear off and rebuild consisted of little more than a few 4-inch concrete masonry units set on grade. To pass inspection on the replacement structure, Horgan would need to start by installing new code-compliant foundation piers.
Since the beachfront house was in a prime location facing Cape Cod Bay and built near sensitive protected dunes, the local conservation commission wouldn’t let Horgan bring any power equipment across the beach. With no access from the street side of the house, Horgan and his crew faced the unhappy prospect of digging more than a dozen 4-foot-deep holes in the ground with pick and shovel, hauling dozens of bags of concrete mix over the sand, and forming and pouring pier footings on site.
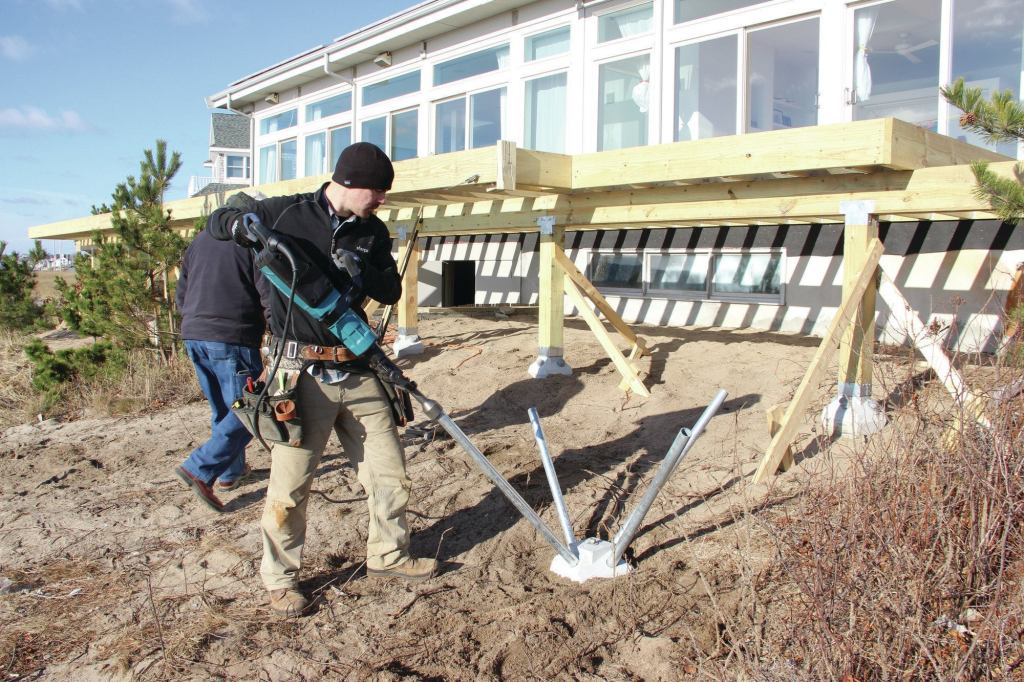
Instead, Horgan decided to use Diamond Pier pin-pile footings, which rely on steel pins that can be driven as much as 5 feet or more into the earth to support the deck’s gravity load and transfer lateral and uplift forces into the ground. At grade, the subsoil pins are connected together by the “pier head”—a precast reinforced concrete knuckle that supports the wooden deck post and transfers loads between the driven pins and the post. Installing each pier is a simple matter of setting the pier head in a shallow hole, driving four pins into the earth through guide holes in the head, and bolting on a steel post base.
Though Horgan had never used Diamond Piers before, his engineer looked at the site and thought that they would be a perfect fit. For this project, he specced DP75 piers, which have about the same load capacity as a 24-inch-diameter Bigfoot post base with a 12-inch-diameter cardboard tube pier.


Ted Cushman
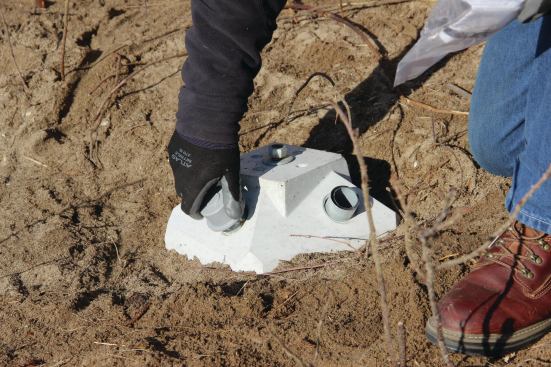
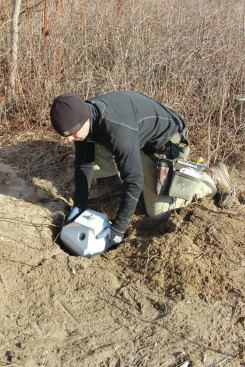
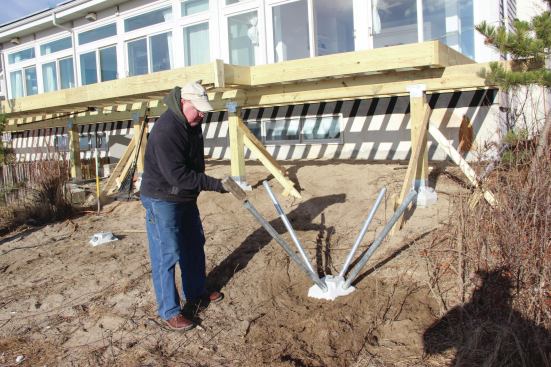
A Diamond Pier footing head can be placed in a shallow hole, bec…
Installation
One factor that sold Horgan on the piers was that there would be no delay for inspections. “Our local inspector told us we can put these in the ground and begin framing right away. He can just come out and take the caps off the pins, run his tape down into the ground, and he knows that they’re deep enough. So we can just go.”
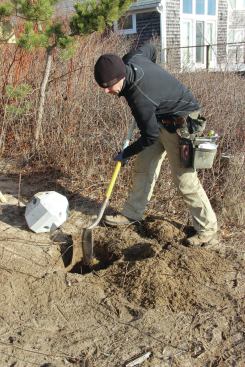
Installation starts with a shallow hole in the ground, just deep enough to cradle the bottom of the Diamond Pier head. One worker can carry the 75-pound pier head and set it in the hole by hand. Next, the installer uses a torpedo level to level the top of the head.
The concrete pier heads for Pin Foundations’ DP50 and DP75 units weigh 50 and 75 pounds, respectively. The company also supplies a 100-pound pier head (the DP100) and a 200-pound pier head (the DP200), for heavier-load applications (where site-specific load engineering is typically required). The larger heads are too heavy for a single worker to manage, but in a pinch, workers can insert pin pipes into a head’s guide holes and team up to carry and maneuver it by holding on to the pipes. The same method is also handy for aligning and leveling the smaller pier heads.
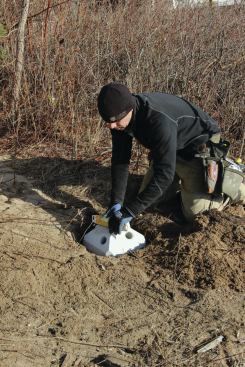
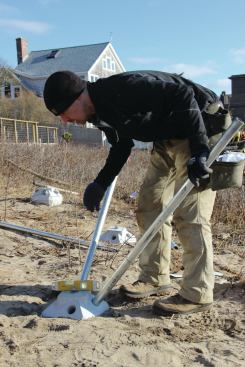
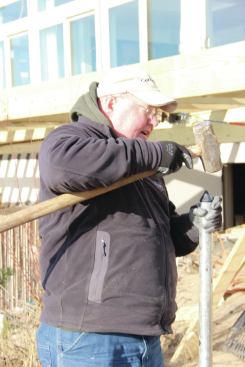
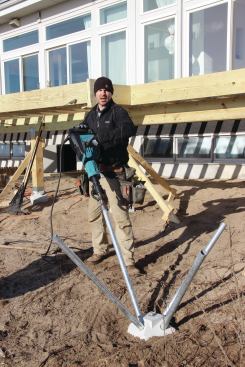
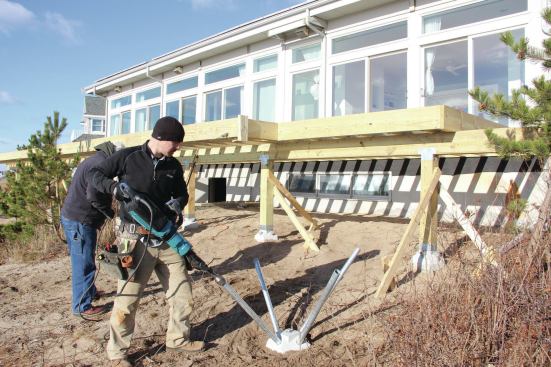
Once the pier head is suitably positioned, it’s time to insert the pin piles, which are made of 2-inch Schedule 40 galvanized steel pipe. First, the worker inserts a pointed plastic plug into the end of the pipe to help the pipe penetrate the soil and to keep soil out of the pipe. The worker inserts the pipes into the guide holes in the pier head and starts the pins with a few blows from a sledgehammer. In average soil, you can drive pins all the way home with the sledgehammer—but it’s much easier and a fair bit faster to use an electric demolition hammer and special driving bit.
Working around and around the pier head, the worker drives each pin a foot or so at a time before moving to the next pin. When a pin is fully set, the driver bit bottoms out on the pier head, leaving the pin protruding just enough to accept the sealing cap that serves as an inspection plug for the pin.
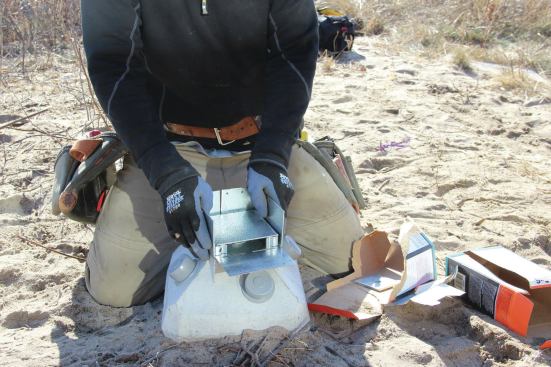
With the pier head set in place and pinned to the ground, all that remains is to set a galvanized post base: Place the base plate over the anchor bolt cast into the pier head, tighten down the nut, and position the standoff plate.
Engineering Details
The minimal excavation required before setting the pier heads is a major advantage for the method. But how does the Diamond Pier support deck loads when the concrete element is resting on uncompacted topsoil? Simple, says Pin Foundations executive Mike Donoghue: The soil directly under the pier head doesn’t carry any of the load. The concrete knuckle’s function is just to lock the pins together and transfer loads between the pins and the deck post, Donoghue explains; it’s the pins in the ground that transfer the load to the earth.
“When we do our capacity calculations,” says Donoghue, “we neglect the first 10 or 12 inches of soil, because that’s where you have tree roots and organic material, and that’s unconsolidated—there’s really not a lot of capacity up there. But as those pins are driven into the soil, they deflect just enough so that they lock into that head. And then when you load the structure on top, that further locks the pins into the head. So the head actually acts as a pin lock. And the pins transfer the load into the soil, but there’s no bearing in the head itself.”
Frost
Diamond Piers have been tested for bearing, uplift, and lateral force resistance, and a contractor seeking approval from an inspector can show him an ICC-ES report. But when it comes to things like frost, high-water, and high-wind performance, there is no way to really test those in a lab, explains Donoghue. That’s the reason the company started its national rollout for residential use in frigid Minnesota and Wisconsin (job-specific engineered versions of the product have been used for years in public and commercial settings).
“We wanted to make sure that we had the observational evidence of decks that have withstood a number of bad winters, frost and thaw, without any settling and without any movement whatsoever,” says Donoghue. “When our ICC-ESR was written, it left the evaluation of the capability in a frost zone up to the discretion of the local code official.” And if there’s any question, the company can show building officials in other parts of the country affidavits from northern Midwest installers and specifiers attesting to the system’s performance in frost country.
Limitations
The system might not be appropriate for all site conditions. For example, architect Gabriel Keway installed 24 Diamond Piers for a Solar Decathlon house in Michigan a decade ago and found the process rough going. “While I can only dream of installing them in the sandy soils of Cape Cod, in our soils it took more like an hour or two each,” Keway told me. “On most we hit rocks, requiring us to drive harder using sledgehammers, or pull the pins (spinning them out using a big pipe wrench and lots of elbow grease), and then twist the pier a bit hoping to miss the rocks on the next try.” (Backing out the pin and rotating the pier head is the manufacturer’s recommended response to hitting a rock.)
Labor savings? Not so much, said Keway. “On three or four piers, the pins hit rocks, sending them off course and breaking the side off the pier, requiring it to be replaced (be sure to buy extra). On average, when we had finished driving in the pins, the ends were so mushroomed that we had to hacksaw the ends off in order to get a cap to fit. In the end it was a lot of work: Five long days of manual labor.”
Horgan agrees with this assessment, pointing out that a contractor should always be checking soil conditions for any underground installation. “We had an ideal situation on our Provincetown job. We mushroomed a couple of pipe ends the first time around, too, but that was due to starting the pins with a sledgehammer and not with the attachment that is meant to be used on the jackhammer. When we did that, I just took a grinder to it for about 30 seconds and ground off the mushroomed part. But we figured out how to avoid that pretty quickly.”
Cost
In addition to labor savings, Horgan found that he saved time by not needing to wait for concrete curing and multiple inspections. “Even with a machine,” he says, “to dig eight holes for 24-inch bases, pump those with concrete, then call for the inspector to come out and make sure the tubes are 4 feet down before we even fill them with concrete, and then come out again after they’re filled with concrete … you’re looking at a two-week span from the time you dig the hole to the time you can actually stand a post on it and start your framing. I put six Diamond Piers in the ground in about 40 minutes—by myself. Just me and a jackhammer—and we were ready to start framing.”
According to Horgan, the DP75 piers cost $175 each, which included all the necessary hardware, such as 4-foot-long pins (they also come in longer lengths for different situations); pre-installed anchor bolts; pointed end-caps for the entry end of the pins; and heavy plastic caps for covering the exposed end of the pins (which the inspector just pops off so he can check the depth at the same time he does the frame inspection). Hammer rental cost about $50 per day, though the pins can also be driven with a sledgehammer.
On this job, total installation time for 16 piers was less than two hours for one man, from pre-install stake-out to the start of framing.
“It’s not a panacea,” Horgan concludes. “And I’m not saying I’ll only use Diamond Piers from now on. But they will definitely be my priority, with traditional cardboard tubes being the secondary option—all depending on the situation.”
Ted Cushman is the editor of JLC’s Coastal Connection newsletter. He can be reached at [email protected].


