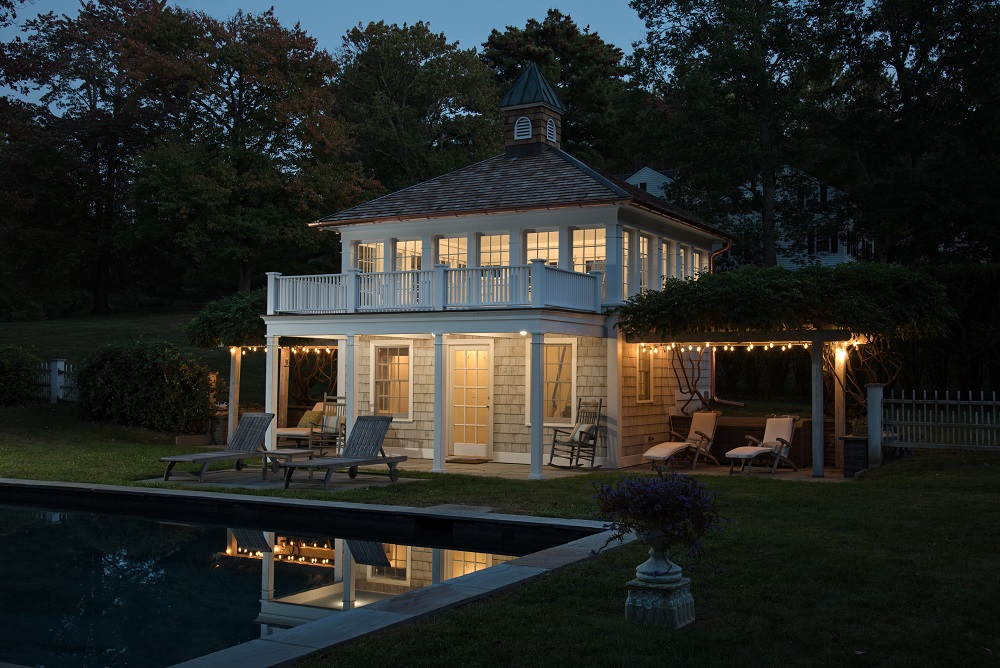
My client–who is also an architect–had big plans for his small, single-story pool house. It was in decent-enough shape with a workable bathroom and kitchen, but it mostly served as a utility room to store pool furniture and supplies. To provide an informal area to relax and enjoy this backyard retreat, he wanted to add a second floor with an attached deck.
Kyle Diamond
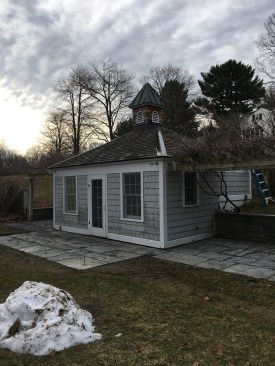
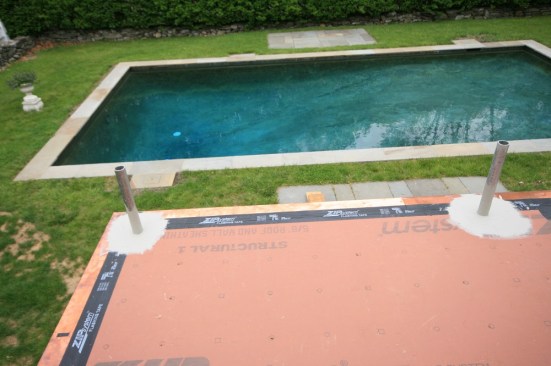
The original pool house. Piers have been poured for the new deck, and new bluestone pavers have been installed. The next step is to remove the cupola, which will be reinstalled later.
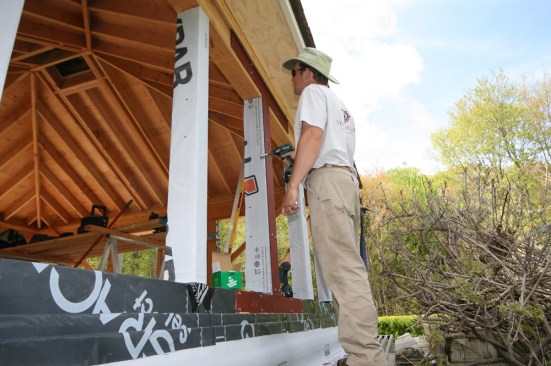
After I finalized the plans with my client, the first step was to remove the existing cupola, which would be saved and reinstalled later. We set up a pair of 24-foot aluminum scaffolding planks covered with plywood and used a combination of ropes and muscle power to slide the cupola safely off the roof and down to the ground. Then we stripped off the old shingles and disassembled the roof framing down to the top plates.
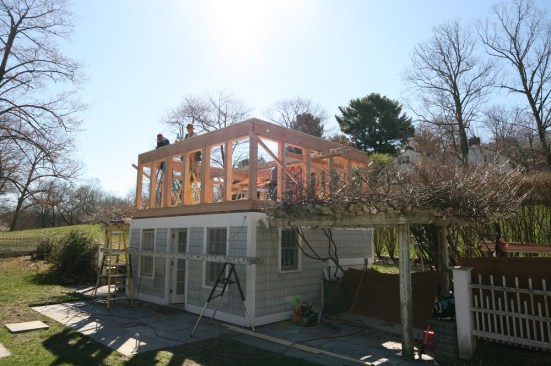
Next, we installed a new floor system and framed up the second-story walls. Because of the many window and door openings, the wall framing consists primarily of a continuous header around all four sides of the structure, supported by trimmers for the 22 rough openings.
Since there’s no plywood sheathing to brace the walls, we custom-fabricated steel brackets out of 1/4-inch steel plate for the corners and trimmers to prevent racking. We coated the brackets with a primer and fastened them to the wall framing with 3-inch by 5/16-inch-diameter lag bolts after the roof was framed and sheathed.
Kyle Diamond
The new second-floor wall framing consists primarily of window and door openings.
Kyle Diamond
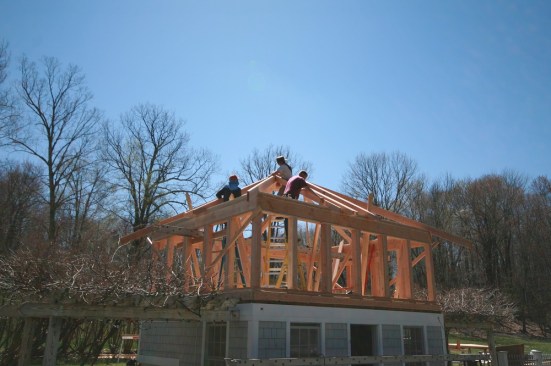
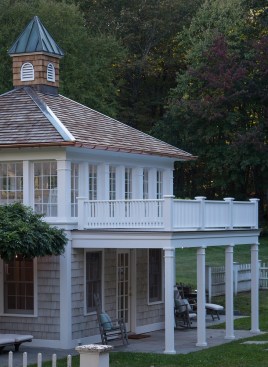
The new hip roof has the same 6/12 pitch as the original roof.
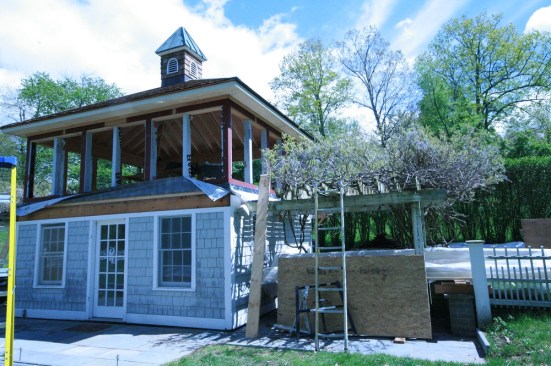
Our client wanted the new roof to match the look and pitch of the roof that we had removed. So we framed the new, regular hip roof with a 6:12 slope, starting with the short ridge and common rafters (see “Laying Out a Hip Rafter,” JLC, Dec/17). After sheathing the roof, trimming the fascia with Boral TruExterior poly-ash trim, and installing copper drip edge and cedar shakes, we re-installed the cupola, sliding it back up into place using a rope come-along and the same scaffolding setup that we had used to remove it. Then we started on the new deck.
Isaias Santos
Custom-fabricated steel brackets were bolted to the framing to brace the walls.
Isaias Santos
Capped by its new roof, the second-story addition is ready for window and door installation. Note that the cupola has been reinstalled.
Post Support
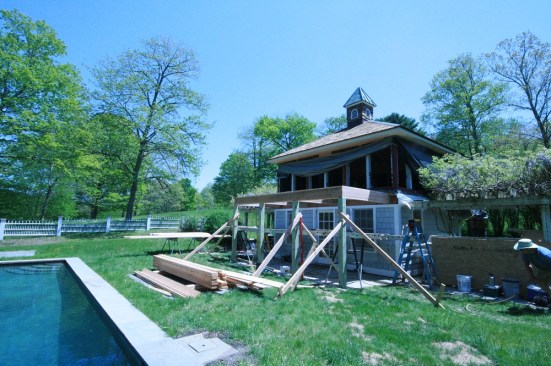
The deck framing rests on 6×6 PT posts supported by 4-foot-deep-by-12-inch-diameter poured concrete piers, but we didn’t want the tops of the piers to be visible around the post bases. So we came up with a post-base connection detail that would allow us to make the cutouts in the bluestone pavers around the piers smaller than the posts. This meant that the post bases had to be elevated slightly above the surface of the pavers.
When we poured the piers, we embedded long 1/2-inch-diameter galvanized anchor bolts in the concrete and bored matching holes in the centers of the post bottoms. Before sliding a post down over the bolt, we threaded a nut onto the anchor bolt followed by a 1/2-inch-thick galvanized steel plate, which supports the post base and holds it up off the ground.

Isaias Santos
Holes were bored in the base of each post to allow it to slide down over the 1/2-inch-diameter anchor bolts embedded in the piers. Threaded nuts and steel plates hold the post bases up off the piers and the bluestone pavers that are cut closely around them.
Isaias Santos
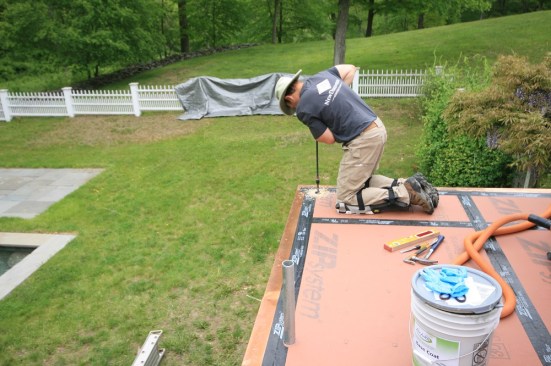
The new deck is protected by a waterproof walking surface, so it was framed with standard instead of PT lumber.
After bracing the posts into position, we framed the deck using standard rather than PT framing lumber because the entire structure would be protected by a waterproof decking surface. Then we sheathed the top of the joists with 5/8-inch T&G Zip System sheathing.
Waterproof Deck Surface
The deck surface is a fluid-applied acrylic elastomeric coating (from Acrylabs), a product that we’ve used for years with great success. We like it because flashing penetrations through the deck surface with it is easy, and it can be field-applied by our crew. The system consists of a base coat with a mesh fabric reinforcement, followed by a couple of finish coats. We brush-apply the base coat around penetrations and edges, then roll on the rest using foam roller covers, building the thickness up to about 45 mils. The finish texture is quite smooth, and a number of different color options are available.
Recently, we returned to a project on which we had applied an Acrylabs roof coating about a decade ago. It wasn’t leaking, but it was looking a little weathered, so we pressure-washed the surface, allowed it to dry thoroughly, then re-applied a single top coating. It looks as good as new (and functions as well, too).
Railing
Before installing the Acrylabs coating, we located our rail-post centers around the perimeter of the deck and bored holes for 1 1/2-inch-diameter galvanized steel pipe. The holes penetrate solid blocking installed between the rafters in each of the post locations. Before inserting the pipe, we squirted a generous helping of polyurethane construction adhesive into the holes to lock the pipes in place.
Isaias Santos
Holes bored down through the sheathing and into solid blocking installed between the floor joists provide solid support for the 1 1/2-inch-diameter galvanized steel pipe the author used to build the rail post assemblies.
Isaias Santos
The post pipes were sealed to the deck sheathing with the Acrylabs roof coating. Later, 2×4 PT blocking will be installed around the pipes to form a base for the post wraps.
After sealing the pipe openings and applying the deck coating, we wrapped the galvanized pipe posts with 2×4 PT blocking to provide a solid base for our column wraps. To lock the PT to the posts, we cut V-shaped notches on the faces of the 2x4s that lie against the pipe. Once the assembly was screwed together, the posts were rock solid and ready to be wrapped with Boral trim.
The railings and balusters were built out of clear red cedar. Note the deck's slight pitch, to allow the waterproof walking surface to drain properly.
Following the architect’s design, we milled the railing parts out of clear cedar, which we cut, primed, and painted on site. To shed water, we beveled the top of the 2×4 hand and bottom rails slightly, and we used square 1 1/2-inch-by-1 1/2-inch balusters to create the look of a southern porch railing. We used Festool dominoes to assemble the railing.
Isaias Santos
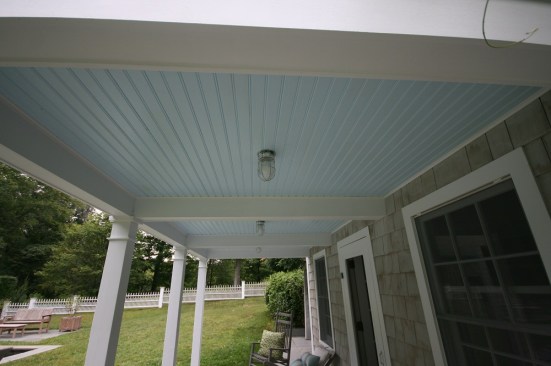
The beadboard porch ceiling was painted robin's egg blue, completing the traditional look.
To finish up, we wrapped the support columns and fascia with Boral trim and installed a traditional beadboard ceiling.


