While I was repairing shingle siding on a house last fall, my client asked me to look at some rot damage on her screen porch and give her an estimate to repair it. At first glance, the porch appeared to be in good condition, but with visible damage at the base of some of the posts. Then closer inspection revealed that previous repair attempts had masked the extent of the problem, and that the framing would need to be replaced.
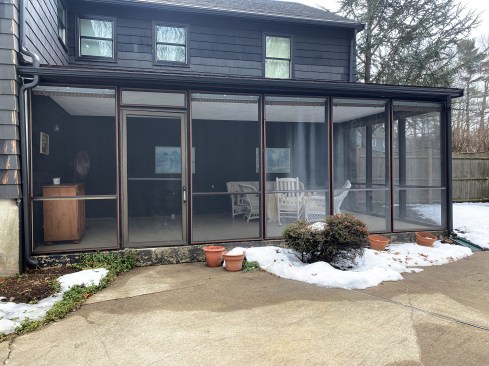
The roof of the existing screen porch was structurally sound, but the support posts and screens needed replacing.
My proposed solution involved removing the aluminum screen panels and the porch framing they were attached to, replacing the framing with new material, and trimming the porch exterior with low-maintenance PVC. The project would also include repainting and rescreening the existing panels, which were otherwise in good condition, and replacing the old screen door with a new unit.
The porch began life sometime in the 1970s, when the split-level home was built, as an uncovered porch framed on top of a small concrete slab leading into the back of the house. At some point—possibly when the backyard pool was installed—the small porch and slab had been replaced with a larger slab on grade and screen porch overlooking the pool.
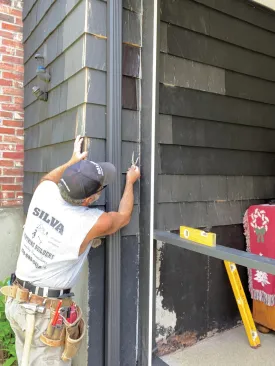
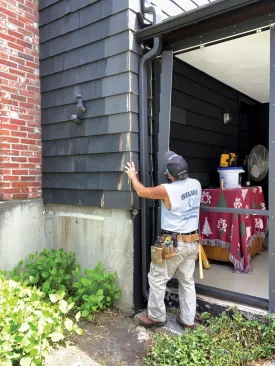
It appeared that untreated fir had been used to frame the porch, including the 4×4 corner post and intermediate posts. Fir, particularly the heartwood, has rot-resistant qualities but will eventually rot when bearing directly on a concrete slab that occasionally gets wet. Some pressure-treated material had been used to make repairs to the framing but mostly as applied patches to the sill plates rather than as replacements.
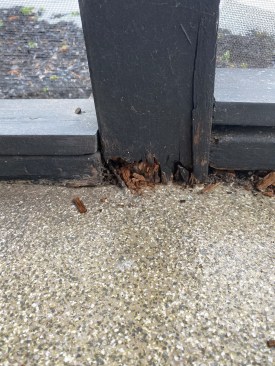
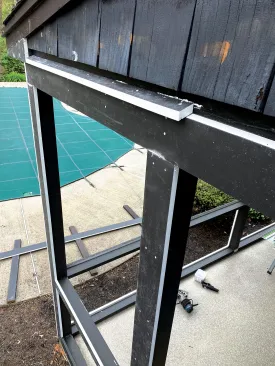
The fir posts and untreated sill plates were rotting where they were in direct contact with the porch’s concrete slab floor.
While the aluminum-framed panels could be re-used, the aluminum screening needed replacement.
The concrete slab was in good condition and had been finished with an epoxy floor coating. It looked like the coating might have contributed to the rot problem, as the seam between the coating and the framing appeared to have the potential to trap water blowing in through the screens instead of allowing it to spread out over the floor and dry.
New Framing
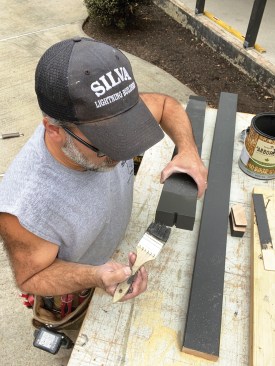
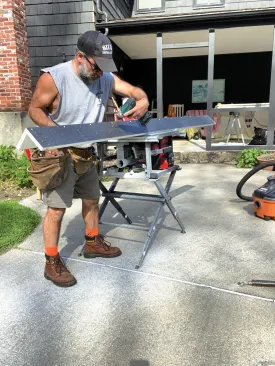
To match the look of the original porch as closely as possible on both the interior and exterior, I found a good source of clear, vertical-grain Douglas fir. Because the stock came with a smoothly sanded surface, I decided to scuff-sand it with 100-grit paper to raise the grain so that it would better accept the finish. Then, before installation, I rolled on two coats of Benjamin Moore Arborcoat exterior solid stain, coating all four sides of each piece.

Prior to finishing the clear vertical-grain Douglas fir stock that the author used to replace the framing, he sanded it with 100-grit paper to open up the grain.
This step helped the wood more evenly accept the solid latex stain finish, which the author color-matched to the home's existing finishes.
The roof framing was in good shape, so my plan was to use a screw jack to raise the area around each post just enough to take pressure off of the post so that it could be removed and replaced. As it turned out, the process was a little too easy. While the posts were nailed at the top to the beam supporting the rafters, there was nothing connecting the bases of the posts to the slab, and I was able to just pull them free once my temporary support post was taking the roof load. The sill plates between posts weren’t much more difficult to remove. They had been fastened to the slab with concrete nails, and because of rot damage, the sills simply pulled free of the fasteners, leaving the nails embedded in the concrete. I cut them off with a reciprocating saw.
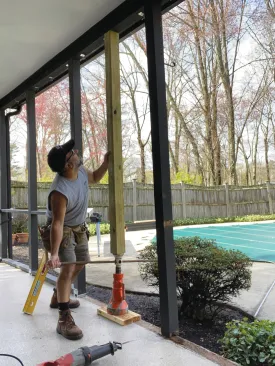
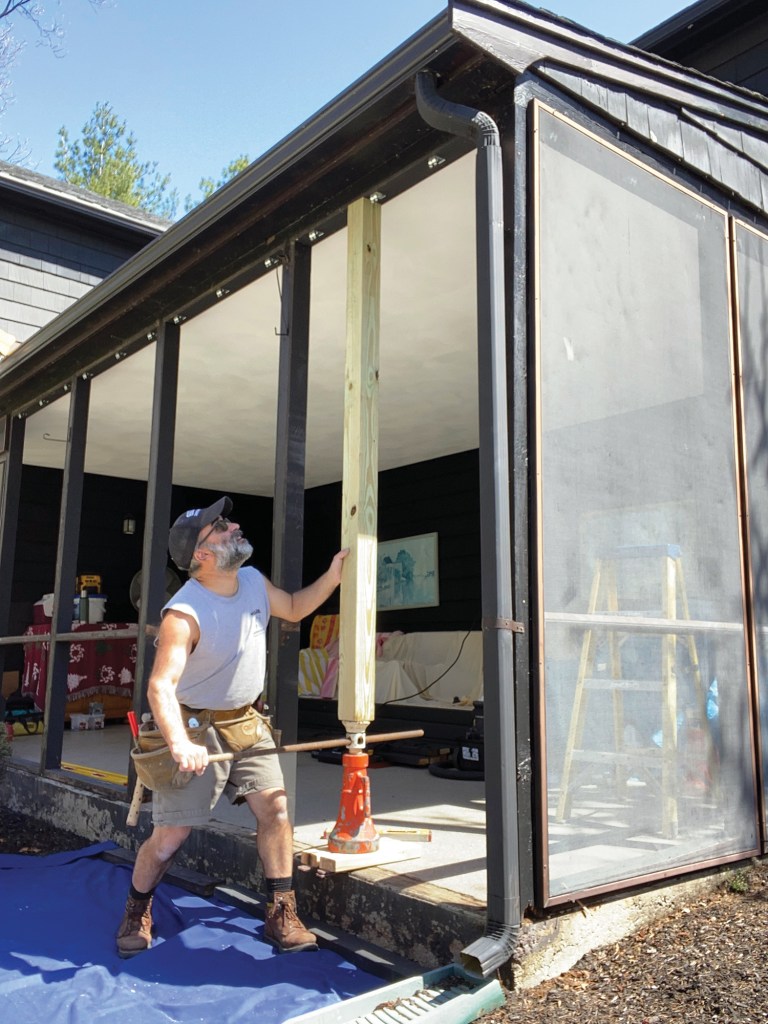
The author replaced a pair of support posts at a time, centering a screw jack in the opening and raising it just enough to take the weight of the roof off of the two posts.
I worked one section at a time, placing the screw jack and temporary support post in the middle of an opening so that I could remove and replace two posts at once.
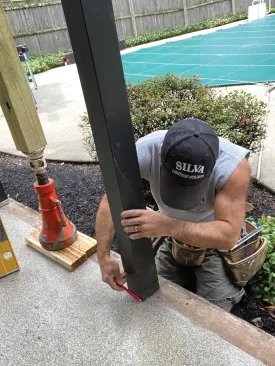
After removing a post, I carefully measured the distance between the slab and the beam at the post location and cut the new post to that length. Next, I positioned the new post so that it was plumb in both directions from the bearing point on the beam, which I had marked in pencil prior to removing the original post. After outlining the position of the base of the post on the slab, I removed the post and trimmed it to length to accommodate the metal post base. Not only do the post bases anchor the posts to the slab, they also raise the wood above the concrete by an inch to allow for drainage and keep the base of the post from contacting the concrete.
I used Cobra Parawedge 1/2-inch-diameter wedge anchor bolts to fasten the post bases to the slab. Prior to fastening the post to the post base and to the beam above with structural screws, I coated the end cuts with Arborcoat stain.
At each post location, the author started by tracing the post’s footprint onto the slab.
Then he recut the post to fit the metal post base, and traced again around the metal hardware.

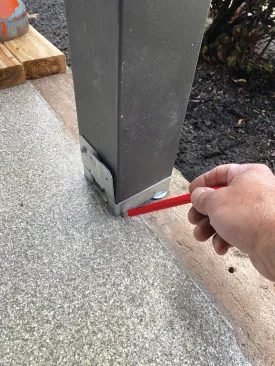
Next, he drilled a 1/2-inch-diameter hole for the 1/2-inch-diameter wedge anchor used to fasten the metal base to the slab.
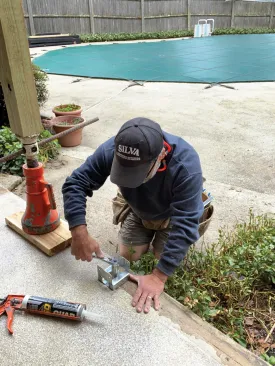
As he tightened down the nut, he checked the base for level and used metal washers to shim between the slab and the base as needed.

A dab of adhesive sealant on the washers ensured that they’d stay put under the weight of the post during assembly.
After inserting the post into the post base, he fastened it to the metal hardware with structural screws.
Rot-Resistant Details
The panel openings are framed by horizontal 2x4s that span between the posts both at their bases and at railing height 36 inches above the floor. To protect these framing members from rot, I didn’t anchor the sills directly to the slab but instead left a 1/2-inch gap between the bottoms of the 2×4 sills and the slab, which would later be covered by PVC trim. I also notched the ends of all the 2x4s that make up the sill pieces and the intermediate railing sections to allow any water that collects at the joint between the horizontal and vertical framing members to drain instead of getting trapped.
I used U2 trim-head structural screws driven like toenails to fasten the sills and rails to the posts, first coating the cuts and notches with stain. After the new framing had been installed, I applied a touch-up coat of stain as needed.
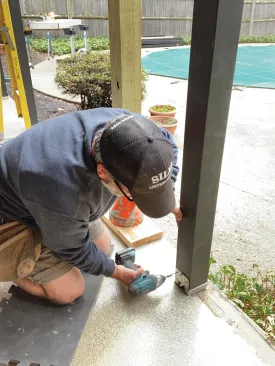
After anchoring the base of the post to the slab, the author checked that the post was still plumb and then drove coated U2 structural screws through the top of the post into the roof framing.
When cutting the horizontal 2×4 framing pieces, the author notched the ends so that water could drain from the joint.
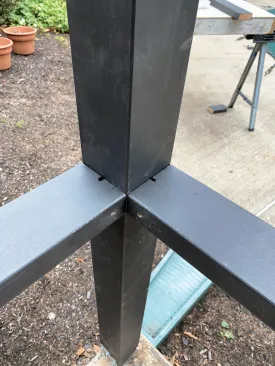
Coating the end cuts and notches with stain helps prevent the end grain from absorbing moisture.
Low-Maintenance PVC trim
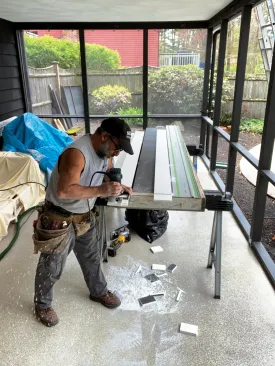
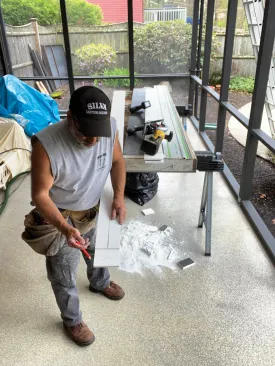
To give the Douglas fir framing a bit of protection from the weather and reduce the need for maintenance, I clad the exterior with PVC trim, which I cut to size from 3/4‑inch sheet stock, using a track saw. First, though, I rolled on a coat of Benjamin Moore’s PVC-compatible Regal Select Low Lustre exterior paint that was color-matched to the solid stain I used on the Douglas fir framing.
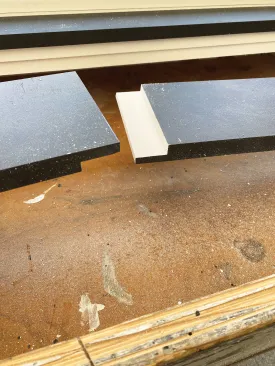
After I cut the trim pieces to size, I routed a 1/4-by-1/4-inch groove down the middle of the back of each piece to create a drainage pathway for any water that might get between the PVC trim and the wood framing. I also routed three grooves spaced evenly apart and perpendicular to the long groove on the back of each horizontal trim piece, again for drainage.
When I ripped the claddings for the posts, I oversized them so that they would overlap the posts by about 3/4 inch on each side. This made the 4×4 posts appear to be a little wider and allowed for variations in the post locations of the old vs. the new structure. This was important because of the screen panel sizing, which was based on the old post locations. Because the original posts were—in some cases—out of plumb, the screen panels would not have fit several of the new openings without the PVC overlay. To me, it was more important to fabricate the PVC trim so that the panel openings would be square and uniformly sized than to follow the roofline, which sagged a little bit. I also used a router to relieve the back of the trim at the bottom to fit over the metal post bases.
After cutting the PVC post claddings to size, the author used a router to relieve the backs to fit over the metal post bases.
1/4-inch square grooves routed down the backs of the PVC claddings create drainage channels.
I fabricated the long fascia trim across the front of the porch underneath the eaves from three pieces of PVC cut from sheet stock. Instead of cutting butt joints or scarf joints, I cut half-lap joints using a router where the trim needed to be joined together. This detail allows the PVC to expand and contract with changes in temperature without creating a gap that would permit water to penetrate into the framing.
The long fascia was joined together from several pieces with half-lap joints, a configuration that allows the PVC to move with changes in temperature without opening up the joints.
Along the side wall, a sloped PVC water table with a kerfed drip edge underneath was fitted to the beveled fascia and bedded in sealant to direct water away from the porch framing.
Along the side of the porch, which has minimal protection from the roof overhang, I beveled the top edge of the PVC fascia, then installed a sloped water table on top of that to direct water away from the wall. I kerfed the bottom edge of the water table to create a drip edge, and bedded the trim piece against the wall in a thick bead of OSI Quad sealant.
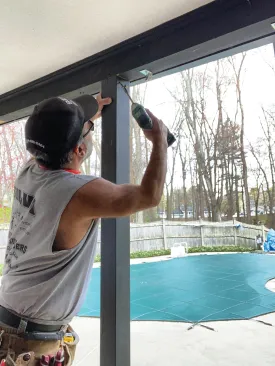
I prefabricated the L-shaped corner post trim using PVC glue and FastenMaster Cortex screws, which made it easier to plumb the trim in both directions while installing it. I fastened the corner and intermediate post trim to the framing with more Cortex screws, which I later plugged. Then I fastened the rail-level trim, again using Cortex fasteners.
The author prefabricated the corner from two pieces of PVC joined together with PVC glue and Cortex screws.
Cortex screws were also used to fasten the PVC trim to the framing.
Because the slab was uneven, I scribed the base trim to get a good fit, which was necessary to keep insects out. At the corners where the screen porch meets the house wall, I scribed the end PVC trim pieces in a sawtooth pattern so that they would fit tightly against the shingle siding. For a three-season screen porch like this, I didn’t think it was necessary to pull off shingles and rework the home’s weather-resistant barrier to marry the two walls together. After the trim was in place, I touched up the cut edges with more paint, inserted the Cortex plugs, then gave everything a second coat before installing the screen panels.
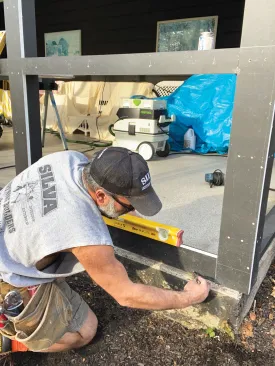
Scribing the bottom rails to the irregular concrete slab ensured a tight fit.
Where the screen porch is joined to the house, the author scribed and cut the trim pieces to fit tightly over the shingles.
Since the screen room is outside the building envelope, this solution was more cost-effective than removing and reinstalling the shingle siding.
Screens
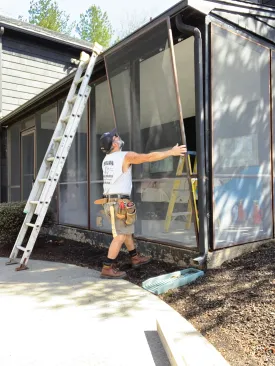
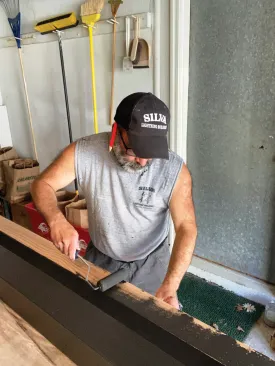
The frames for the screen panels were in good shape, but the existing aluminum screening needed to be replaced. After pulling out the splines and removing the screening, I cleaned up the frames and gave them a fresh coat of paint. I used the same paint that I had used for the PVC, first checking with my supplier to make sure it was compatible with aluminum.
Choosing replacement screening with the homeowner proved to be a challenge. I’m not a fan of aluminum screening because it dents and deforms easily, so I recommended pet-proof fiberglass mesh screening as a durable replacement. After my client checked out samples with various colors and transparencies, she thought that pet screening was going to be either too dark with low visibility or not the right color for the project. But—a cat owner herself—she decided that durability was not that much of an issue, and eventually we settled on a standard charcoal-colored fiberglass screen that was neither too dark or too light.
After cleaning and painting the aluminum screen frames, the author installed new fiberglass mesh screening.
After reinstalling the screen panels, he wrapped up the project with a new screen door.
When splining screening into a frame, I’ve tried several different methods to apply uniform tension to the screening. I used to install separate splines for each side, first tensioning the longer parallel sides and then the top and bottom, but I’ve found it works just as well to use a single spline, starting at one corner and working my way around the screen frame to get a snug fit.

Standard charcoal-colored fiberglass screening provided the right combination of transparency and durability for the homeowner.
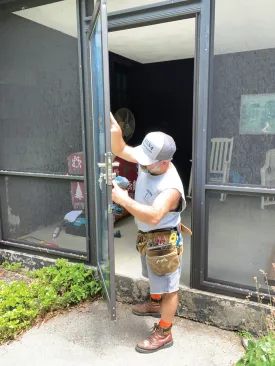
To finish up the project, I installed a new Andersen 6 Series Fullview Retractable Storm Door, which comes with both a glass panel and a screen panel. I suspect the glass panel will never be used; my client tells me that during the winter months, she just places all the porch furniture in the middle of the room and covers it until the following spring. ❖
Photos by Emanuel Silva.


