If your clients are like me, they’re not looking for any extra places to clean. So why suggest that they install a 3- or 4-inch-tall backsplash on their kitchen countertop? Besides collecting crumbs and dust, this narrow ledge creates the illusion that the wall cabinets have been hung too low. A fully tiled backsplash is a lot more practical and offers more design options. Because this wall area is quite limited in the typical kitchen, finishing it in ceramic tile shouldn’t break the bank. For example, while handmade 4-inch-square ceramic tile can cost as much as $24 per square foot, commercially made tile in the same size is available for as little as $2 per square foot. And although tumbled stone and glass tile can range anywhere from $10 to $30 — or more — per square foot, a single square-foot sheet can yield 11 lineal feet of 1-inch tiles. This is a lot of decorative bang for your buck, since running two or three rows of stone or glass around a backsplash would probably require only 2 or 3 square feet of material.
Here are some of the guidelines I follow to design beautiful, durable, easy-to-clean backsplashes.
Context Matters
The first thing I discuss with my clients is what’s likely to remain in view on the countertops. Daily-use items — the coffee maker, a toaster, perhaps a utensil container near the stove, even a bowl of fruit — are typically kept right where they’re used. These items become part of the décor, and there’s no point in placing a favorite decorative tile where it will be hidden.
Consider the upper cabinets, too. If they have glass doors or extensive open shelving, whatever they hold becomes a decorative element in the kitchen. Your tile design should create a canvas or backdrop that complements all of the kitchen’s other features.
Lighting is another important factor to consider. Make sure your clients view prospective tile samples in natural daylight and with the lights on at night, to make sure the tile looks good in both conditions. Keep in mind that, depending on the reflective properties of its glazing, tile can help color and brighten a room.
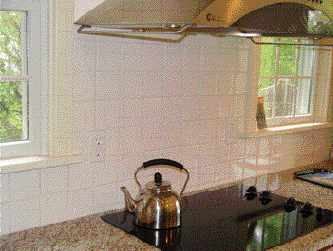
Be sure to consider negative spaces, where no decorative tile should be placed. For instance, look for outlets, which indicate likely locations for countertop appliances that might block the view of a decorative tile insert.
Pattern Considerations
Decorative inlays can be too busy in a kitchen with a greater-than-average amount of counter space. A simple backdrop of texture and color, created with a stone or crackle tile or by changing the size or direction of the tile, can bring more balance to the design.
When looking at the space over the stove, remember that home decorating magazines often show vast expanses of wall area there. But in the real world, most kitchens have a slide-in range with a riser back and a hood or microwave oven above, which leaves little room in which to work a design. In this case, options might include using random decorative tiles in an otherwise uniform field of blanks, installing a decorative border tile, or just turning the field tile on the diagonal to create a different texture.
If the kitchen is part of a great room or is open to an adjacent space, decorative tiles that feature fruits or vegetables tend to visually separate the two areas rather than pull them together. Instead, work with a more neutral look, using either colors found elsewhere in the house, or shapes and designs that are more general in theme. Glass tile inserts can also be used to add just a spark of color.
Since playing cards provide the same approximate quantity of color as a painted decorative tile, you can use them to help determine the “random” distribution of decorative tiles in a backsplash. Take the face cards — jacks, queens, and kings — from the deck and stick them to the wall in the likely locations. Or, if the client has already selected a specific decorative tile, I simply make color photocopies and tape them to the wall. This is a good way to experiment with the layout and get an idea of what the backsplash will look like before the tile is permanently installed.
For a listello, or decorative band, a good rule of thumb is to run it across the backsplash at about two-thirds the total height up from the countertop. This is similar to the way the horizon appears in nature and gives a balanced appearance, rather than cutting the scene abruptly in half; it also allows the band to clear objects placed on the countertop. When a backsplash is interrupted by appliances and windows, a listello that looks good in the showroom may end up looking like Morse code — lots of dots and dashes — on the job.
Before your clients commit to a particular design and order the tile, borrow a few from your local supplier and stand them up on the countertop. Again, make sure the homeowners view them at night with their task lighting and in the morning under natural lighting conditions. This will help them decide whether the tile they think they like in the showroom is actually the tile they’ll enjoy seeing day and night over the coming years in their kitchen.
Lane Meehanowns and manages Cape Cod Tile Works with her husband, Tom, in Harwich, Mass.


