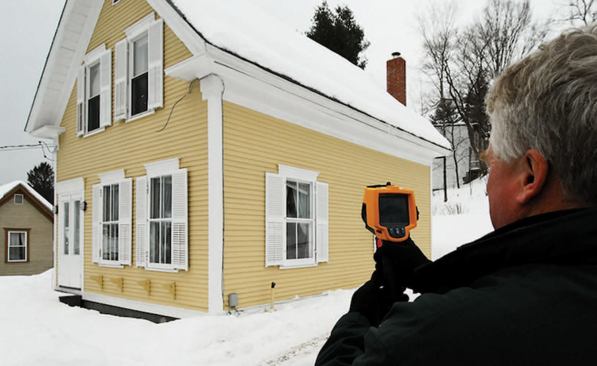
During the late 1970s and early 1980s, I supervised residential insulation projects in central Vermont while working with a couple of regional agencies. Despite our best efforts, we had many problems with blown-in insulation, which was becoming popular at the time.
On one occasion, I was doing the final inspection on a newly insulated Victorian – a three-story balloon-framed monster – when I realized I could look down from the attic into empty stud cavities in the exterior walls. Desperate to know how bad the situation really was, we called in a guy with an infrared scanner. The equipment available in those early days was cumbersome and expensive. It required nearly perfect conditions to provide even crude images, and the only way to get a hard copy of the output was to snap a photo of the CRT view screen. Even so, the IR technician was able to confirm that the house was only about 60 percent insulated.
From that point on, we began using IR imaging as part of the final inspection on all newly insulated homes. I was so impressed with the technology, I quit my job and went to work for the thermographer. In 1986, I started my own company, which now offers infrared training across the U.S. and internationally.
Today’s equipment is easy to use. Image quality is high, and prices have fallen dramatically. When cameras costing less than $10,000 began appearing in 2002, I couldn’t imagine prices going any lower, but excellent equipment is now available for half that price, and more limited (though still useful) versions sell for as little as $1,500. However, the affordability and easy availability of the equipment have a potential downside: Builders who buy an IR camera with the expectation that they’ll learn to use it through trial and error are likely to struggle at first, and risk making costly – or at least embarrassing – mistakes. In my experience, a two-day training session in IR-imaging basics is worth about a year of flopping around on your own. It’s like anything else in the building trades – having the right tool isn’t the same thing as knowing how to use it effectively.
There are two standards you should become familiar with, even if you don’t always follow them: ASTM C 1060, Standard Practice for Thermographic Inspection of Insulation Installations in Envelope Cavities of Frame Buildings; and RESNET’s Guidelines for Thermographic Inspections of Buildings. Both provide a good foundation.
IR Imaging Basics
An IR camera works by sensing the radiant energy given off by objects in its field of view. It does this with an array of built-in thermal detectors, the number of which determines its “array size” (see “Shopping for an IR Camera,” page 36). The camera’s built-in software converts the radiation into a visual image called a thermogram.
A matter of interpretation. The right IR image can allow the operator to draw some very detailed conclusions about what’s happening beneath the surface of an object. But it’s important to understand that IR images aren’t like medical X-rays – they’re really just detailed maps of variations in surface radiance. The conditions under which the image is taken – the time of day, the difference between indoor and outdoor temperature, and other factors – determine how much that map will let you deduce about what’s hidden from view.
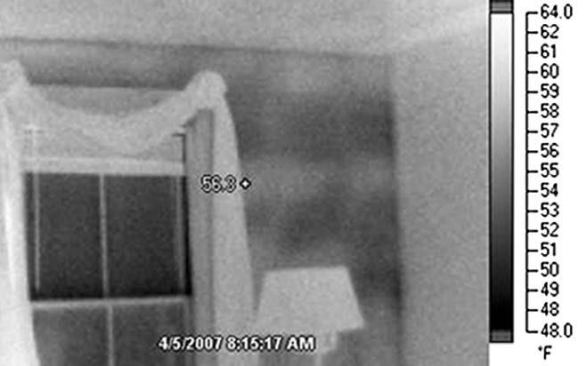
Color choices. The color-coding of an IR image can be varied to suit the situation and the user’s preference. In the early days, most IR images were grayscale, like the picture on an old black-and-white TV set. The warmest areas were white, the coolest were black, and areas between those extremes appeared as varied shades of gray.
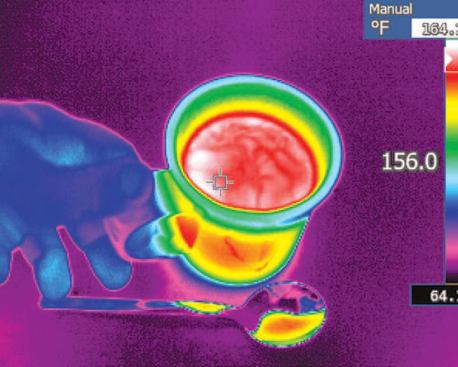
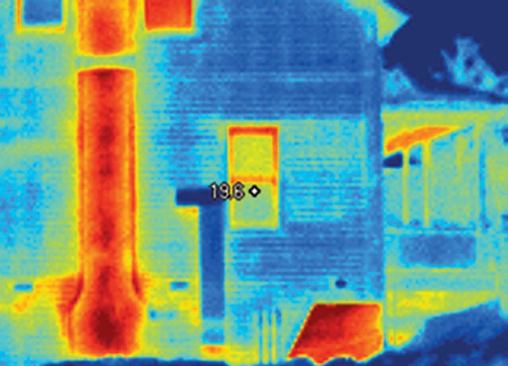
Most cameras still let you display images in grayscale, but simple color images usually show things better. The best color palettes are intuitive, meaning that warm surfaces are indicated by warm colors like red, orange, and yellow, with cooler surfaces in blues or blacks. The best palette for a given application varies with the camera brand and model. The key is to find the palette that shows the greatest contrast while displaying the scene intuitively.
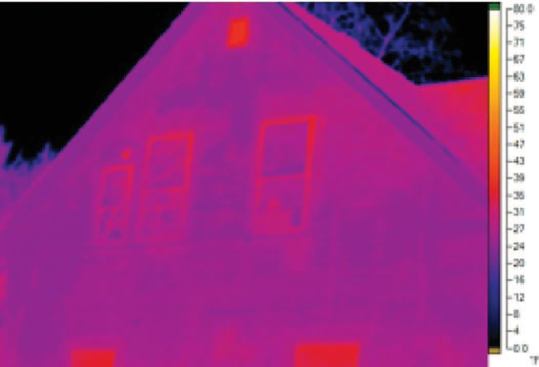
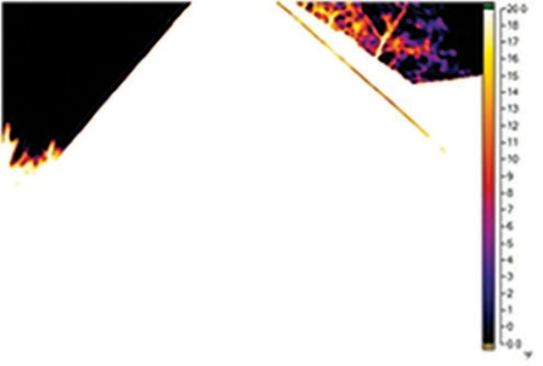
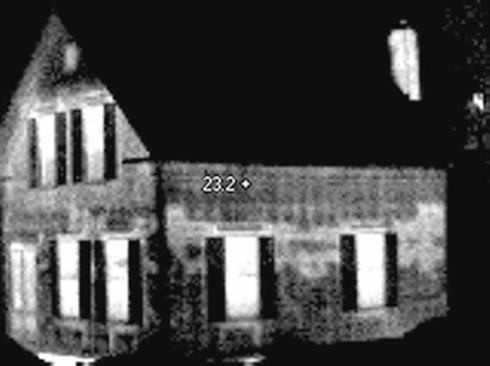
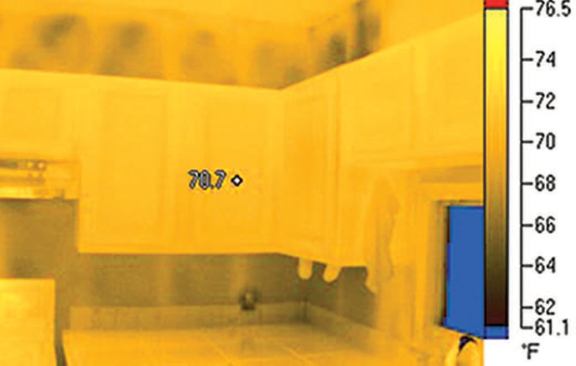
The thermal span in this image is an overly wide 80°F, which ha…
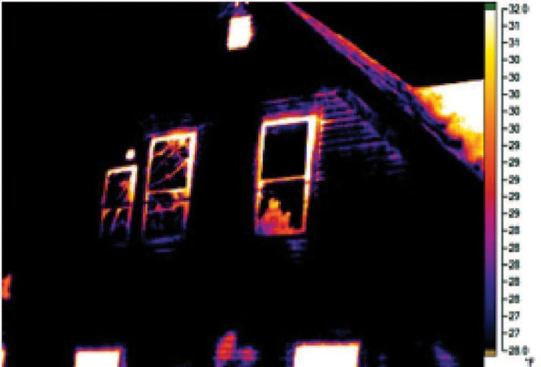
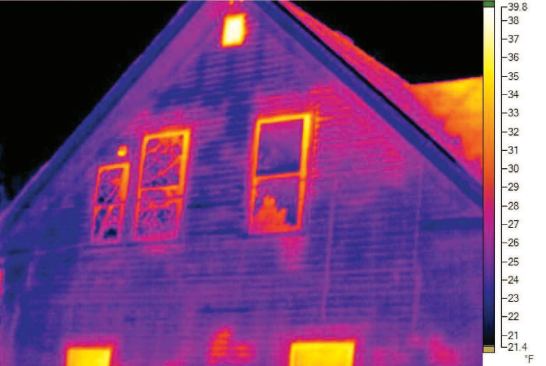
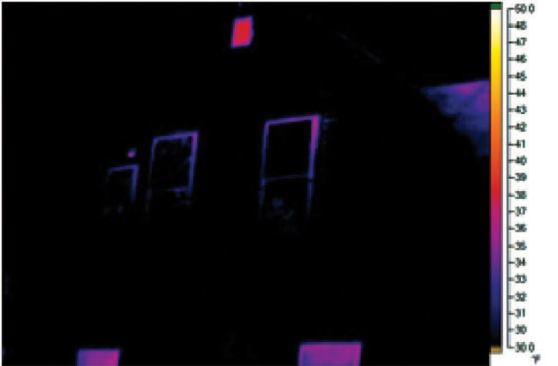
Span and level. In addition to deciding on a color palette, the user also must select the upper and lower temperature limits of the subject area, a setting sometimes known as thermal contrast, or – more technically – the span setting. Depending on what you select, it’s possible to put the full range of colors within a narrow span – of, say, 4°F – or a very wide one, of 100°F or more. The best setting will clearly show a high level of contrast in the area of interest. The camera operator has the option of displaying a scale at one side of the image, which keys the colors in the image to the temperature.
Many cameras have a function that will automatically set the span to encompass the warmest and coolest objects within its field of view. This is useful at times, but if the area contains a very warm object, like a hot wood stove or a light bulb, or a cold one, like a window, the auto function will set the span so wide you’ll probably lose too much contrast and detail for the image to have much value.
A second adjustable range, called thermal level (similar to “brightness”), determines where on the temperature scale the selected span will appear. If you’ve already selected a 4°F span, for example, you can choose whether you want that area of interest to fall between 10°F and 14°F or between 64°F and 68°F. Depending on how you tweak the level setting, you can make things look extremely hot or extremely cold, or – ideally – just right. Almost all of today’s imagers have both automatic and manual adjustment modes. The automatic mode is useful, but in most cases the thermographer will also have to do some fine-tuning of the image using manual mode.


