Two years ago, I reviewed the DeWalt DCN690 20v Max cordless framing gun. Cordless guns like the Paslode XP have been around for a long time, but the DeWalt was unique because there was no combustion engine requiring fuel. Instead DeWalt uses a flywheel to generate enough power to drive a nail. A more detailed explanation is found the review of the DeWalt framing gun.
About 6 months ago, I was asked to review the new DeWalt 20v Max cordless positive placement nailer, and it finally showed up earlier in the summer. We use positive placement nailers all the time framing because we live in a seismically active zone. I reviewed the Hitachi NR38AK nailer last summer, and we still use that gun almost every day. It is small and light and fits everywhere, but eliminating the need for a hose could be a huge benefit.
Tim Uhler
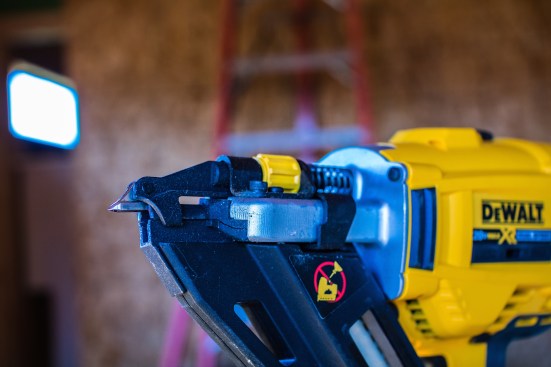
Features. This positive placement gun has the same features of any positive placement gun we have tested, plus a couple. Positive placement nailers use either the nail itself (like the Hitachi does) to find the hole in the hardware or a probe attached to the tip of the nosepiece (photo, left), which is what this DeWalt gun has (and Paslode, which brought to market the first positive placement gun).
I prefer the Hitachi design because I find it faster, but the probe works well too. The difference is most noticeable when it is a little dark or cramped and access to the hardware is limited. Then you are finding the hole by feel with the gun, and for me it is easier using the nail and not the probe. But the difference is really a matter of preference.
This gun has a dial-type depth of adjustment on the nosepiece. This is important because overdriving nails on hardware can negatively affect the performance of that hardware. In addition, the gun has a dry-fire lockout so when the magazine is empty you can’t fire. This is good because you don’t end up with deformed hardware from the driver pin.
This gun will shoot both 1 ½” and 2 ½” nails in diameters up to .162” in the same angle as all the positive placement nails commonly found. We use Paslode brand and Halsteel and have had good success with both brands. At the base of the magazine and right above the battery is a selector switch for shooting either length of nail.
Tim Uhler
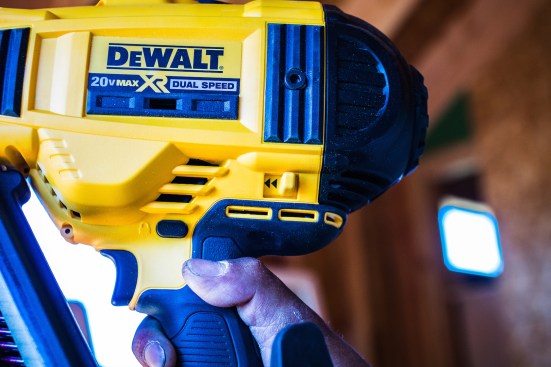
The firing mode on this gun can be set to sequential or rapid fire (photo, left). Rapid fire just keeps the flywheel spinning so you can pull the trigger and not have wait for the flywheel to get up to speed to shoot the nail. We kept the gun in this mode because we try and install as much hardware as we can to a beam while the beam is on sawhorses. I found, too, that when shooting on hurricane clips, I preferred to keep the gun in rapid cycle.
I like the adjustable belt hook. This is a great feature because often I need to hold a piece of hardware in place and then start shooting it on. So I’ll set it with both hands and then grab the gun off my belt.

Tim Uhler
We found that the driver pin kept getting stuck when we were shooting HD galvanized 2 ½” nails. On top of the gun is a lever to reset the driver pin (photo, left), which makes getting out of a jam fairly quick. It seemed we had trouble with just that batch of nails. We also had one nail jam and get bent in the nosepiece, but that was easy to fix. DeWalt has an Allen wrench on the gun that made it easy to remove two screws and pop the magazine off. It is common for us to miss on thicker hardware and the nail to bend in the nosepiece. This has happened with every gun we’ve tested, but DeWalt makes it easy to quickly fix.
Performance. Right out of the gate, we used this gun to shoot 2 ½” x .162” nails and they were all proud. We dialed the depth all the way in, but they were still ½ ” proud. This was for two reasons: First, we were shooting into LVL, and second, we had it set to 1 ½” nails. Even after we moved the switch to 2 ½” nails, though, it didn’t always set the nail deep enough.
After shooting into different materials, I think that this is mostly because the LVL we were shooting into was just really dense. Mostly, we shoot hardware into Doug fir or Glulams made of Doug fir and the gun did just fine.
I found when shooting hurricane clips onto rafters that were 16” o.c. that, even with a ceiling joist nailed next to the rafter reducing the space, I could still fit the gun on an angle and was able to shoot off the hardware. We’ve learned to plan ahead and are usually able to leave room for guns to shoot hardware; and if not, we use a palm nailer.
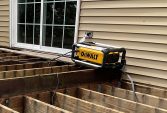
Using the gun off a ladder or for any overhead work is tiring because it is heavy and big. The advantage of going cordless, though, trumps that issue for me. We used this in the summer, and I can see not dragging a hose through mud being a huge advantage. We have to shoot hardware on when we work in crawlspaces and this is another benefit of this gun: no hose to get tangled.
It was a little less reliable than the pneumatic guns we’ve used. You have to learn the rhythm of this gun, and at first it is frustrating. You have to make sure the nosepiece is all the way in to shoot the nail. This takes a little bit of force. I figured it out right away, but it took some practice. At first, though, it was frustrating to pull the trigger and have nothing happen.
I recommend this gun for the convenience it offers. That, for me, outweighs its few small, irritating quirks.
The kit costs $445 and includes a charger and one 4.0-Ah lithium-Ion battery. By comparison, the Hitachi NR65AK2 that shoots both sizes costs about $350.