by Bill Averette
For many years I owned a remodeling business and a wholesale
building-products company. Although I made a decent living, I
really didn’t enjoy the work. So in 2005, with help from
a friend who’d built his own log home, I started a
log-home–building company, Mountain Dream Homes. One of
the best parts of my new business is the clients: Most have
always wanted a log home in the mountains, so they’re
easy to work with. That makes building fun again.
But even with all the interesting projects and good clients,
log building presents certain unique difficulties. For
instance, the logs arrive at the site precut, so the foundation
must be perfectly sized and square within 1/8 inch.
Also, we have to educate clients about the various differences
between conventional and log homes and between kiln-dried and
green logs. Kiln-dried logs cost more, of course, but they also
minimize a home’s maintenance needs and maximize its
livability. Green logs, on the other hand, shrink quite a bit
as they dry, causing cracks and checks in the wood and openings
between logs that have to be sealed regularly. For the first
year or two after the house is built, springs and screw jacks
need to be adjusted every couple of months by either the
builder or the homeowner as the logs shrink. During the
building process, we have to allow for the shrinkage by leaving
a 3-inch gap above all doors and windows, so the house can
settle without damaging them. This can make installing trim and
air-sealing more difficult. And plumbing and hvac systems
require special slip joints and careful planning.
With kiln-dried logs, none of these steps are necessary. Our
supplier guarantees no more than 3/8 inch of movement
throughout the life of the home. The Logs The eastern white
pine logs we use come from the northern Pennsylvania and
western New York area. Our favorite supplier is Kuhns Bros.
(800/326-9614,
kuhnsbros.com), a
company that uses a unique kiln-drying process that heats the
logs to 170°F for four to seven weeks. Besides
drying the logs to a uniform 19 percent moisture content, this
step sanitizes them and kills any insects living inside. (The
only other insect control needed is a termite ground treatment,
which is standard procedure in our area anyway.)
The logs are debarked and machined to uniform size in one of
15 profiles. Some profiles have rounded sides, like the Swedish
cope profile on the home pictured here. Others have flat sides
with or without a decorative notch or V-groove.
Once we place an order, delivery of a log-home package
typically takes three to four weeks. We can arrange for it to
arrive in as many as five different deliveries. If, for
example, there’s not enough room at the site to stack all
the logs and material, we’ll store it at our local
lumberyard and get the material delivered in smaller
quantities. The local yard charges a small storage and delivery
fee for this service.
The logs arrive on pallets, wrapped in plastic for weather
protection, and we cover them with tarps as added insurance.
The pallets are arranged so the logs we need first are at the
top of the stack. On delivery days, we rent an all-terrain
forklift to get the logs from the trailer to the building site
(see Figure 1). We make every effort to stage the deliveries so
we receive only the material we need at that particular
time.
Figure 1. The author rents an all-terrain
forklift on delivery days. The pallets are covered with plastic
and arranged so the lower log courses are on top of the
stack.
Design
Most of the homes we build are custom, but Kuhns Bros. has a
catalog of standard designs that can be modified to the
homeowner’s individual specification. For custom homes,
we work with a designer who specializes in log construction.
Some homeowners bring us their own plans. Either way, Kuhns
Bros. uses the provided drawings to engineer the home and
precut the logs. With our supplier’s help, we can build
almost any log structure, regardless of size and
complexity.
Tools
Besides standard carpentry tools, we have two specialty power
tools we use regularly: a 16-inch Makita beam saw, which we
call “Big John,” and an electric impact wrench to
drive the 3/8-inch lag screws that connect the log courses
(Figure 2). We also have a 16-inch Husqvarna chain saw that we
use on occasion. We rent telehandlers and cranes for setting
ridge beams and other heavy work.
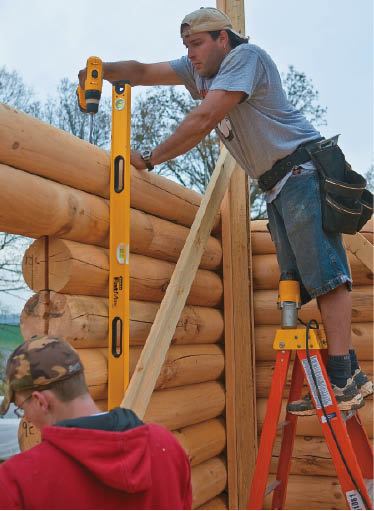
Figure 2. In addition to standard
carpentry tools, building with logs requires a large circular
saw for trimming ends and adding or expanding window and door
openings. A 1/2-inch electric impact wrench drives the lag
screws that connect the log courses.
Stacking Logs
Our log homes start with a pretty conventional foundation and
floor system — except that the band joist is 4x10 hemlock
instead of 2x10s or engineered rim board. We attach it to the
2x10 floor joists with metal banding. Next we install a layer
of 3/4-inch AdvanTech, then two beads of Sikaflex polyurethane
caulk to seal the joint between the first log course and the
subfloor (Figure 3).
Figure 3. Set into urethane sealant, the
first log course is carefully aligned to the layout lines with
a framing or layout square. The ends of logs have dadoes that
receive plywood splines for structural reinforcement and
weatherproofing. While this wall starts with a full log,
adjoining walls start with a half log so they can overlap at
corners.
The first course is lagged into the band joist with
3/8-by-12-inch galvanized lag screws every 30 inches. We place
a self-adhesive gasket on top to seal the gaps between logs.
Following courses are screwed together using the same fastening
schedule. The logs come from the factory predrilled, but
sometimes we need additional holes, in which case we use a
3/8-inch drill bit with a counterbore at the top. Where logs
are butted end to end, a 1/2-inch plywood spline strengthens
and weatherproofs the joint.
The manufacturer’s standard wall height is 8 feet, but
most homes we build have 9- or 10-foot ceilings in keeping with
the lodge aesthetic so many homeowners want. We use temporary
bracing at corners and near doors and windows to hold
everything plumb while we work our way up the wall (Figure 4).
Where framed interior walls meet the log exterior walls, we
make a kerf in the logs to receive either T&G paneling or
drywall (Figure 5).
Figure 4.Dried to about 19
percent moisture content, kiln-dried logs are noticeably
lighter than green logs. Most can be carried and lifted into
place without struggle by a pair of workers. Logs are
identified on their ends, and a framing plan provided by the
manufacturer shows their location in the structure. T-shaped
braces hold the walls plumb while they’re
assembled.
Figure 5.Where stick-framed
interior walls meet the log walls, saw kerfs make it easy to
install drywall or paneling that doesn’t require fussy
finishing or scribing. The kerfs are made on site with a
circular saw and a chisel.
Mechanicals
One of the greatest challenges with log building is hiding the
plumbing, hvac, and electrical systems. Our strategies vary
according to where the systems are located. Concealing them on
the house’s first level is easiest: We almost always have
either a sawn-lumber or an I-joist floor system where we can
run pipes, ducts, and wires.
On the second floor, pipes and ducts are harder to hide.
Generally we build a conventional floor system above the
log-shaped ceiling joists and tongue-and-groove ceiling planks.
This has the added advantage of making the house a lot quieter.
Although the log joists and 2-by ceiling boards can be
load-bearing, sound passes easily through the single layer of
solid material, making the home very noisy floor-to-floor.
Plus, even if we tried to save the client money by eliminating
the second-floor system, we’d still have the expense of
trying to hide the mechanicals, which is labor-intensive and
creates design and aesthetic problems.
Most interior walls are stick-framed and covered with either
drywall or tongue-and-groove paneling, so we use the stud bays
for running the mechanicals between floors. We avoid putting
pipes or ducts on exterior walls, but we do have to install
electrical devices in them (Figure 6). Routing the wires from
the floor cavities below limits the number of logs we have to
drill through to reach the boxes.
Figure 6. Using a cardboard template, a
worker draws the outline of a work box (top left), then uses a
1/2-inch drill with a Forstner bit to hog out the material
(bottom left). A small router finishes off the
recess.
Windows and Doors
Kuhns Bros. cuts the logs to length, which creates the rough
openings for doors and windows. The log ends have a 1/2-inch
groove cut from top to bottom. We insert plywood splines into
the routed grooves (Figure 7) and seal them with a heavy
application of Sikaflex urethane sealant. We then install a
wood buck over the splines and seal the joint between the wood
buck and the logs with another bead of Sikaflex. The window is
nailed to the wood bucks and trim installed over the nailing
fin (Figure 8). We use a foam gasket between the logs and the
window buck at the top and bottom. The log that forms the
bottom of the opening is beveled so it sheds any water to the
outside.
Figure 7.A carpenter taps in
plywood splines (top left) that mate with dadoes in the backs
of door and window bucks (top right). The window fins are
fastened to the bucks, then covered with trim
(bottom).
Figure 8.Doors and windows are
cased with pine trim to match the logs. The preassembled
picture-frame casing is scribed and let in over the
window’s nailing fin. A layer of peel-and-stick flashing
over the fin seals the joint.
Finish
We use Sikkens (866/745-5367,
www.nam.sikkens.com)
and Sashco (800/767-5656,
sashco.com) products for
finishing the exterior because we’ve had good results
with their adhesion and durability. Lighter stains, we’ve
found, last three to five years and darker stains five to
seven. We add a product called Bug Juice (Walla Walla
Environmental, 800/247-9011,
wwenvironmental.com)
to the stain to prevent damage from wood-boring bees. Roof
overhangs and window casings are generally stained to match the
rest of the house.
To seal and protect the log interior, we use Sansin’s
Purity Clear (877/726-7461,
sansin.com), which prevents
the wood from darkening or yellowing too quickly.
Bill Averette co-owns Mountain Dream
Homes in Blue Ridge, Ga.