The two most common ways to trim out a window are wrapping all four sides with casing (sometimes called “picture framing”) or installing a horizontal stool on the bottom that supports the side casings and has a separate “apron” trim below the stool. Sometimes, however, I am called on to do a “both/and”—installing casing that wraps the window as well as a stool that overlaps part of the casing.
What’s interesting to me is that carpenters often think they have to choose between picture frame or stool and apron trim. To have both a picture frame and a window stool is sort of unique. Once I learned about this unique treatment, I started running into it on a wide range of homes, and every time it changed the way I think: it’s not either/or—it’s both.
I’ve encountered this window treatment on Tudor-Revival- and Queen-Anne-style homes, particularly for windows that come down near the floor. I’ve also encountered it on Beaux-Arts and Classical Revival homes from the late 1800s and early 1900s, which are known for their elaborate woodwork and strict symmetry of architectural elements. In these cases, the bottom of the windows are often filled in with woodwork to provide visual symmetry with door openings. I’ve even seen it (and reproduced it) on Spanish Colonial Mission homes whose woodwork tends to have very simple, clean lines.
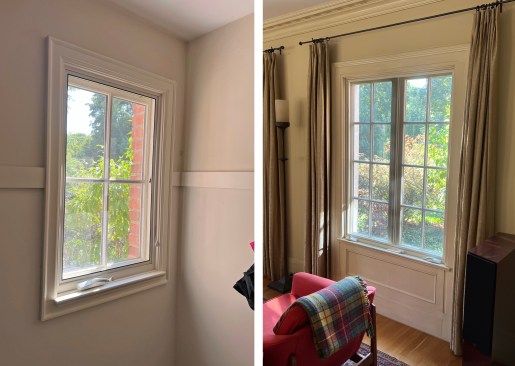
Two examples from a Classical Revival home: In its simplest form, the stool overlaps onto picture-frame trim (left). In the home’s formal living areas where windows are larger, the casings come all the way down to the floor and the area below is filled-in with panels. The stiles and rails around the panels are on the same plane as the casing.
Two Common Cases
Regardless of the architectural style, there are two common situations where this detail comes into play:
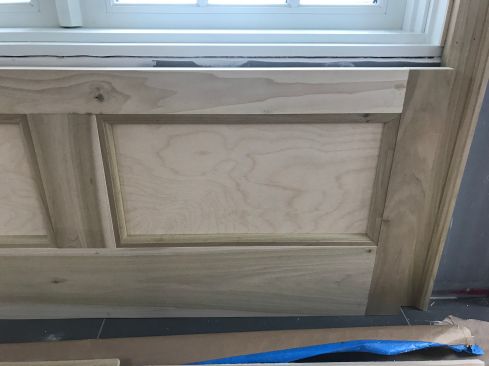
Casing that runs past the sill and continues to the floor. If the window is low to the floor, it’s not uncommon to have the side casing run all the way down. It’s worth noting that in most cases, the casing runs to the floor. It doesn’t run just to the top of the baseboard. Instead, the baseboard is interrupted by the casing so the panel infill reads almost like a “separate furnishing,” or like a door. The area below the window is filled by a stile-and-rail panel that is independent from any baseboard or wainscoting that may or may not be included in the room.
A picture-frame casing with an overlapping stool. When the windows aren’t close to the floor, I sometimes see (and reproduce) a picture frame around the entire opening with a stool added below the window. In that case, the stool has very short “horns” that lap onto the face of the side casings. These overlapping horns do not extend past the side casings, as is typical for a traditional window stool. For the amount of overlap, I’ve seen a range, from about 1 inch of overlap down to about 1/4 inch.
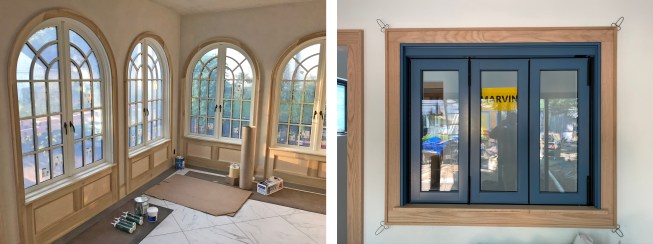
While common for ornate interiors, such as this Tudor Revival interior trimmed out by the author (left), the modified stool also suits the clean lines of a Spanish Colonial Mission style home (right), where the author reproduced the trim style found throughout the home around an interior window separating an office space from a glassed-in porch.
Trim Process
Once I have the window set and my jamb extensions are figured out so they flush to the interior wall, I case the window. I rarely miter the corners when picture-framing a window unless that’s already an established look in the home. Most of the time I butt join the corners because it’s more stable, and staying true to the period of the older homes I typically work in, it’s how most traditional casing was typically done. Miters tend to open either at the toe or the heel as wood shrinks across the width of the board. With a miter, this shrinkage of both meeting boards adds up. A butt joint, on the other hand, “sees” only half of this shrinkage. If the casing has a profiled edge, I typically cut a jack miter where only the profiled edge is mitered and the flat of the board is cut straight to receive the butt end of the meeting board.
If the casing doesn’t run to the floor, you have to account for the thickness of the stool when measuring for the side casing. I will clamp a piece of stool stock to the window, accounting for the reveal on the window, and then measure to the bottom of this piece of stock. Or I may hold the stool stock in place and draw a line to measure to.
If the area below the window will be filled, I set all the panels between the casings before I install the stool. The panel can be tricky sometimes because the stiles are often flush to casing, and depending on how flat the wall is, these two don’t always track together and may need to be sanded flush.
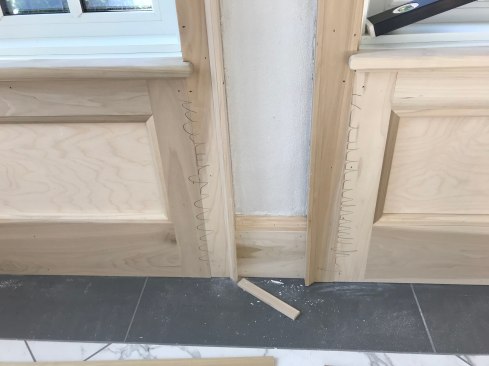
The author builds his panel sections after running the casing to…
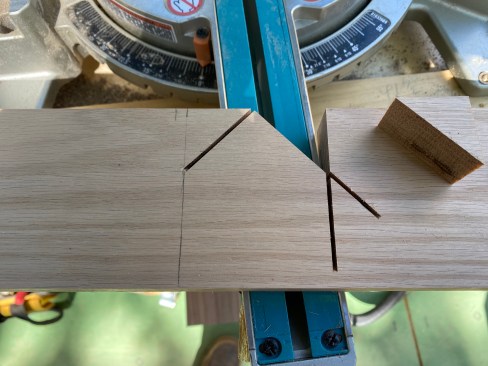
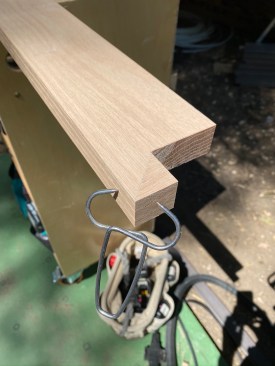
When installing the stool, I almost always cut a miter return on the ends of the overlapping horns, particularly with stain-grade work. That’s because on stain-grade work, the end grain will stain much darker and always ends up looking like the proverbial sore thumb—unless you cut a miter return. For painted work, you can round over the end grain at the end of the horn, though the painter may need to fill this grain to smooth it out. The horns are a small detail, but they make the difference between a seamless finish and one that draws the wrong kind of attention.


