Simple Frame & Panel Trim
Craftsman-style wood paneling is one of the easiest types to install because the stiles and rails have no sticking profile: They’re cut square, which means you don’t need cope-and-stick router or shaper bits. And with square-cut stiles and rails, there’s no need for fancy panel molding either. The trick is to preassemble all the stile-and-rail sections and install the panels before fastening anything to the walls or columns.
We recently finished a job where we wrapped structural columns with a frame-and-panel treatment. The columns supported angled arches, which continued the paneled treatment. Fortunately, the owner wanted a collar of crown molding near the top of each column, which provided a good way to hide the joint between the column panels and the angled panels for the archways.
Careful Layout & Design
I wanted to know exactly what we were up against before we installed anything, so we started with a laser and shot control lines on the OSB substrate of each column. Control lines don’t have to represent any specific height or elevation; they just provide a level reference from which all other layout marks can be measured. (I use control lines whenever I’m setting windows and doors, so the jambs and casings will all be aligned.)
Measuring up from the control lines, we quickly discovered that the headers weren’t framed level. In one opening the header was crowned down, with a 1/2-inch sag. The floor was out of level, too, as much as 1/2 inch across a single opening. We established the lowest header as our starting point and laid out the paneling for the head jambs from that elevation.
Using the same control lines, we next marked the location for the finished spring lines of each arched opening, so that all the spring lines would match and be perfectly level. The only problem that remained was the floor. I knew there would be two different widths of panels — narrow ones for the inside “jambs” of each opening, and wider panels for the outside “casing” on each opening (see Figure 1). But I was determined to make the panels all the same height. The best solution for the out-of-level floor was a classical one — I just allowed for a second joint between the shaft of the column and the plinth, the perfect location for a base cap. The base cap mimics a classical column, which has a torus molding above the plinth; scribing the baseboard solved the rest of the problem.
Figure 1.Rabbeted stiles and rails, joined with pocket screws, and 1/4-inch plywood panels create a production version of an expensive-looking paneling job.
Story Pole
Before starting any woodwork, we laid out the dimensions of the column panels on a story pole, just to be sure we had it right. We made the top rail wide enough to accept the crown molding and still leave an exposed rail that was wider than the stiles. We also increased the width of the bottom rail so that it would accommodate the additional base cap molding and still be wider than the top rail (columns look best with the heaviest elements at the bottom).
Burma teak is the most popular type of wood used in Craftsman-style homes in the Pasadena area, but the owner of this home chose alder, which is much less expensive and still a good-looking hardwood. I usually use sheet goods for wainscoting, typically hardwood veneer with an MDF core. But for this job, solid wood was the only choice because there was no molding hiding the inner stiles and rails, and the outer edges were visible, too. Though it added considerably to the board-foot price, I ordered all the solid material S4S from a local supplier to save milling time. For the 1/4-inch paneling and 3/4-inch plinths, I used alder veneer with an MDF core.
Assembling the Columns
Wrapping the lower section of each column was the easy part of this job. We used the story pole to determine the heights of all the panels, then cut a stack of stiles and rails. The wide top rails had to be glued up because the alder boards didn’t come wide enough. Since the backs of all the panels were hidden against the columns, we were able to use pocket holes to secure the boards and didn’t have to wait for the glue joints to set up. We also used pocket holes to secure the stiles to the rails, which allowed us to move along at a pretty good clip (Figure 2).
Figure 2.Pocket screws make for tight joints between rails and stiles (top left) and allow the frames to be handled while glue is still wet. In a quick operation, a carpenter rabbets the frame (top right), then installs the panel with glue and staples. The panels were cut 1/8 inch smaller than the overall width to allow for seasonal movement.
We didn’t even wait for the glue to dry before rabbeting the back of each frame for the 1/4-inch panel. We set the panels in a small bead of glue, dropped each panel in place, and then secured it with staples.
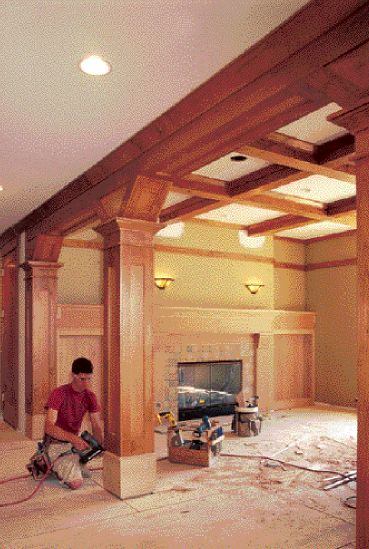
Installation went pretty fast, too, at least on the center columns. We eased the edges of every outside corner to emphasize the joinery and provide a little wiggle room: Installing flush corners can be much more demanding. Next, we glued up the corners, holding them in place with clamps so we could adjust the fit before securing the corners and the field with finish nails (Figure 3).
Figure 3 . Clamps hold the glued panels in place while a carpenter secures the joints and the field with finish nails.


