Like many small contractors, I do extremely varied work. One
week I may remodel a bathroom, the next construct a deck, and
the one after that build out an attic room. With so much
variety, I never know what I'll need from job to job —
and I despise having to drop everything and run for hardware,
tools, or supplies.
I used to do the "tools in the back of the truck" routine, but
it severely limited my ability to carry material. As my tool
inventory increased and my back complained, I realized I needed
something better. I looked at enclosed trailers, but they ran
$5,000 and up for a quality unit. Even at that price, they
needed to be "built out" inside, and their storage capacity was
limited by the need for a pathway.
So I hit the drafting board and started working on a design of
my own. I wanted a tool storage and transportation system that
would free up my truck for material handling and nonwork use,
make it easy to set up on site, and keep my tools as secure as
possible. If the trailer also helped me work, that would be a
bonus.
After several months and numerous revisions, I had my design.
It took a few more months to source items, find a fabricator
for the custom parts, and actually construct the "gdboss,"
which is what my wife named the trailer (it's a play on my
company's name, gdcarpenter).
Landscape Trailer
The storage unit sits on a 6-foot-by-12-foot flatbed trailer
— the kind many landscapers use. I paid $1,050 for it at
a Texas Bragg trailer outlet in nearby Burlington, N.C. The
model I bought came with 4-inch drop axles rated at 3,000
pounds. The trailer was already low to the ground and got even
lower when I began adding weight, so I upgraded the axles to a
5,200-pound set with electric brakes. This cost an additional
$1,100; it would have been cheaper to have ordered the heavier
axles in the first place.
Body. The trailer body consists of a
pressure-treated lumber frame that's lagged together, bolted to
the metal trailer, and clad with MDO plywood fastened with glue
and nails. I made the drawers and interior panels from
AdvanTech, an extra-water-resistant type of OSB, and finished
the shell with Hammerite paint (Masterchem Industries,
866/774-6371, www.masterchem.com), an exceptionally
tough, quick-drying product with a hammered finish that's so
convincing many people think at first glance the box is made
from metal.
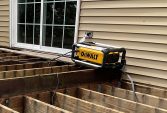
A 68-inch-high storage area occupies the front of the body;
behind it is a 6-foot-by-91/2-foot deck with drawer storage
underneath. The deck slopes from 48 inches high in front to 42
inches high in back, which helps drain off rain.
Front storage. The forward storage
compartment is accessed through a bifold gate, which I had
custom-fabricated from angle iron and heavy-gauge screening
(Figure 1). Hinged doors weren't an option because they
wouldn't clear the frame of the trailer and they'd be in the
way when open. The gate folds up and out of the way, giving me
full access to the compartment behind it. Closed, it's very
secure, thanks to deadbolts on either side, index pins at the
bottom, and heavy-duty strap hinges on top.
Figure 1. A metal bifold gate covers the
trailer's front compartment (top); it has hinges at the top
(middle) and is secured with deadbolts at the side and pins at
the bottom. Folding up the gate provides unimpeded access to a
compressor and shop vac (bottom). The heavy-gauge screening
lets in supply and cooling air when the compressor is
running.
In the compartment, I store a 25-gallon vertical compressor, a
shop vacuum, a retractable air-hose reel, air and vacuum hoses,
accessories, and an emergency tarp. The space also houses a
Wonder Winder containing 75 feet of 12-gauge extension cord
that plugs into a job-site power source. The cord feeds through
a switch to a GFCI outlet for the compressor, and from there
runs to duplex receptacles on either side of the trailer
(Figure 2).
Figure 2. Inside the front compartment,
an extension cord feeds to a GFCI outlet (top). From there,
power is fed to a pair of outlets built into the sides of the
trailer. Various storage spaces suit different tools: Delicate
items have their own shallow niche (middle), while larger ones
reside in a series of drawers (bottom).
The front compartment is made of metal mesh so that when the
gate is locked, the power-supply cord and hose can still run
through the bottom gap and the compressor can continue to draw
intake air and keep cool. Although secure, the mesh is quite a
bit lighter than a solid gate. Rain can get in, but I don't
keep anything in this area that would be hurt by a little
water.
To make it easier to drain the compressor, I extended the
drain through the bottom of the trailer and installed a petcock
there.
Hinged-door compartments. On the
driver's side of the front compressor area, a door leads to
shallow storage designed for delicate tools that would be
damaged if allowed to bounce around inside a toolbox. A door on
the passenger side leads to a deeper compartment; here I store
nail guns, collated nails, air hoses, extension cords, and an
extension-ladder standoff.
At the very back of the trailer is a 2-inch-deep,
19-inch-by-26-inch storage area dedicated to storing saw
blades.
All doors are 1 1/2 inches thick and have hinges with
nonremovable pins, keyed-alike deadbolts, and stainless-steel
folding T-handle latches.
Drawer compartments. The trailer
also contains seven drawers, which ride on Accuride model 9301
full-extension drawer glides. Rated at 300 pounds, these glides
are designed for mobile applications, which means they can
withstand vibration and rough usage.
The two forward drawers are the largest. The one on the
driver's side holds a 12-inch sliding-compound miter saw
mounted to a piece of 3/4-inch AdvanTech; grab handles make it
easier to lift the saw in and out. The drawer on the other side
stores most of my cased equipment: a recip saw, a couple of
circular saws, cordless drill/drivers, a jigsaw, an orbital
sander, a power planer, an electric stapler, a plunge router, a
biscuit joiner, and a pocket-hole jig. I also throw my toolbelt
in there at the end of the day.
Another large drawer sits at the right rear of the trailer; it
holds a portable table saw, a large Dremel kit, a short
stepladder, and a supply of various caulks.
The trailer also contains three small side drawers, about 6
inches tall, that carry items likely to get lost in a larger
space: smaller tools — a belt sander, a palm sander, a
right-angle grinder — and their accessories and supplies;
fasteners, glues, tapes, wood putties; and such miscellaneous
tools as staplers, drill bits and drivers, and pry bars.
The final storage area is a long drawer that pulls out from
the back (Figure 3). It's 30 inches wide, 12 inches deep, and
more than 72 inches long. I use it to store bins containing
electrical and plumbing supplies, more miscellaneous tools, and
longer items like a 6-foot level. Since a 5-foot slide was the
longest I could get, this is the only drawer that doesn't have
a full extension.
Figure 3. At the back of the trailer, a
6-foot drawer accommodates long tools — like a 6-foot
level — and bins of electrical and plumbing supplies.
It's the only drawer without a full extension.
One of the few problems I have had with the trailer as
originally built was the tendency for the rear doors and drawer
to leak — mostly, I think, because the deck drains to the
back. I have since weather-stripped these openings, and leaks
are no longer a problem.
Locking mechanism. The seven drawers
have the same stainless-steel T-handles as the compartment
doors. I didn't put locks on the drawer fronts because I didn't
want to deal with an excessive number of deadbolts every day.
Instead, I secure all but the long rear drawer with an internal
locking mechanism that I designed and had fabricated.
Accessed through a lockable door at the back of the trailer,
this mechanism consists of a square steel tube with L-bolts
welded to it that runs down the center of the trailer below the
deck. Since the tube is bolted on through elongated holes, it
can slide from front to back. When the tube slides forward, the
L-bolts slip through eyebolts on the back of each drawer (two
per drawer); the drawers can't be opened unless I retract the
L-bolts by pulling back on the tube.
For additional security, there's a way to padlock the tube in
the locked position.
I lock the rear drawer by reaching through the access door and
operating a vertically mounted slide bolt.
Work Setup
When I'm working outside, the trailer functions as a
workstation. Two folding shelf brackets, available through
Rockler (800/279-4441, www.rockler.com) and rated at 750-pound
capacity per pair, slip onto the side of the trailer and
provide support for a miter saw (Figure 4). Since there isn't
room to fold them down over the fender below, I made them
removable by enlarging the mounting holes into keyhole slots
that fit over bolts in the side of the trailer. Similar —
but permanently attached — brackets serve as stock
supports for long material.
"
Figure 4. Removable shelf brackets hold a
miter saw (top); folding shelf brackets serve as stock supports
(middle). Brackets attached to the rear of the trailer put a
table saw at just the right height for the deck to be used as
an outfeed table (bottom).
At the rear of the trailer, a pair of folding shelf brackets
support the table saw; they're positioned so that the saw's top
aligns with the deck of the trailer. This arrangement allows me
to rip material that's up to 10 feet long, with the deck
functioning as an outfeed table. When the trailer's ladder
racks are in place, I can rip material that's slightly more
than 16 inches wide; for wider rips, I loosen a couple of bolts
and remove the racks.
Ladders and Material
The ladder racks were designed for a truck, so to make them
fit the trailer I got a metalworker to alter the upper mounting
brackets (Figure 5). Rated for a 250-pound load, the racks can
be adjusted for height and width of load. I keep them high so I
don't bump my head on them.
Figure 5. The author had truck ladder
racks altered to fit his rig.
Fully equipped, the entire rig weighs a little more than 4,000
pounds; thanks to the 5,200-pound axles, I can still haul
another 1,000 pounds or so on the bed. Eight 1,200-pound-rated
rope rings (four on each side) let me secure the load with
tiedown straps without blocking any drawers.
I have had my trailer now for more than three years. It has
withstood the rigors of hard work and rough handling and has
helped me be more productive. Its solid construction and unique
locking mechanism keep my tools secure enough that I can leave
everything overnight at most job sites. And it accommodates all
of my equipment so neatly I never lose time searching for stray
items.
Excluding my labor, it cost $6,000 to build.
Garfield Karpiak is a supervisor with Holman
LLC in Westport, Conn.