Eddie Martindale
Every paver installation starts with excavating down to stable s…
Eddie Martindale
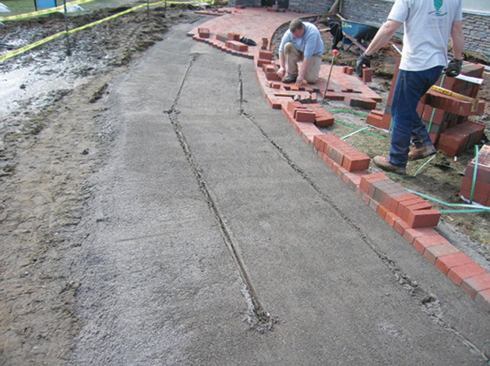
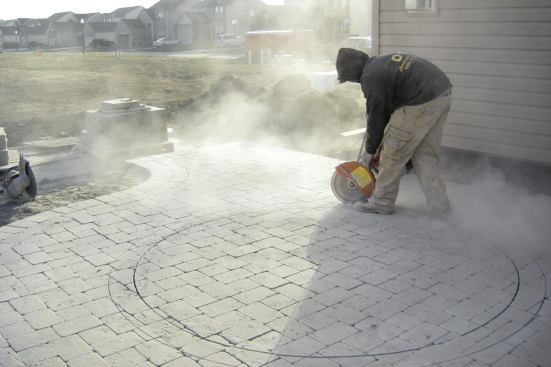
Most projects begin with marking the edges and laying a soldier …
When I explain my installation process to clients, I ask them to imagine their house without a foundation. It may look good for the first few days, weeks, or months, but eventually the walls will sag, the floors will collapse, and the roof will cave in.
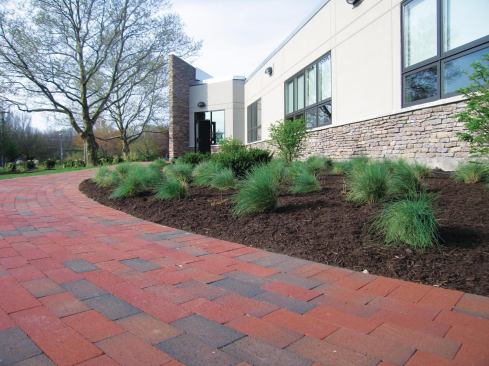
Likewise, the appearance, longevity, and safety of a patio or walkway depend on the quality of its foundation. The surface can be made of anything from the newest faux-stone concrete pavers to ADA-approved bricks to granite, flagstone, mica, and other slabs. But if attention isn’t given to what lies beneath it, sooner or later the surface will have unsightly dips, rolls, or other toe-catchers — and a resulting trip could easily turn into an injury and potentially a lawsuit.
Preparing the Grade
The single most important aspect of paving installation is base preparation. Every job incorporates two layers of base material. The bottom one is a thick layer of compacted crushed stone that acts as a foundation. On top of that is a thin bedding layer of sand. Once the base is prepared and the bedding course set and screeded, setting the actual pavers is pretty simple.
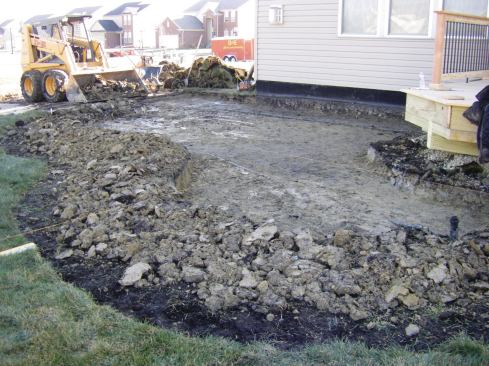
In my northern climate, the typical excavation for a walkway or patio is about 8 inches. I always excavate a minimum of 6 inches wider than the final paving dimensions in all directions, to be sure the pavers will be completely supported. For drainage, the subsoil (and consequently, all the other layers) should be sloped at least 1 inch in 8 feet prior to compaction.
The final depth of the excavation depends on the quality and compaction of the subsoil. Undisturbed soil is usually adequately compacted, but if fill was recently installed, we remove it and replace it in 4-inch lifts. We use a walk-behind plate tamper to compact each lift to the ASTM standard of 95% compaction.
The level of compaction can be tough for a small contractor to confirm. On our commercial and government jobs, engineers hired by the GC verify compaction using expensive equipment that just doesn’t make economic sense for most residential work. At least one manufacturer (Weber; 800/709-3237, webermt.us) produces plate compactors with a readout that lets the operator know when the layer is fully compacted. I haven’t used one, but it would take the guesswork out. As a practical matter, we find that we’re pretty close to 95% compaction when the compactor bounces on the surface.
If the subsoil is wet, it often means that the clay content is high. In that case, I make sure the subsoil is properly pitched to promote drainage, and I lay down a layer of 6-ounce nonwoven polypropylene landscape fabric before adding the stone base layers. This fabric, which stabilizes the base by preventing the clay from migrating into the stone, can be the difference between success and failure.
Base Layer
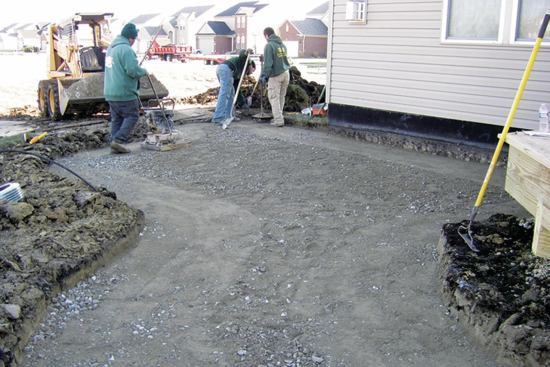
The next step is to install the base stone. The formal name for what I use is 21AA, but in my area, it’s called “crusher run.” It’s a mix of crushed stone from 1 1/2 inches down to stone dust. Properly compacted, this stone creates a hard, concrete-like surface that is extremely stable and will shed excess water while also allowing some percolation into the soil.
I fill the excavation with 4 to 5 inches of crusher run. This is the most critical phase of the installation and will determine its long-term viability. First and foremost, the crusher run needs to be compacted as thoroughly as possible. As with the subsoil, we use a walk-behind plate tamper. Bear in mind that most plate tampers will compact only a 3- to 4-inch lift of stone. For greater depths, we place the stone in several 3- to 4-inch lifts, tamping each one until the tamper literally begins to hop on the surface. With limestone or slag fill, we add water to each layer, which helps with compaction by making it easier for the stone particles to slide past each other. With crusher run, however, too much moisture can create a muddy mess that is harder to compact.
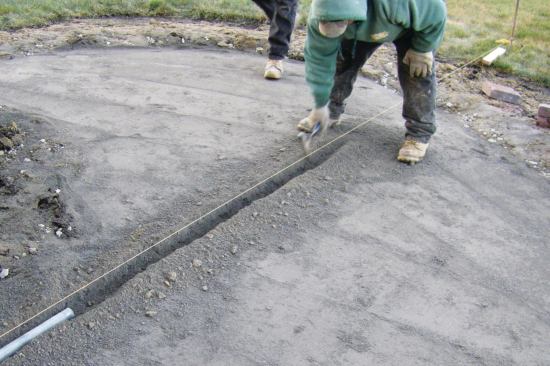
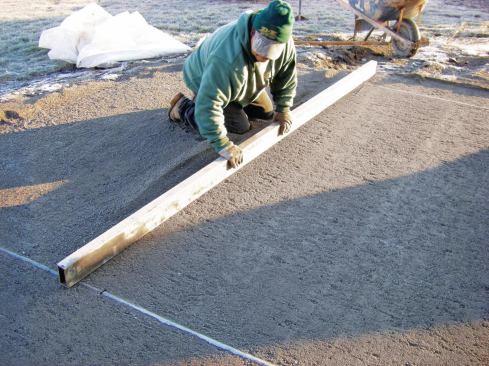
We try to keep the stone flat and in-plane while tamping, coming up to within about an inch of the final crusher-run height. We set the grade with strings, then place screed guides — 1-inch-diameter conduit or 1-inch angle irons — digging them into the base or supporting them on piles of stone as needed. After making sure the screed guides are straight, we fill around them with more stone and screed the surface flat. Then we remove the screed guides and tamp the stone.
The goal is to have as smooth a surface as possible after tamping. Most paver manufacturers require that any dips or mounds in the base material vary by no more than 1/4 inch from the overall grade. This is because the sand bedding course will follow the contour of the base layer, and any variation will telegraph through to the pavers on top. A flat base surface ensures a paver surface that is as smooth as glass and will stay that way. It also saves time screeding the bedding course.
When installing products whose thickness varies — such as flagstone and bluestone — the overall base level is not as critical, because the large stones can bridge any minor variations in the sand bedding course.
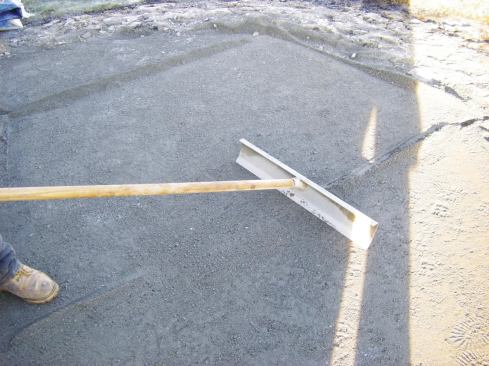
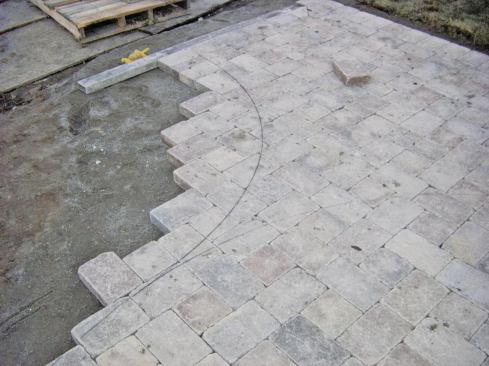
The Bedding Course
I typically set pavers in a 3/4-inch-deep bedding course of concrete sand. Mason sand is too fine, and block sand is too coarse — like buckshot — but concrete sand sets nicely and perks water quickly, two critical attributes for walkways and patios. Many contractors use stone dust as a bedding material. While this is easy to use and compacts nicely, my locally available variety is limestone, which tends to dissolve and cause efflorescence on the paving above.
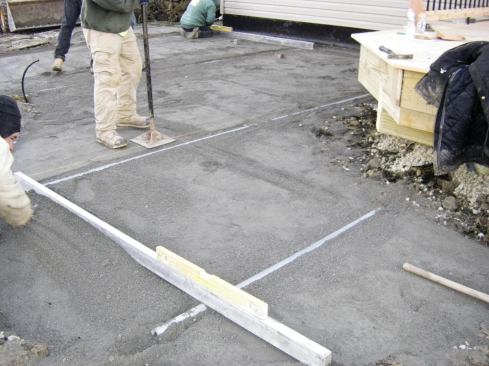
For screed guides, we place smaller, 3/4-inch conduit directly on the surface of the compacted base layer; we then place the sand and screed again. Once the sand is leveled, we remove the screeds and fill in the troughs.
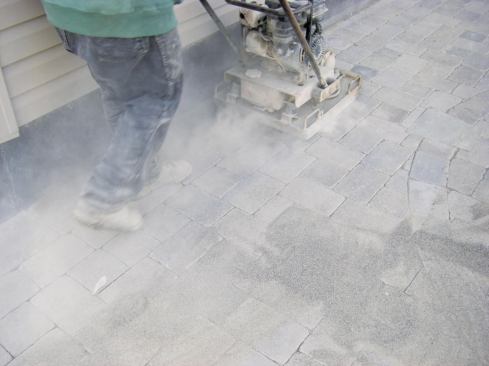
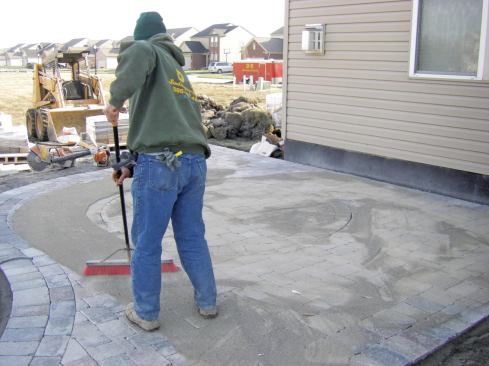
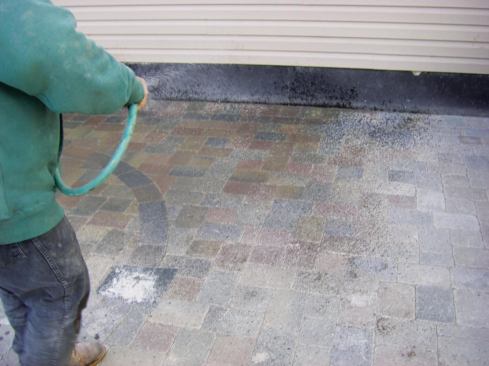
Most manufacturers recommend laying concrete pavers on a loose setting bed, then tamping afterward with a plate compactor. This helps to achieve a flat surface, and also works sand up into the joints, locking the pavers in place. Sometimes, however, if we are doing a lot of designs, we may compact the sand first to minimize damage to the surface from foot traffic.
We also compact the bedding layer first when laying clay brick; otherwise, the compactor may break the pavers. Sand for use below clay bricks can be compacted by tamping, but I prefer to use water because it will absolutely compact all areas. I thoroughly wet the sand, let it sit for a few minutes to allow the water to perk through, then screed it smooth. The sand will be a perfect 3/4 inch thick.


