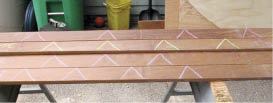
Ipe’s natural density and tenacity make it necessary to cut it into thin pieces in order to bend it. For the curves in this deck, 3/16 inch was as thick as I could go. I marked the boards with chevrons first so I could reassemble the ripped pieces in order; I left the rough table-saw finish on them to give the epoxy something to grab.
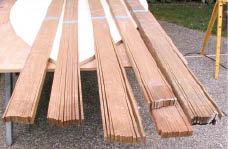
About 30 individual pieces of ipe made up one 5 1/2-inch wide piece. Glue doesn’t penetrate ipe well, so I used System 3 epoxy, a two-part high-performing structural epoxy.
I mixed enough epoxy at a time to glue up one full piece and brushed it along each layer of ipe with a small paint brush, working as quickly as possible so the epoxy would stay malleable, and stacking every five or six horizontally so the epoxy wouldn’t run.
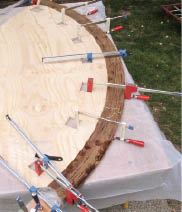
I had made five full-size plywood templates – for the top rail, the bottom rail, the two curved border pieces, and the sub-top rail – with squares cut out along the curve to give the clamps positive placement for better holding power. Once I coated all the layers for one piece, I clamped the first section in the middle of a template and worked out toward each end to keep the clamping pressure even and to keep the pieces from distorting. One trick with epoxy is to not clamp too tightly or the glue joint will be starved.
I kept the pieces glued up overnight and then took them to a millwork shop to run them through a large planer/sander and take them down to 3/4 inch to match the decking.
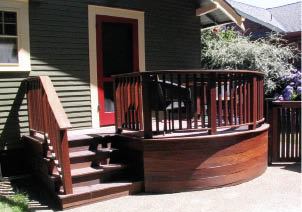
One mistake I made on this project was that I installed the wood at the high point of summer without letting the ipe acclimate after being milled to size. As a result, some of the joints opened up, and I had to fill them with a mixture of epoxy and ipe dust.
Paul Johnson is a remodeling contractor in Portland, Ore.


