Courtesy Emanuel Silva
The author cut out two cardboard templates, one for each end of …
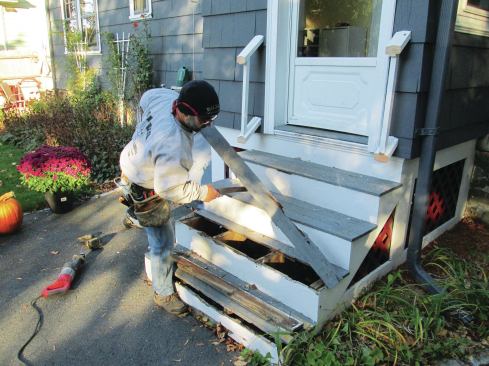
Through the years, much of my carpentry work has involved restoring old porches and their aging staircases. I’m always looking for new ideas to make the job easier and faster, while improving the final product.
Recently, for example, I prefabricated new PVC skirtboards and risers for a set of stairs that I was repairing. Once I slipped the new assembly over the old stringers, it was like working on a brand new set of stairs.
PVC Skirtboards
I like to use low-maintenance materials whenever I can, so I ripped new 12-inch-wide skirtboards and 71/4-inch-wide risers from a 4×8-foot sheet of 3/4-inch-thick Kleer PVC (thetapcogroup.com). Sheet goods aren’t necessarily much cheaper than dimensional stock—an 18-foot length of 1×12-inch PVC trim costs about $80 (or about $4.74 a square foot) in my area, while a 4×8-foot sheet of PVC costs about $150 ($4.69 a square foot)—but I find that sheet goods are easier to handle and produce less waste.
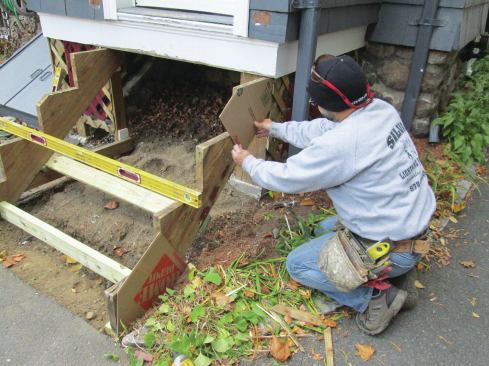
Templates. Since the assembly had to fit precisely, I sized the skirtboards with the help of cardboard templates. First, I traced the upper and lower stringer profiles onto a couple of pieces of cardboard, cut them out, and tacked the templates to the first stringer. After marking the positions of the templates on the stringer, I measured the distance between my upper and lower marks. I repeated this process for the other stringer. Then I placed the templates on my skirtboard stock the measured distance apart, plus 1/4-inch on each end to make the skirts slightly longer than the stringers, guaranteeing that the assembly would fit.
To determine the notch locations, I tacked the PVC skirtboards to the stringers and traced the steps. But I also measured the rise and run of each step. Then I set my framing square to the longest rise—adding 1/8 inch so that the bottom of the skirt would extend past the stringer—and the longest run and squared up my traced lines.
Track saw. I’ve found that my Festool track saw is the key to working efficiently with sheet goods. I used it not only to rip the skirts and risers to size, but also to quickly make accurate notch cuts in the skirtboards.
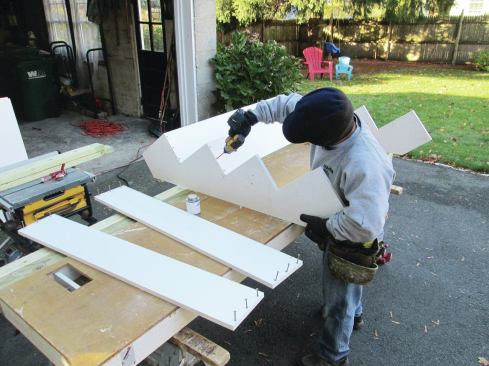
I could have cut miters for the riser returns, but I prefer butt joints for this detail when working with PVC trim. Unlike with wood, there’s no problem with the end grain being exposed. And because of the way PVC expands and contracts with changes in temperature, butt joints look neater than miter joints, which can gap unevenly over time.
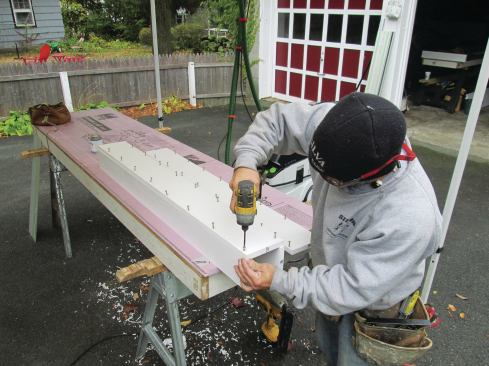
When I assembled the pieces on my work table, I pre-drilled all the holes with a Fuller countersink bit (wlfuller.com). I fastened everything together with coated deck screws, reinforcing the joints with Azek PVC glue. Later, I filled the holes with PVC plugs that I cut from scraps using a matching Fuller plug cutter.
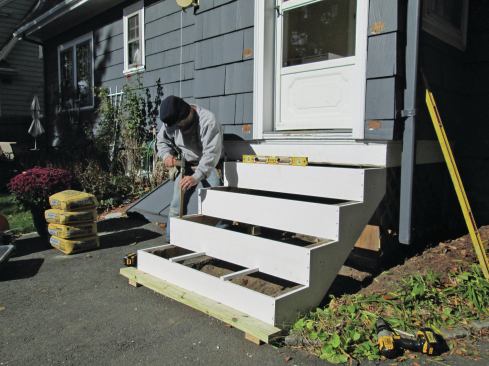
Sliding the prefab riser-skirtboard assembly over the stringers was quick and easy. Once it was in place, I shimmed it to make it level and square, and then fastened it with screws driven through pre-drilled holes in the skirts.
Landing Pad
The original stringers rested on the ground, but I wanted to reinforce the base of the stairs with a 6-inch-thick concrete pad. To make the form, I braced the bottom PVC riser with a 2-by, and fastened another 2-by support brace to the rear of the stringers.
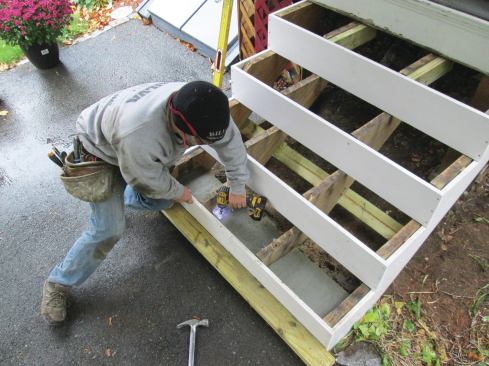
Once the concrete had cured, I trimmed the bases of the two middle stringers (which I had removed when I disassembled the original stairs) to fit and fastened them to the concrete with Simpson angle brackets and Tapcon masonry screws. I also drove GRK concrete screws through the skirts and outside stringers into the concrete pad.
Posts and Treads
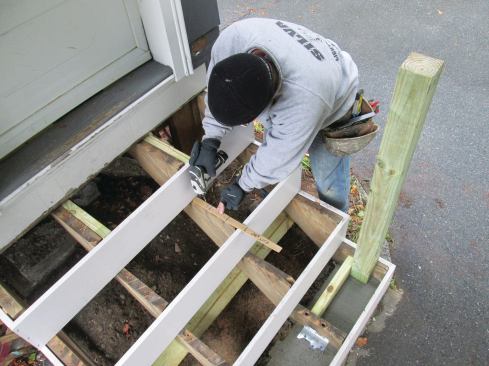
Even though notching a 4×4 post potentially weakens it, it’s often necessary to do in a retrofit. Notching the posts around the stringers at the base of the stair puts them in the right position and creates a little more room (36 inches is the minimum in my area) on the treads. This detail has been approved—and is sometimes recommended—by my building inspectors.
To prevent rot, I carefully sealed all cuts in the posts with a wood preservative. After shimming the posts plumb, I fastened them to the stringers with TimberLok structural screws. Then I installed plenty of blocking to tie the posts and stringers together, leaving space between the blocking for drainage.
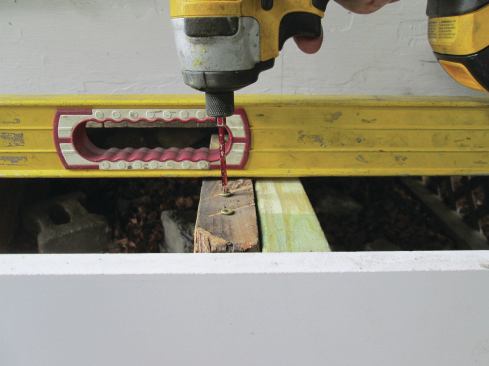
Shim screws. I usually install treads with glue and nails, but first I like to level the tops of the stringers. This stair had three Meranti Batu deck boards per step, so each board needed to be shimmed level with the one next to it. Instead of using wood wedges as shims, though, I used screws because I could quickly and easily adjust them up or down.
The shim screws must be positioned correctly, so I made a quick template indicating the layout of the three tread boards. After I drilled pilot holes through the template where I wanted the shim screws to be located, I placed it on each stringer and drilled small starting holes for the screws.
I screwed a 1 1/4-inch coated deck screw into each hole. Then I laid a long spirit level across both skirtboards and adjusted each screw so that it was flush with the bottom of the level. Before installing the treads, I fastened the risers to the middle stringers, using shims as needed to keep the risers straight.
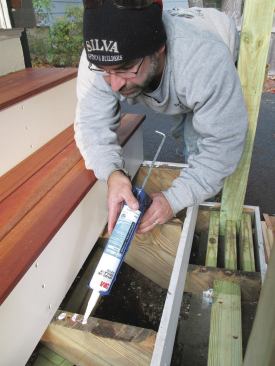
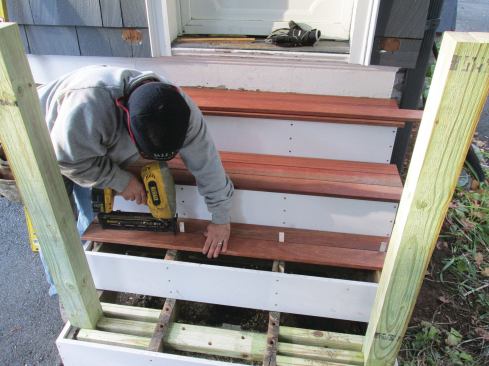
Treads. I like to apply an initial coat of Penofin penetrating oil finish to all four sides and the ends of each tread board prior to installation. This helps prevent moisture from getting into the underside of the boards and causing rot.
When I installed these treads, I first applied dime-sized dabs of 3M 5200 marine adhesive to the top of each shim screw. Then I fastened the boards to the stringers with pairs of 2-inch stainless steel nails at each shim location. I placed a spacer between the boards when installing them, to make sure water would drain quickly from the treads.
PVC Post Wraps
I dressed up the posts with PVC wraps to match the risers and skirtboards. I ripped the sides from sheet stock, adding 1/4 inch to the inside dimension of each side to make sure the wraps were a little oversized and could be adjusted plumb. Then I ganged them together and cross-cut them all to 48 inches. After assembling the post wraps, I trimmed them to their final length of 42 inches.
Prior to assembly, I scribed lines 3/8 inch in from the edges of the wider boards, pre-drilled countersunk holes 6 inches apart along those lines, then pre-set all the screws. I used PVC cement on the joints as I fastened the sides of the wraps together, being careful to make the joints flush to minimize final sanding. Finally, I plugged all the holes with PVC plugs, cut them off with a Japanese-style saw that cuts on the pull stroke, and sanded the post wraps smooth.
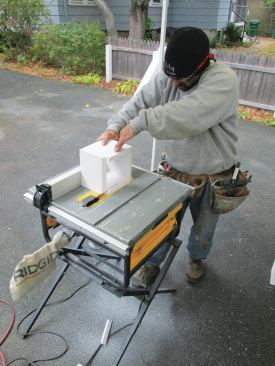
Bases. I sized a pair of short post bases to slide down over the post wraps. I fastened them together with PVC glue and stainless steel finish nails and ran the bases through my table saw to bevel the top edges.
Caps. I sized the square post caps to have an inch of overhang on each side. The caps measure 1 1/2 inches thick and are made from two layers of 3/4-inch PVC glued and screwed together. After running the glued-up caps through my table saw to square them up, I profiled all the edges with a 1/4-inch-diameter round-over bit.
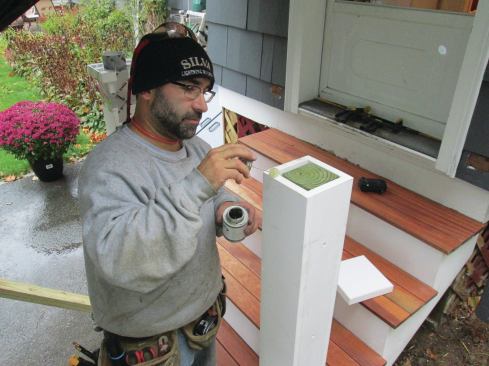
Installation. I dry-fit the post wraps and post bases before installing the boards for the bottom tread. At this point, the tread length is easy to adjust so that everything looks right.
I had pre-drilled three holes on each side of the wraps, all in the same location, for the screws that would secure the wraps to the posts. I slid the wraps over the posts, used a level to make sure they were plumb, and screwed them to the posts. I just nailed the bases in place.
I fastened the caps to the posts with PVC glue, using tape to hold everything in place while the glue set.
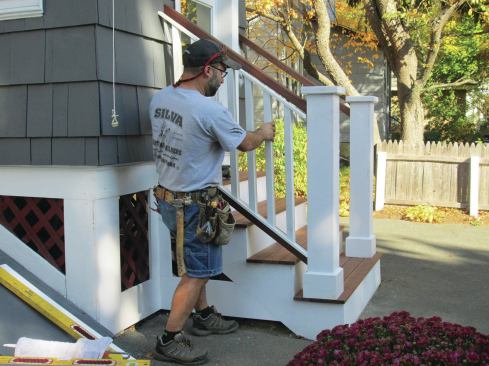
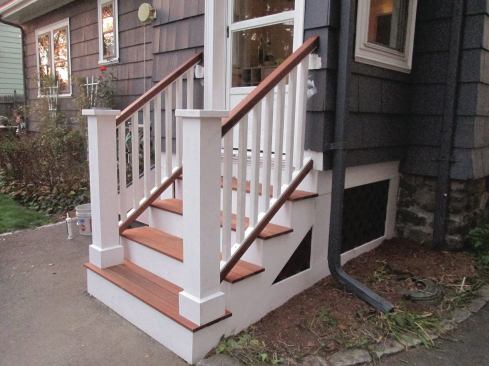
Rails. To finish up the stair, I cut, assembled, and installed mahogany railings and painted fir balusters. The new railings are higher than the old ones (36 inches rather than 30 inches), and the new balusters are spaced 3 inches apart (rather than 5 inches apart) to meet code—maximum spacing in my area is 4 inches. But once I installed the lattice enclosure underneath the skirtboards, the new staircase looked like a close cousin of the original’s. And it should last a lot longer, with a lot less maintenance, too.


