Emanuel Silva
Poor drainage and a lack of maintenance caused the original newe…
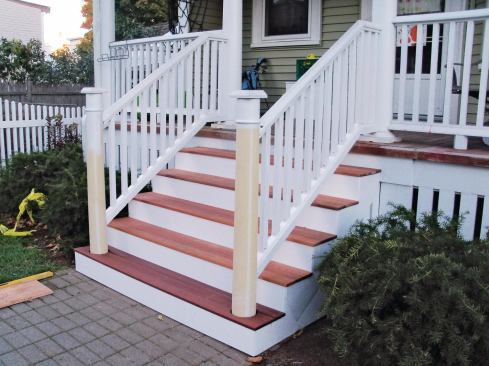
Unlike a porch, which is protected by a roof, its staircase is usually exposed to the weather and takes a licking over time. The resulting loose or cracked treads, shaky railings, and wobbly newel posts can make for unsafe travel, in addition to detracting from the appearance of the house.
The porch and staircase in this article are typical of what I see in Massachusetts. The porch itself held up well, but the staircase did not. It wasn’t maintained and small issues became larger ones.
Repairing to Prevent Future Rot
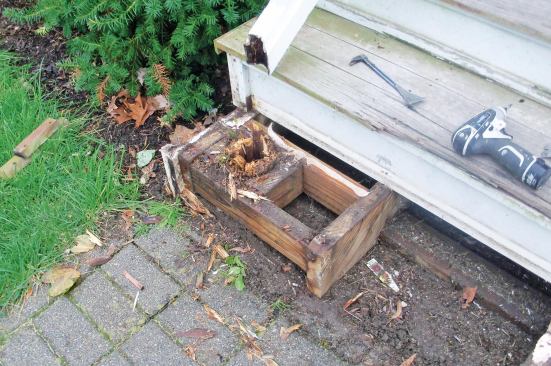
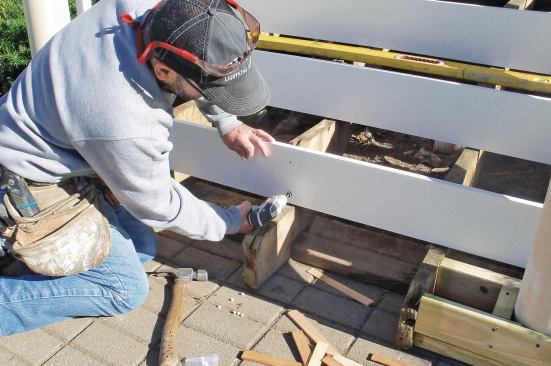
When I dismantled the newel posts, they fell apart as if I were peeling back a banana. The bottoms were totally gone. Though not made of treated material, the posts were short columns meant for use on porches and some care had been taken initially to prevent them from failing. Each had been installed on a pressure-treated block to keep it away from ground contact, and the middle of each block had a hole drilled in it to provide drainage.
But even with these details, the posts took on moisture. The supports around the posts were soaked with water, too, and one of the stringers had minor rot damage. A huge contributing factor was that dirt had collected between the tread and the posts, trapping the moisture.
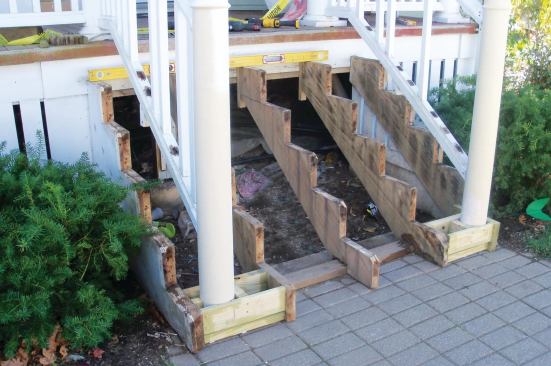
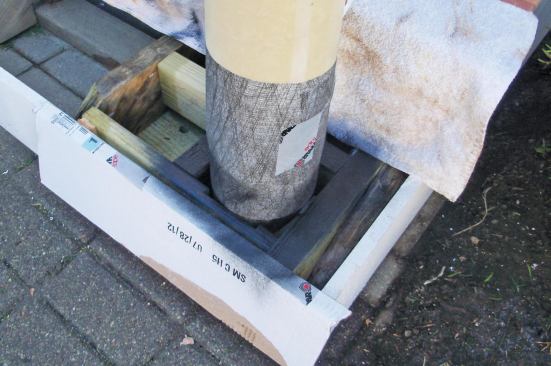
After removing all the supports for the posts and cutting out the rot damage to the stringer, I could start to rebuild. I cut a piece of pressure-treated stock and fastened it to the side of the damaged stringer, which stiffened it up and gave support for the new post. All the fresh cuts got a coat of wood preservative to help prevent rot. I repeated the original block detail beneath the posts, but to improve drainage, I added PVC spacers to the bottom of each block and drilled multiple, larger holes.
Replacing the rotted posts with something similar would mean the homeowners would have to perform regular maintenance to prevent the same kind of damage from happening again. Instead, I decided to replace them with something that would require much less maintenance. I ended up using PermaCast columns (HB&G; 800/264-4424, hbgcolumns.com); they are produced from a proprietary fiber-reinforced composite that won’t rot, and they look identical to the old posts. I bought two 6-inch-by-6-foot columns and cut them to the correct height for the railing.
After placing the new support blocks on the ground, I temporary installed the columns in their exact locations. I measured and cut bracing blocks to fit around the columns while keeping space around and below them for drainage. Again, all the cuts got a coat of wood preservative. I screwed the blocks together with the columns, making for a tight connection.
Making and Installing Treads and Risers
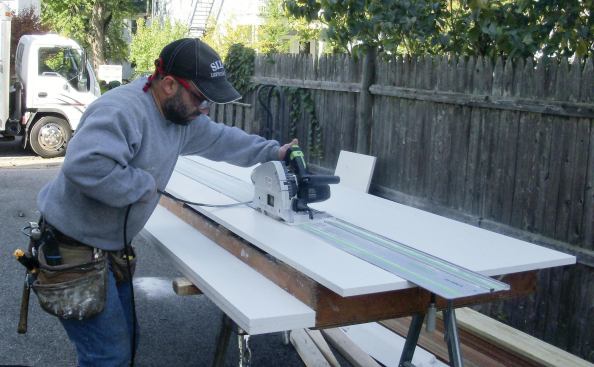
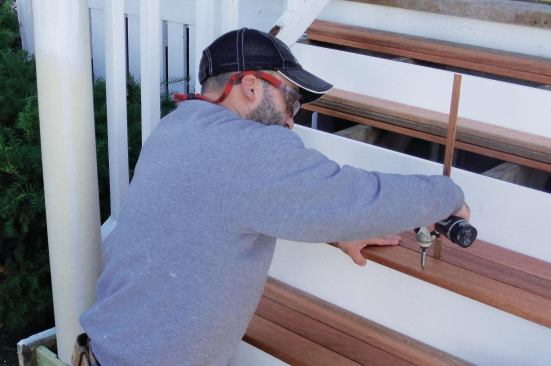
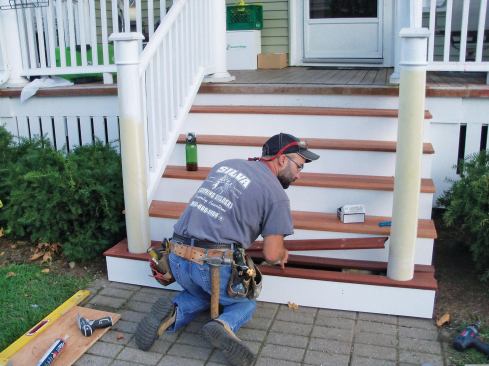
The old risers were wood. Although only the bottom riser had rotted, I decided to replace them all with PVC (Kleer Lumber; 866/553-3770, kleerlumber.com). PVC won’t rot, decay, crack, or warp over time, plus it takes paint beautifully and it can be laid on the ground and up against soil without any harm being done. I prefer to buy PVC in sheet stock, for a couple of reasons. I am able to produce larger pieces that require fewer or no joints, and stock cut from the same sheet is a uniform thickness, which helps make all my joints flush.
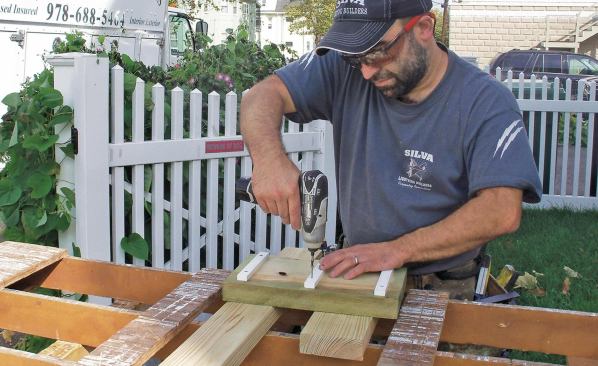
At my workstation, I have a table where I cut all my stock to size. A Festool track saw (Tooltechnic Systems; 888/337-8600, festoolusa.com) made cutting the risers quick and accurate. Before installing the new risers, I applied a coat of primer to the cuts on the existing skirt boards, which were in good shape. The risers were fastened to the stringers with Cortex fasteners (FastenMaster; 800/518-3569, fastenmaster.com). These made quick work of securing the screws and hiding the screw holes. Shims installed as needed to keep the risers flat and straight also helped keep the space between the treads and risers consistent.
I used three mahogany 1x4s for each tread, with one board ripped to 2 1/2 inches to yield a tread depth of 103/8 inches, including the tread overhang. That won’t meet code in a lot of jurisdictions, but many northeastern states, including Massachusetts where I work, allow a minimum tread depth of 10 inches.
After cutting the treads to size, I ran a router along the edges of the narrower pieces to round them over to match the other boards. I also eased all the ends. Before installing the boards, I applied a coat of Penofin penetrating oil finish (Performance Coatings; 800/736-6346, penofin.com) to all six sides to help prevent them from absorbing water.
The boards were bedded in sealant (Geocel; 800/348-7615, geocelusa.com) and fastened to the stringers with Grip Rite stainless steel trim screws (PrimeSource Building Products; 800/676-7777, grip-rite.com). The sealant acts both to glue the joint and to exclude water from it. I spaced each board about 3/16 inch from its neighbors as I installed it. The holes made by the trim-head screws were so small that I left them as is.
Fitting the Bottom Tread to the Posts
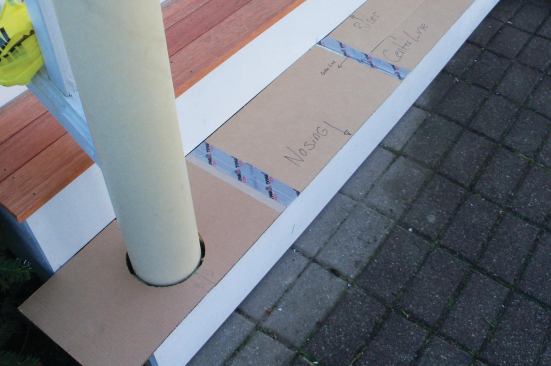
When it came time to fit the bottom tread around the columns, I was scratching my head. The plan was to leave a space between the tread boards and the posts to encourage drying, but I still wanted the cuts around the posts to be as neat as possible. My solution was to make a template.
I taped together several pieces of cardboard so the template would be a couple of inches longer than the tread. I slid the cardboard up against the front of the columns and marked it where it touched them. I did the same thing on the sides of the columns, marking their centers on the ends of the template. Squaring in from these marks gave me the centerpoints of the posts.
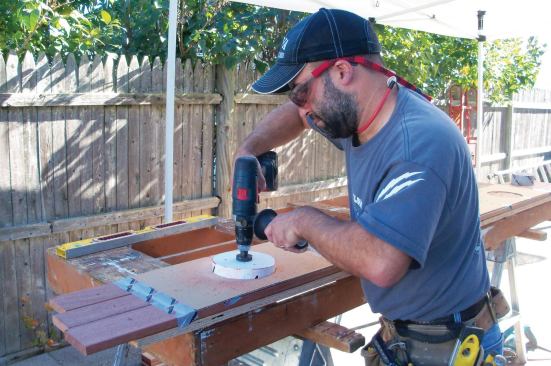
Using a hole saw — which gave me a cleaner cut than a utility knife — I cut a hole about 3/8 inch larger than the columns. I then slid the template over the columns and checked its fit.
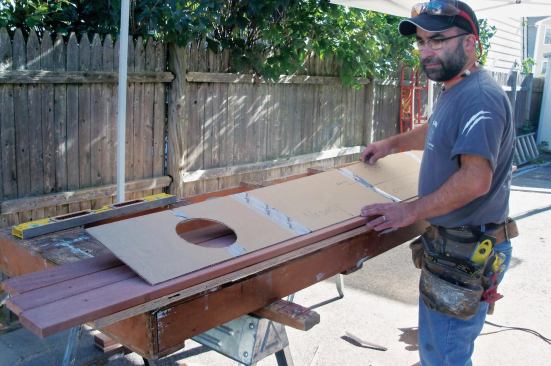
I secured the three tread boards to a plywood backer, leaving the boards a few inches longer than the finished treads would be. I screwed the boards to the backer through their ends (which would get trimmed off). Securing the template to the boards with tape kept everything in line.
Drilling with a hole saw can be tricky. The pieces that were to be cut out could move around, causing damage, so I screwed them to the backer to keep them in place as I drilled. I set my drill on low speed and drilled through the mahogany with no problems. Then I laid a guide across the boards and cut them to length. I eased the ends of the boards and applied a coat of Penofin.
Before installing the treads, I spray-painted the bottoms of the columns and supports with black paint to make them less visible through the gap between the tread boards and the post. Lining up all the boards correctly to install the bottom tread took a little patience.
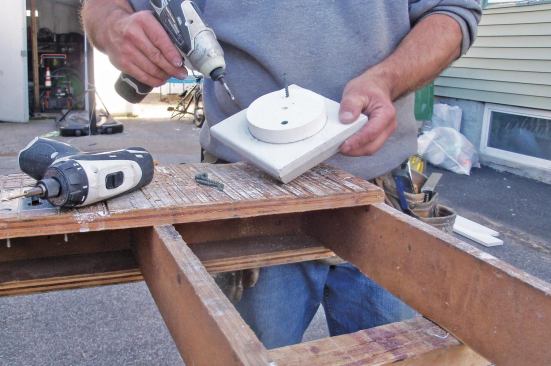
I reused the existing post caps but replaced the inner supports for the caps with PVC.. These I cut using a 4-inch hole saw, and then I screwed them to the bottom of the caps. No screws were needed to fasten the caps to the posts, just sealant applied around the support.
Some of the balusters were rotted, too, along with the nailers on both bottom rails. I removed the nailers and balusters, replacing the nailers with PVC and the balusters with mahogany. I fastened the new parts to the bottom rail using trim-head screws. The balusters were primed on all six sides before installation.
Emanuel Silva is a carpenter in North Andover, Mass.


