In my experience, deck builders have one of two approaches to resurfacing decks. For Group 1, it’s a hard “No,” and for plenty of sound reasons. For Group 2, the response is the opposite: “No permits. Ready-made revenue.” Neither group is wrong, of course. Much like the dump truck/dump trailer/dumpster debate, the choice depends on what works best for your business and what you’re set up for (I’m in the dump-truck camp, by the way).
While I prefer new construction—and a number of the decks that I’ve resurfaced have left me wondering why on earth I’m not in Group 1—the majority of the frames I inspect have decades of life left in them. I can’t see below grade, of course, but 99% of the framing I’ve seen looks lumberyard new, even joists and other framing that is in ground contact. Other than some staining and maybe some rust at the hangers and some unfortunate 19.2-inch-on-center joist spacing, I can read the tags and lumber stamps like the lumber just slid off the truck. At times, the wood fiber is still so tenacious that removing fasteners is impossible.
For the most part, belt-and-suspenders structural repairs on decks like these are straightforward. But deck resurfacing projects call for a confluence and overlap of building code, craft, and common sense, especially when it comes to guard rails and unique features such as privacy screens or built-in benches.
Client Base
My resurface customers tend to have a lot in common with one another, again landing in two main groups. Clients in the first group are older and want minimal disruption and expense. I can see in their eyes that they want their old deck back. Those in the second group have kids in college or thereabouts and are justifiably trying to maximize their budgets.
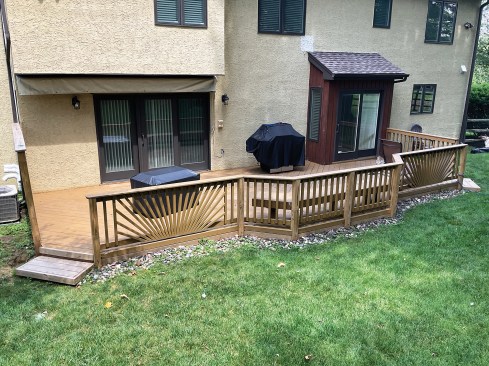
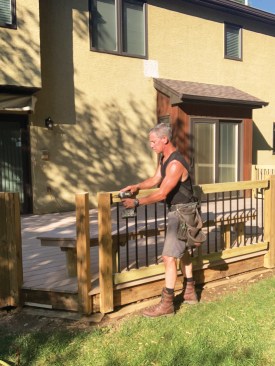
This home’s existing low-level deck was structurally sound, but the aging western red cedar decking and guard rails needed replacement.
When we meet to discuss resurface options, I can also see in their eyes—whether they’re trying to save a buck or repair what they’ve got—that unless I can demonstrate that there are structural flaws, they’re finding somebody to resurface the deck. The way I see it, that can be me—a deck builder set up for it—or not me.
Client meeting. All the decks I have resurfaced—and by resurface, I mean remove and replace the decking, guard rail system, or both—have been built with pressure-treated lumber or western red cedar and are around 25 years old. Some age out. Others incur storm damage. Either way, the decking is cooked.
Paint. Sometimes, a deck has been “rescued” with deck rescue paint. These paints cake up the old, checked wood grain and deliver a robust new look … until they don’t. It seems to me that once water gets into these systems, it can’t get out, and decay accelerates. I’ve seen recoated decking on old decks on houses that needed to be sold without a pricey ping on the home inspection.
Materials. Despite being on a budget, everyone asks for composite decking. Upon my sharing the additional materials cost compared with treated southern pine, the lights start to dim. Upon clients’ learning the additional labor and material costs for the extra blocking needed for picture-framing composites, and the similar cost trajectory of the rails, the lights flicker. And when I explain that composite decking gets hotter in the sun than wood decking, the flicker is just about out—especially for pet owners. But they still want low maintenance. Who wouldn’t?
Selections
The real headache for deck maintenance is surfaces that need it least: the verticals. Assuming 2×2 PT balusters (or similar), each one requires coating on all four sides—none of which the coating applier is ever optimally positioned to coat. Instead, it becomes a slatherfest.
Railing. The stuff that’s easiest to prep and coat—the wood decking—is more affordable than composite material, even after factoring the time spent coating it, especially if you can eliminate all the persnickety vertical work. To that end, I recommend a wood-metal-hybrid rail system: DekPro powder-coated aluminum balusters and rail brackets with wood rails and a wood top cap. My supplier can get the balusters and brackets quickly, the combination looks terrific and short-circuits the vertical maintenance tedium, and it’s in line with a budget project. It’s also in line with my business model of leaving customers happy for the long haul.
Decking. Most of my clients select PT decking, but lately, I’ve been using a middle-ground composite that has the qualities of wood without the maintenance issues: Acre by Modern Mill. It’s not all plastic—or plastic-y. It’s low maintenance, but it also accepts coatings. There’s a natural component to it, too: 53% upcycled rice husks, combined with 47% PVC. It is more versatile than typical composite deck boards (it comes in 1-by profiles, shiplap, V-joint tongue-and-groove, and more), and it’s mercifully cool on the feet. It also works beautifully when cut, ripped, and routed—think dust, not statically charged, snowy fibers.
Demo
Put a bunch of deck building carpenters in a room, and you’ll get 10 sets of preferred methods, tools, and levers for quickly dismantling a deck. I’ve tried approaches such as cutting up the existing decking with a circ saw or chain saw (definite “no thank you” to the chain saw; I prefer not to be feathered in the rooster tail of chips shooting out everywhere). I’ve also tried various levers, none of which I find better than the uber-useful and effective, carpenter-designed NestorBar wrecking bar I prefer. It works both as a breaker bar and a lever.
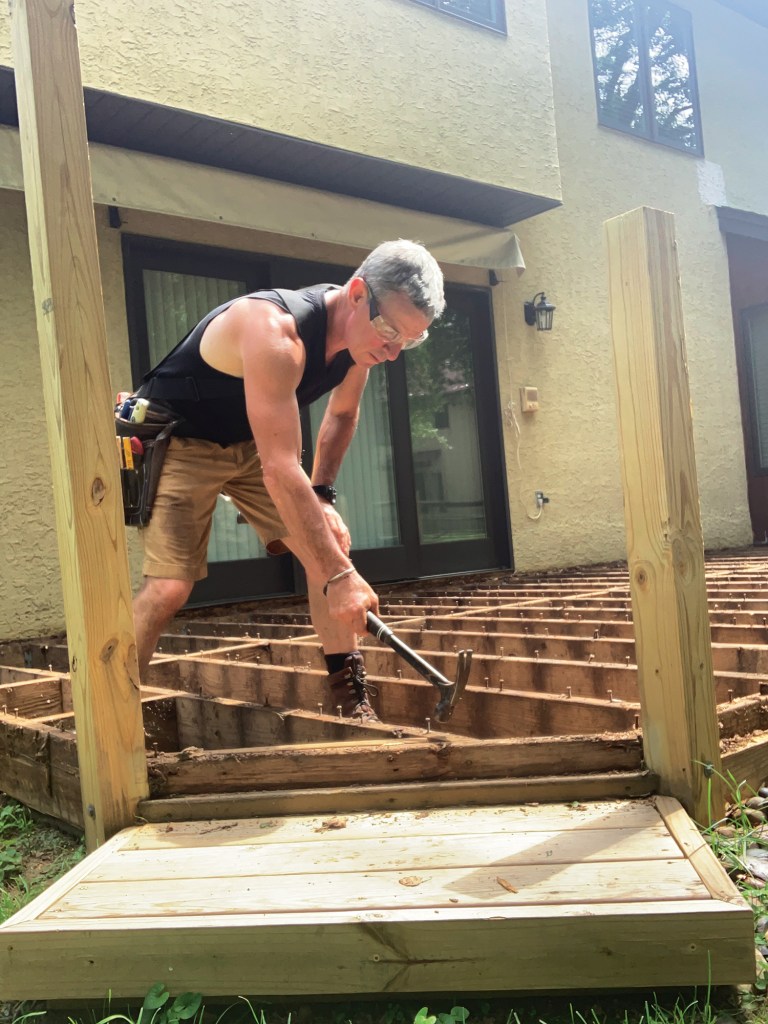
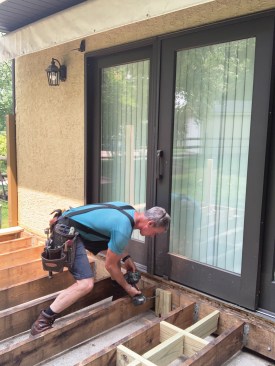
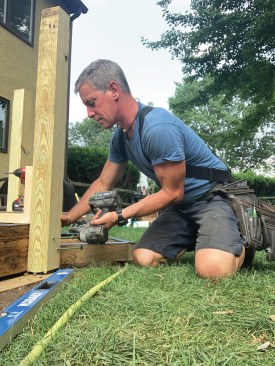
The author began by removing the rails. Then he used a NestorBar to pry up the decking, starting from the center.
First, though, I try to back out any fasteners I can, especially with PT decking. Some screws come out. Others … well, the second the bit skids out, that’s it, and I’ve found there’s no payback in trying to get after it. For cedar, like the deck shown in this article, it’s almost moot. The NestorBar’s perfect fetch pulls boards right through the screws and I break them off later.
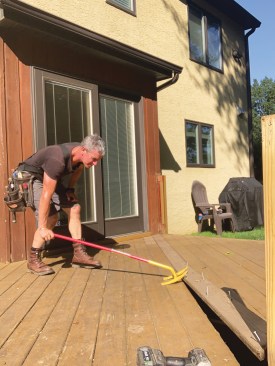
On diagonal decking, I like to start on a long board in the field. Using a NestorBar and a set screw, I can lift a board, get some levers under it, and pop it off. Then, with the NestorBar’s front and back claws, I can work from the center in either direction.
Some guard rails can be pulled apart by hand; those that can’t, I unbolt and unscrew. Bashing stuff might save time upfront, but I lose it in the end picking up splinters and shards and fixing what I moved or broke.
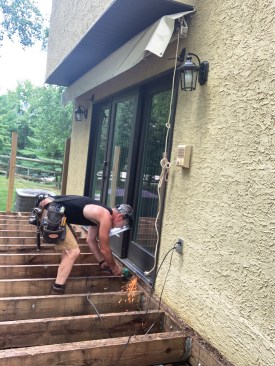
Pulling up deck boards often leaves screws embedded in the framing. When the author can’t break off a fastener with a hammer, he cuts it off flush with the framing with an angle grinder.
Debris. I have three categories of debris: bucket, trash can, pile. I carry a bucket to fill with fasteners and little things. The trash can (with liner) gets whatever is in the 3-foot range. The rest goes in the pile. The debris all has to find its way out of the yard, and it’s easier to manage it on the front end than to pick it out of the grass on the back end.
Exposed Frame
With the frame exposed, I inspect whatever connections I can and make an assessment. That typically means driving a pair of structural screws per joist bay into the ledger. I use 5/16-inch-diameter, 6-inch-long Spax PowerLags with a washer head; they invariably suck the ledger tightly back to the house.
On a deck with post-to-beam connections, I drive the same screws into those connections to reinforce them. On the project shown here, a patio deck over a concrete slab, I dropped a few 2×6 blocks to the slab to help support some longer spans and stiffen things up (Figure 2).
Once the existing framing is exposed, the author reinforces it with additional structural screws driven through the ledger into the rim joist and blocking as needed.
A lot of organic debris had built up in the quarter-century this deck had been in place. Disrupting it made me cough up a lung, so I spent a couple of hours blowing off the debris and rinsing off the slab. I’m the only person who knows those couple of hours were spent doing that, but I sleep better at night when a jobsite is clean and tidy.
Fasteners and joists. What fasteners don’t break off with a hammer—hello, eye protection—I beat back into the framing. Fasteners I can’t reach with my Estwing I cut flush with the framing using an angle grinder.
After the fasteners are gone, I apply joist tape to the tops of the joists and beams. I’ve used brands that have writing on them or that peel like duct tape, but I prefer Spax peel-and-stick, pressure-sensitive tape. It’s easier to use and doesn’t have lettering that shows through the gaps between decking boards. Whatever tape I use, I’ve found that a sharp, 25mm, snap-off knife is by far the best tool to cut it.
Last thing, I make sure to roll flashing tape along the top of the ledger and up the side of the house a little ways. Most of the time, the ledger is unflashed; 25 years ago, nobody gave a second thought to flashing.
Added preservative. The chemical treatment in deck and fence posts degrades just at and below grade over time. I visually inspect posts and poke them with an awl, and they are almost always intact. However, that condition can’t last forever, so I’ve started using Post Proservative, a product new to the consumer market but one that utility companies have used for decades to re-treat utility poles. It’s a dehydrated stick of fungicide and wood preservative in the form of a fused glass rod that inserts into a drilled hole. Here, I used it in the grade beam, but I’ve also used it on PT support posts that extend below grade. Once the wood reaches the right moisture level, the chemical liquefies and is drawn into the wood fibers via capillary action. It’s a simple add-on and upsell.
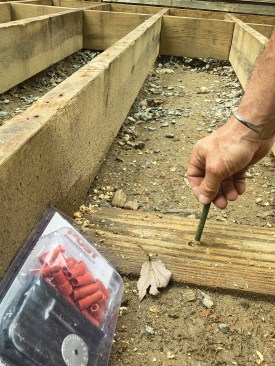
To extend the life of the PT framing that is in contact with the ground, the author inserts Post Proservative rods containing a fungicide and wood preservative into holes bored into the wood.
New Decking
Using Acre on this deck allowed me to get the tight looks composite installation techniques deliver—namely, parting boards and nicely divided sections of decking rather than just an ocean of deck space.
And I can skip most of the difficult, time-consuming elements associated with composites—blocks galore, fighting picture-frame miters closed—with no sacrifice in overall look. Acre is uniform all the way through, so there’s no need to hide the ends or cut edges.
While many deck builders insist that decking should start at the outside band and work inward, leaving a ripped board at the house, I prefer to start with a full board at the house. Getting as parallel as I can to the front band is my main layout concern when I snap the chalk line for the starter board.
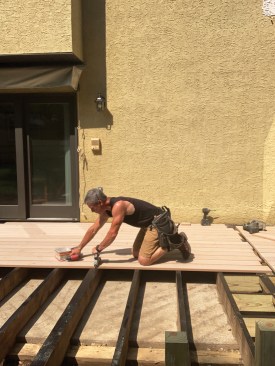
After covering the tops of the joists with self-adhering flashing tape, the author installs the new decking. On this project, he used Modern Mill’s Acre decking, a composite material made from upcycled rice hulls and PVC that can be cut like wood and can be stained or painted.
Another thing I like about Acre is that it is not shiny. If there is a low joist or the deck frame is lumpy, there is no penalty to me. When there are low spots, like at a parting board, I keep some 30-pound felt paper handy like flooring installers do and pack it up as needed.
Camo. On this project, I used Camo hidden fasteners (I always tell customers they’re harder to see; they’re not invisible). With easily 1,500 screws on a deck like this, I try to root out any wasted motion mercilessly. The number of moves required to position your body, the tool, the clips, and the fasteners is not nothing. Finding a way to move all those things in four moves instead of eight (times 1,500) puts money in my pocket.
Posts and Rails
As a member of Group 2 (repair/no permits), I’m left to my own devices to weave safe, effective—and profitable—guard rails into frames I didn’t design or build while meeting a tight budget. And it is here that I take the spirit of the building code—a guard post and, by extension, rail system that can resist 200 pounds of lateral force without failure—into account.
More often than not, I’m replacing notched, saddled 4x4s. If they’re cedar, they’re like toothpicks after 25 years of service. PT posts can be too. Sometimes, a post is notched around a single-ply band joist. In other cases, a band joist consists of 2×8 framing with a 2×10 “fascia.”
Should I add blocking and hold-downs to a modest, suburban deck because that’s what is drawn in the local code book? Or should I use a career’s worth of common sense and experience to replace what was there with something I know would cause catastrophic failure to the frame before it would fail—but is not drawn in the IRC or DCA-6?
On the low-level deck in this project, the point is moot, because the railing is effectively decorative, but in a detail the internet loves to hate, I’ve landed a post-setting process and connection I’m certain works the day I install it, two weeks later, and two years later. It is the simplest, fastest, most accurate way to set a deck post by myself I’ve found yet.
I start by screwing an L-block made with scrap 2-by stock 9 inches up from the bottom of the 4×4 post. Then I drive three 5/16-inch-diameter, 6-inch-long Spax structural screws with washer heads into the post. After setting the post tight to the band joist, I drive a single 3-inch screw in through the L-block into the band, which holds the post in place while I check it for plumb. Then I just snug one structural screw, replumb the post in both directions, and set the second screw, shimming as needed. This second one I drive home, crushing the 4×4’s wood fibers. I recheck for plumb, adjust and shim as necessary, then drive in the third screw. The top and bottom screws I set on the left side of the post; I set the center screw on the right. Using structural screws instead of drilling holes for through-bolts gives me 100% wood-fiber engagement, such that when the wood shrinks, and even if the shims fall out, the post remains slammed in.
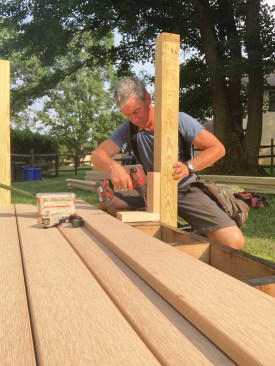
An L-block temporarily fastened to a post helps to hold it in position ….
… while the author drives structural screws through the post and into the framing.
Is this detail drawn in the code? No. Will hobbling this connection cause catastrophic damage to the deck frame? 100%. Do I spend money and time on hardware that’s arguably not necessary? Nope.
Balusters. The DekPro aluminum baluster and bracket system is fast and easy to install. Layout is a snap. It’s tough as nails and just as easy to maintain after the fact. I use it on new construction as often as I do on re-skins.
The author likes to use DekPro's aluminum balusters, a low-maintenance alternative to wood balusters that are available in both round and square profiles.
Top cap. For those of you proud of your miters in PT the day you finish building your decks, you should be. You dialed them in. Two weeks later, however, as the lumber dries, the toes of each miter shrink toward each other while the heels retreat, resulting in a miter that opens about 3/8 inch.
I’ve landed on an alternative I call a “stepped” transition. I use it to transition mid-span rail caps and to get around corners. The basic idea is that all the opposing grain moves together. If it all shrinks, the opening is even along the step. If it all swells, same thing. Basically, however, it stays where I put it.
To hold it in place, I screw it down to the post. I also predrill two 1-inch pilot holes with a 3/8-inch paddle bit in each ear and drive #10 x 3-inch screws into the pilot holes.
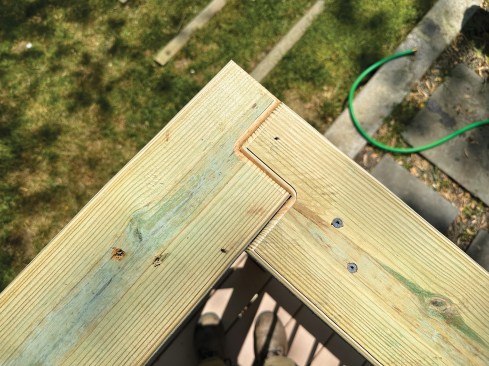
On the top rail, the author uses the stepped transition shown here at corners and when joining two top rail sections together mid-span.
Clean Up
The last step is getting all the detritus out of the yard. I use a dump truck rather than a dumpster. I can back it up where I need it and load it easily, and it is a revenue stream as a hauler for other clients.
I get that some deck builders don’t want to tangle with existing frames—especially those that were “weekend warriored” together—and I get there is a “but that’s not code” conversation about connection strategies that make common sense but stretch the spirit of the code. And I get that deck builders like me see that the customer is going to pay for the deck to be surfaced no matter if I do it or not. But for the way my business is set up, I stand to make a profit and do high-quality work I enjoy. ❖
Photos by Mark Clement


