
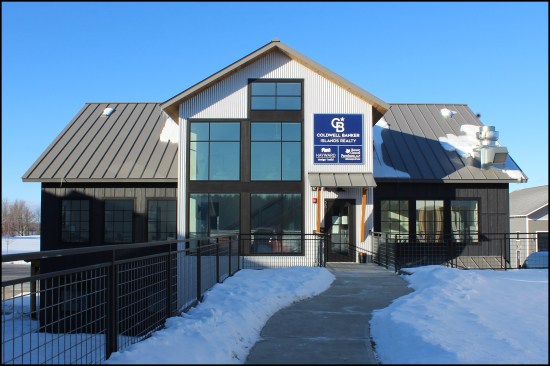
In June 2019, after years of leasing commercial office space, we broke ground on a new office building for my company, Hayward Design Build, in South Hero, Vt. Our firm is known for building high-performance custom homes and light-commercial buildings in northern Vermont, and we approached the construction of our new headquarters in the same manner.
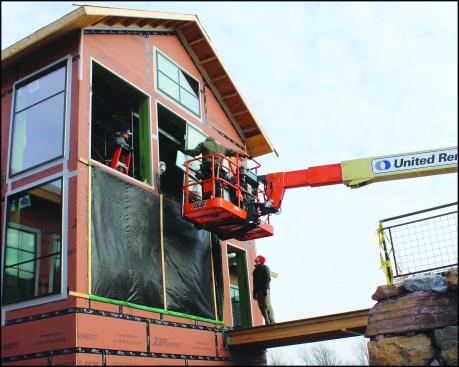
A large triple-glazed fixed window unit manufactured by Fibertec Windows & Doors Mfg. is lifted into place on the building’s south-facing bump-out entry.
Some of the building’s high-performance features include a super-insulated double-wall shell with a carefully taped-off Intello Plus vapor control barrier membrane; triple-glazed windows set in rugged fiberglass frames (some with insulated glass units (IGUs) as large as 7 feet high by 6 feet wide); a VRV (variable refrigerant volume) mini-split system, which supplies heating and cooling to offices and common areas with localized thermostats that allow occupants to control the temperature of individual spaces; and two large-capacity ERV (energy recovery ventilator) units to provide a balanced air supply throughout the building. For more information on the windows and the building’s VRV (variable refrigerant volume) mini-split system, see “Selecting a High-Performance Window Package,” below.
Architectural features. The building was designed to accommodate multiple tenants on three floors. On the second- and third-floor mezzanine levels, we planned for shared office space split between my design-build company, a local law firm, and a real estate company, while the first floor was divided into two units, one occupied by a local catering company. We provided at-grade access to the first and second floors, which eliminated the expense of installing an elevator to meet ADA requirements (the third-floor mezzanine has less than 1,000 finished square feet and doesn’t require ADA access).
Structural. The wall system throughout the entire building is a 12-inch-thick double-stud wall with a 2×6 exterior bearing wall and 2×4 nonbearing interior wall—the thick wall is essentially an insulation holder for dense-pack cellulose. A structural engineer helped design a steel frame, which was needed to support the wood I-joist floor system on multiple floors and the quadruple-ply ridge beam truss running the length of the building. The “hot” roof was framed with parallel-cord trusses, dense-packed, and the roof sheathing was covered with a high-temperature self-adhered roofing underlayment, then metal roofing.
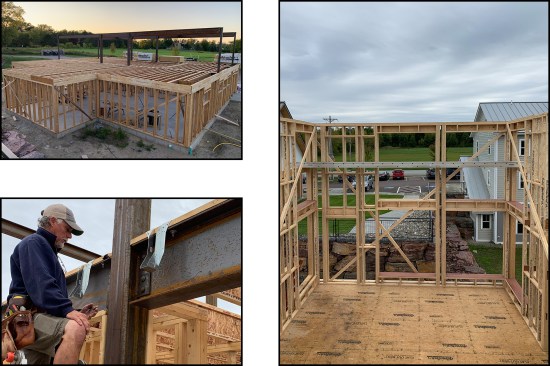
To support floor loads and a structural quadruple-ply ridge beam truss, a steel frame was needed (top left, bottom left). The structural ridge along with parallel-cord scissor roof trusses allowed a spacious quality for the two-story lobby. The exterior walls were framed as a 12-inch-wide double stud wall assembly, shown here in the entry bump-out (right). The author credits taking a Zero Net Energy Buildings course by Marc Rosenbaum through NESEA five years ago with inspiring him to build high-efficiency homes and light commercial structures.
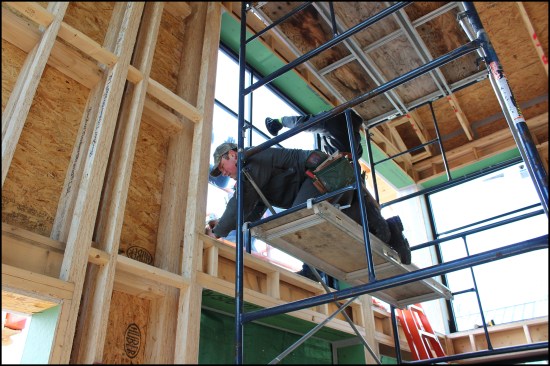
Tall walls with big openings. The south-facing bump-out entry was a transverse gable-end wall. We used engineered LSL studs to balloon-frame the entry’s 17-foot-high double-stud walls, installing them one stick at time rather than building the wall and standing it up, then infilled with 2×6 and 2×4 stock as needed for shorter-length pieces like jack studs, sills, and blocking (see illustration, below).
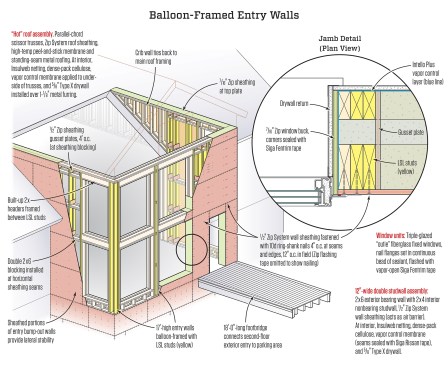
LSL members were used to balloon-frame the bump-out entry’s 17-foot-high wall, while 2-by stock was used to infill shorter-length pieces such as trimmer studs, sills, and blocking. Sheathed areas on the south, east, and west walls helped provide lateral stability to these tall walls with big openings (the sheathing was nailed off per an engineer’s specifications).
We sheathed the walls with 1/2-inch Zip System sheathing. We provided double 2×6 horizontal blocking between LSL exterior-side studs at horizontal seams and nailed off the sheathing in a tight pattern per the structural engineer’s specifications (the small sheathed areas on the bump-out’s south, east, and west walls helped provide lateral stability to these tall walls with their big openings). Finishing up the wall framing, we joined the two stud walls together with plywood gusset plates at 4-foot centers and installed crib walls to tie back to main building’s roof framing. After we installed and taped off the remaining Zip System sheathing, we set the entry’s parallel-cord scissor roof trusses, which ran back to the main ridge.
Muscling windows into place. It took four crew members using 8-inch hand-held vacuum cups to lift the 500-pound window onto a carpeted mover’s dolly. The unwieldy unit was then rolled out onto the footbridge, which was used as a staging area to lift the windows into place. The JLG 600S rental lift came equipped with a “skyglazer” tray attached to supporting forks under the lift’s personnel basket. Again, using the vacuum cups, we lifted the window into the tray, padded it out with pieces of XPS insulation, then attached the unit with rachet straps and lifted it up to the rough opening. The unit was placed on setting blocks on either end of the opening and leveled as needed. The windows were then sealed and flashed (see photo sequence, below).
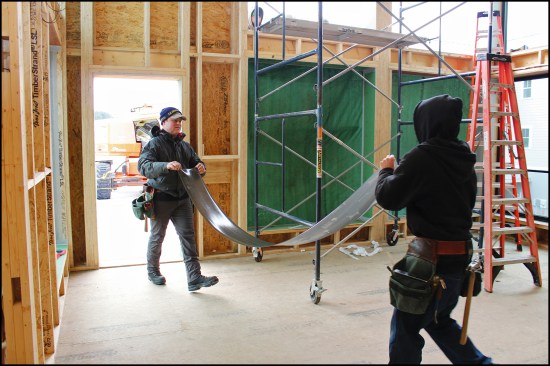
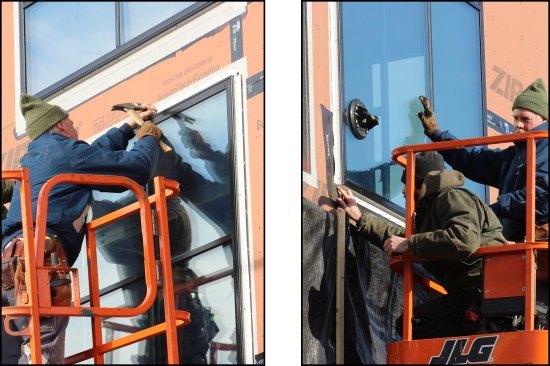
Prior to installing the big windows, the crew cuts Zip System Stretch Tape flashing to length inside. Both Zip System Stretch Tape and regular Zip System Tape were used to flash the building’s window sills.
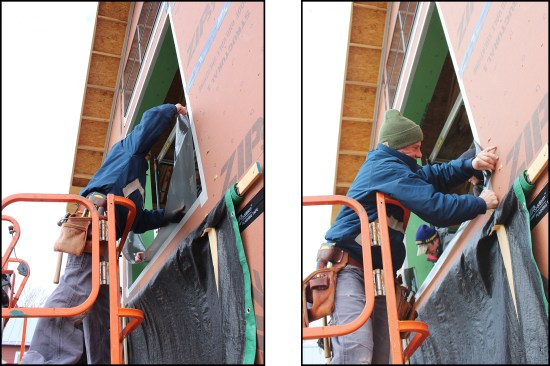
The Zip System Stretch Tape is installed on the sill (above left, right).
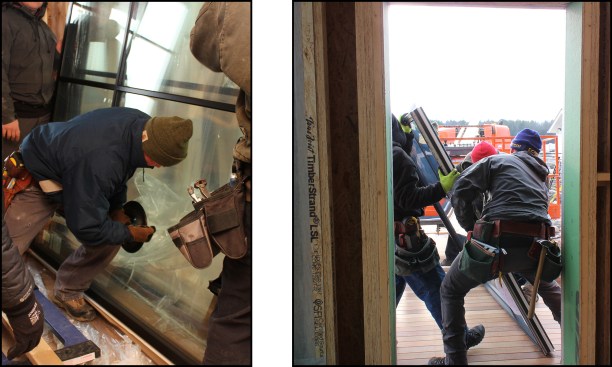
Four crew members manhandle the 500-pound window onto the lift, transferring the unit from a carpeted mover’s dolly using 8-inch-diameter hand-held vacuum cups to grip the unwieldy window (above left, right).
The JLG rental lift is equipped with a “skyglazer” tray to support the base of the window. The unit is attached to the personnel cage with rachet straps, with pieces of XPS insulation used as padding. Prior to installation of the window, a continuous bead of Geocel Pro-Flex tripolymer sealant is applied around the opening where the window nailing flange will be set (above left). The windows are set on 1/2-inch bearing blocks, one at each side of the R.O. (above right).
The window is inserted into the opening, set on the bearing blocks, then leveled from the interior (above).
The nailing flanges are nailed off with stainless steel roofing nails (above left). Before the crew installs the vapor-open sill flashing tape, a dab of sealant is applied to each corner to seal the opening where the window frame and nailing flanges intersect (above right).
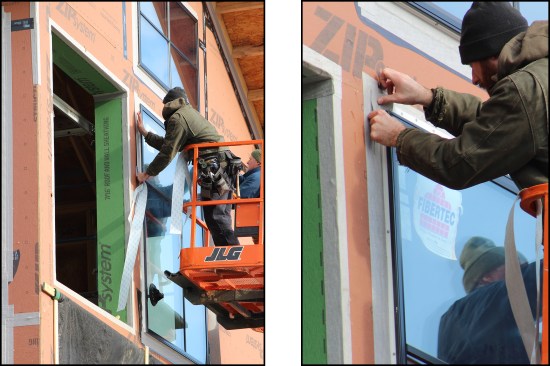
After the Siga sill flashing tape is installed, tape is applied over the open corners (similar to photo below at right). Then the Siga jamb flashing tape is applied (above left). The top inch of the tape is peeled back and the tape worked down the window to adhere it a few inches at a time. The jamb tape is lapped onto the sill flashing tape. After the jamb flashing strips are installed, pieces of the tape are applied at the “open corners” at the top of the window unit on both sides (above right).
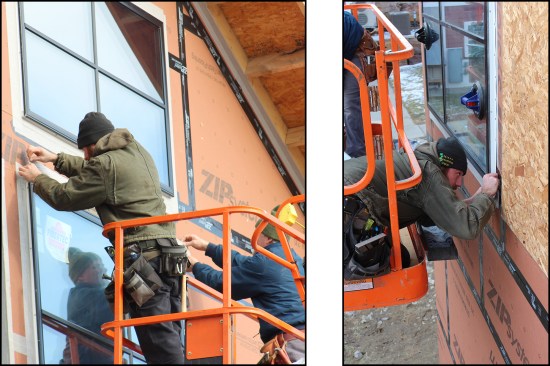
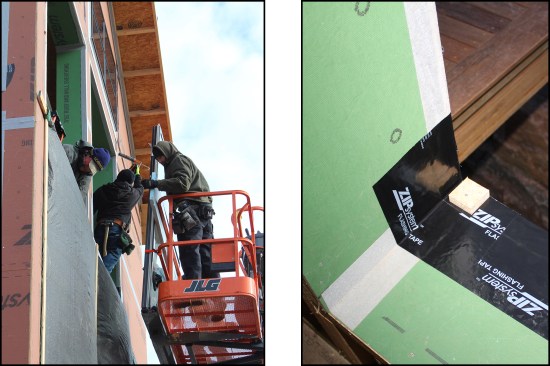
The head flashing strip is then applied, lapping onto the jamb flashing (above left). On a lower window, a small piece of flashing tape is added to seal the intersection of the three planes (above right).
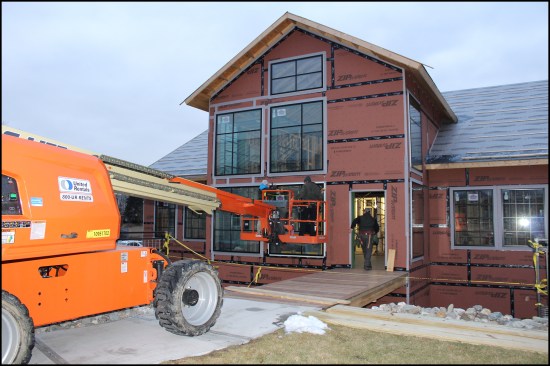
The four large south-facing window units are installed counterclockwise from the top right. Here, the last of the 7'-0" x 6'-0" entry windows is installed. Four smaller, 420-pound fixed windows on the east and west walls (two per wall), as well as a window unit high in the gable-end wall, were installed on the previous days.
Hydrogap drainable housewrap was installed over the Zip System sheathing to provide a small drainage plane. Galvalume siding was installed on the entry bump-out’s three walls.
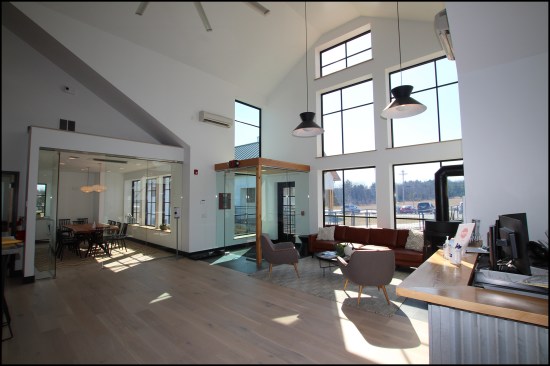
View of the completed second-floor entry lobby open to third-floor mezzanine level. A glass vestibule was installed as an air lock for that south entry’s door. A good industrial door closer was key because the building is located in a fairly windy area and gusts have the potential to rip the door out of your hand and slam it.
Selecting a High-Performance Window Package
A common challenge with office buildings and HVAC is satisfying the comfort level of all the occupants. Battles for control over too few, centrally located thermostats can be commonplace. Combine this with occupants cracking open windows to cool off, warm up, or let in fresh air, and you have the recipe for an unbalanced, inefficient HVAC system.
In an effort to mitigate these issues, we installed a Dakin VRV mini-split system with localized thermostats allowing occupants to control the temperature of their individual offices and small common areas. For fresh air, we installed two large-capacity Zehnder ComfoAir Q600 ERV units to provide a balanced air supply throughout the building. The planned ERV units afforded us the opportunity to install mostly fixed windows throughout the building, the simple design of which provided substantial savings in window costs and later, energy. After a year of occupancy, the combination of the VRVs, ERVs, and fixed high-performance windows has proved to be a success. Although on occasion, occupants have cracked open some of the few code-mandated operable egress windows, which necessitated a polite request to close them and rely on the HVAC system.
Window options. All-fiberglass window frames are durable, and I like that they are silica-based products that will expand and contract a bit with the glazing. So I selected Fibertec Windows out of Canada. Its 300-Series windows offer triple-pane glazed windows in sturdy 3 1/4-inch-deep fiberglass frames, and they’re available in large sizes (the 7′-0″ x 6′-0″ windows we used for the entry were the maximum size they make). The windows’ IGUs are one piece of glass with simulated divided light (SDL); the SDL effect is created with 1 7/8-inch-wide surface-applied muntins.
The U-Factor numbers of the Fibertec windows are pretty phenomenal at 0.14 to 0.17 (0.32 or less is considered a good U-factor in a cold climate). The company was amenable to our using different specialty coatings for the windows on different sides of our building, which is not always the case with window manufacturers. Our window glazing package included a higher SHGC (solar heat gain coefficient) of 0.46 for south-facing windows, while on east-, west- or north-facing windows, we selected a lower SHGC of 0.27. The visible transmittance (VT) numbers increased with the rise in solar heat gain coefficient (see photos, below) —N.P.
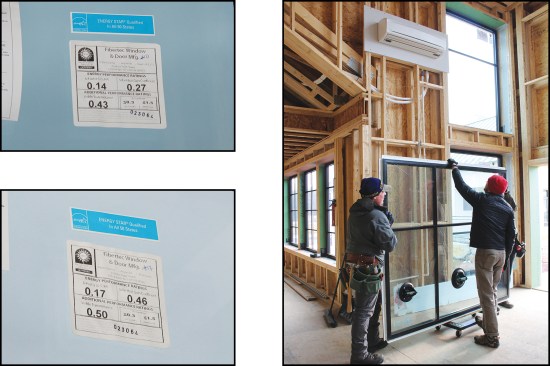
East-, west- and north-facing windows had an SHGC of 0.27 (top left), while south-facing windows had a higher SHGC of 0.46 (bottom left). Crew members move a 7-foot-high-by-6-foot wide, 500-pound fixed window to the lift staging area on a footbridge that connects the entry to the parking area; they pass under a wall-mounted mini-split unit (or head) in the entry’s reception area (above right).
Photos and illustration by Tim Healey.


