In the most recent Building Science Corp. newsletter, Joe Lsitburek offers up clear guidelines for detailing windows in walls with continuous exterior insulation. In typical Joe fashion, he breaks the issues down into simple coherent bites, but swallowing them depends on understanding his terminology.
For Joe, it’s all about control layers — vapor-, air-, water- and thermal-control layers to be exact. The terminology is a little academic. You could substitute vapor retarder, air barrier, weather barrier and insulation to get at the meat of these layers, but this would be incomplete. Each layer not just one material; it’s an assemblage of different components, and taking the time to distinguish each one, making sure the entire layer is consistent is what it’s all about. (A synonym for “layer” could be “strategy,” and Joe uses that, too. It works especially well in “vapor-control strategy” when you use the right amount of continuous exterior insulation to keep the inside face of the exterior sheathing above the dew point, eliminating the risk of condensation. When you employ this vapor-control strategy you don’t need a warm-side vapor retarder, it works in any climate and it’s especially right for any climate when air conditioning is installed.)
Once you get used to the terminology, it’s easy to zero in on Joe’s approach. In this article, it focuses on getting the water-control layer right for “innie” and “outie” windows in walls with exterior insulation:
“If the windows are ‘inset’ [innies]” Joe explains, “and the water- and air-control layers are behind the continuous insulation, everything is real easy—things ‘line up.’ If the windows are ‘outset’ [outies] and the water and control layer is the face of the continuous insulation things are also real easy—things also “line up.” But if the windows are outset and the water- and air-control layers are behind the continuous insulation things get more complicated.”
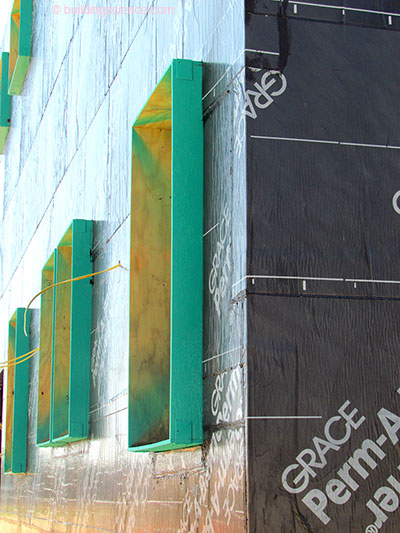
It’s this last case, which is what you need to do with an “outie” window when using mineral wool insulation (e.g. Roxul), where this article becomes especially interesting, providing insights we haven’t seen lined-out so clearly before. In this case, the face of the insulation can’t be used as the water-control layer the way you can if you tape the face of rigid insulation. This means you have to control water at the face of the structural sheathing with an effective WRB. To integrate this WRB with window flashing, Joe’s solution is to install plywood bucks (as shown in the photo above) which get “picture framed” with 2x2s so the extension is wide enough on its face to integrate with the window flange. He then recommends smearing the whole thing with a liquid-applied flashing to provide continuity with the water-control layer on the face of the structural sheathing. The liquid-applied flashing wraps into the frame opening and creates the “pan flashing” for the opening. The window installation can now proceed, following the same steps as for the “innie” approach. Read more.


