Unlike the framing in a house, which remains largely protected from water and temperature extremes, deck framing is exposed 24/7 to all the elements that nature can throw at it: rain, snow, organic debris, wind, and UV rays from the sun. So when building or repairing decks, I like to use details that help protect the framing and avoid problems like rot and corrosion that can eventually lead to structural failure. Some of these details are mandated by building codes, but most I’ve developed based on my 15 years of experience of seeing what works and what doesn’t.
Start With the Basics
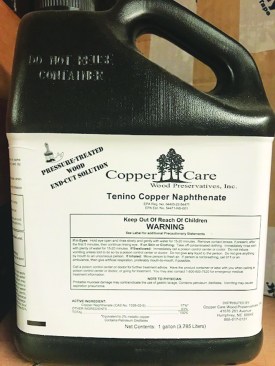
If I didn’t request that my local lumberyard carry wood preservative for treating end cuts and notches in the PT framing lumber that I (and the majority of other deck builders) use to frame decks, I doubt that they would even stock it on their shelves. That’s because they tell me that I’m one of their only customers who buys and uses the stuff.
When modifying PT deck framing, follow cutting, notching, and drilling guidelines to avoid weakening the framing.
Always treat end cuts and notches with an approved preservative to avoid compromising the wood’s rot resistance.
Sure, it takes a few moments to brush on the preservative, and it eventually ends up getting all over my hands and tools. But it’s not just a good idea; it’s a code requirement. According to the IRC, all cuts and holes made in pressure-treated wood need to be treated with a wood preservative, preferably one with a copper-naphthenate or oxine-copper (also known as copper 8 quinolinolate) base, whether the material is treated southern yellow pine or any of the incised western species.
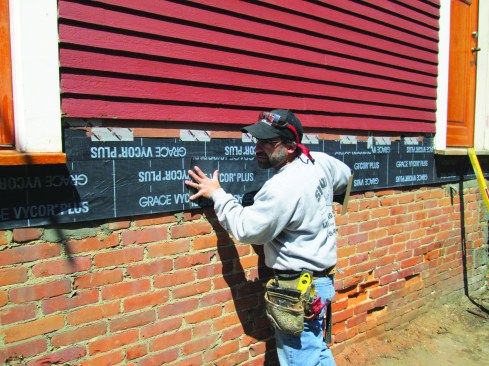
Before installing a deck ledger, the author removes the siding and protects the sheathing with a layer of peel-and-stick flashing membrane.
Another simple tactic I use to increase the longevity of my decks is to make self-adhering flashing (SAF) membranes an important part of my deck-building toolkit. For example, I always completely cover the sheathing with a flashing membrane prior to deck ledger installation, taking care to install it shingle-style with no reverse laps that can collect water.

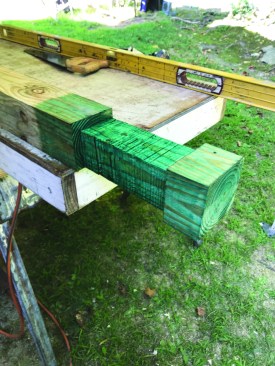
The author applies strips of flashing membrane to PT framing before installing joist hangers and other hardware.
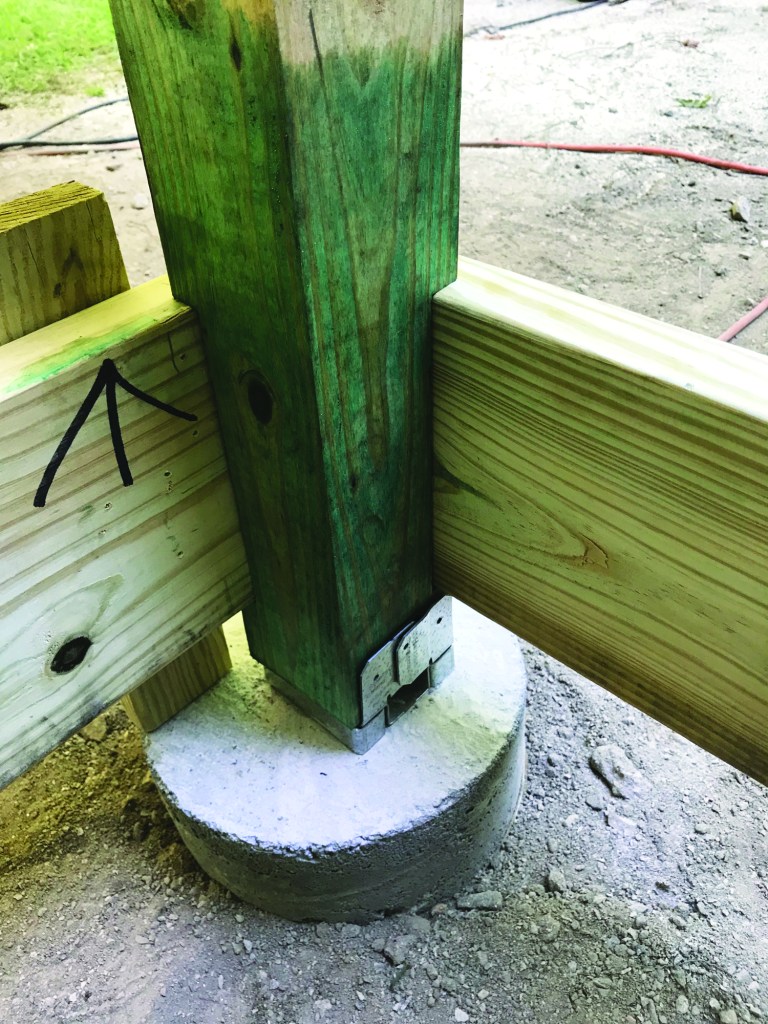
I also use peel-and-stick flashing to separate the deck framing from any structural metal hardware. Many deck builders began using this approach when wood treaters stopped using the less reactive chromated copper arsenate (CCA) to produce their preservative-treated lumber and switched to more corrosive preservative formulas such as alkaline copper quaternary (ACQ) and copper azole (CA). These new preservatives contain two to three times as much copper as CCA in a more chemically active form, and builders began noticing that standard G-90 galvanized hardware was corroding at an accelerated—and alarming—pace.
Hardware manufacturers responded to this problem by introducing metal connectors with thicker, G-185 galvanized coatings and by expanding their stainless steel offerings, and preservative manufacturers continued to tweak their formulations and treatment levels to be less corrosive. Meanwhile, builders learned that using self-adhesive membrane as a barrier wherever metal connectors and PT framing come in contact was an effective way to minimize corrosion; I continue to use this approach today.

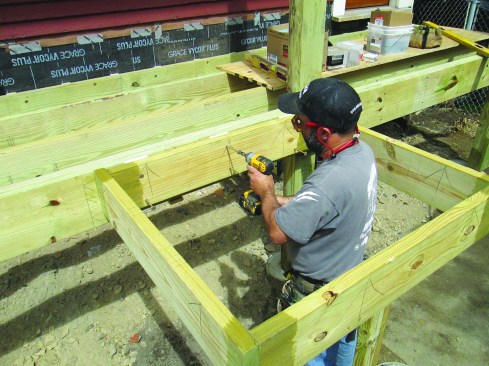
Blocking strengthens the connection between guard posts and the framing.
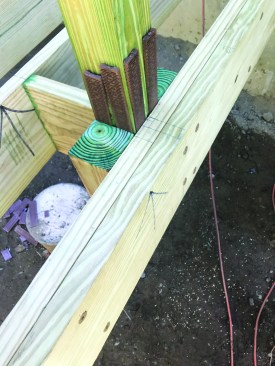
SAF membranes are particularly handy wherever I want to direct water away from a tricky framing detail, such as over a doubled beam or at a joist-to-post intersection.
Shims create drainage gaps between trim and framing, or between some framing members
There are other tactics for managing water when framing decks. For example, it’s sometimes possible to create drainage gaps between framing members with PT plywood or PVC spacers. To promote drainage, I also like to space the ledger away from the SAF-covered sheathing with strips of 1/2-inch PT plywood. Another option is to fasten Deck2Wall spacers, which are code-approved discs made of glass-filled polypropylene, to the back of a ledger to allow for drainage.
In addition, I like to use shims to separate PVC and wood fascia trim from rim joists. Not only does this provide a drainage gap and prevent moisture from being trapped in this vulnerable area, but it also allows me to correct for framing that has dips and curves.
Blocking
Blocking strengthens the connection between guard posts and the framing.
Modern decks and porches require a large amount of blocking. I use different sizes and types of PT blocking to reinforce the connections between the framing and the guard posts, configuring the blocking so that the posts will be strong enough to satisfy my inspector.
When I install the blocking with flat-headed Simpson Strong-Tie SDS screws, I predrill the holes to prevent splitting. Because these screws install flush with the framing, the heads don’t interfere with joist-hanger installation or exterior trim details, such as fascia.
To help true up guard posts and lock them into position during installation, the author uses composite shims.
To ensure that the posts are as close to plumb as possible, I install them carefully using a spirit level and Nelson composite shims to true them up. These shims are waterproof and won’t split, crack, or compress like standard cedar shims, so the posts don’t loosen up.
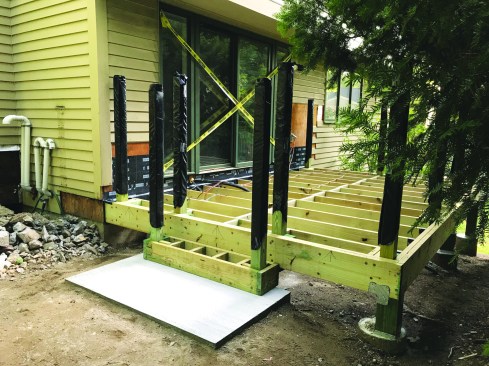
Then he wraps the posts with garbage bags, which help prevent the posts from warping and twisting by protecting them from exposure to moisture and UV rays. Taping the bags tightly around the posts helps them to last until it’s time to finish the railing system.
After post installation, I’m often not sure how long it will be until I have a chance to come back and install the composite or PVC sleeves or other details needed to complete the balustrade. To protect the posts from exposure to sunlight and rain, which can cause them to twist, warp, and curve, I like to simply wrap them with heavy-duty garbage bags, taping up the bags to prevent them from flapping in the wind and blowing away.
One of the last items on my framing checklist before installing the decking is to make sure there is adequate backing for any inlays, picture-frame borders, or other decorative decking details. To avoid creating a collection point for water, I either cut kerfs in the blocking to allow for drainage, or carefully cover the blocking with a flashing membrane.
Straight and Flat
On decks that will have 5/4×6 or larger PT (or cedar) decking, small variations in the dimensions of the deck joists aren’t a big deal. But with composite or PVC decking, those variations will result in a wavy deck surface, because the decking is flexible enough to conform to the uneven plane created by irregular joists. So, prior to installation, I make sure to check the joists and correct them as necessary so that excessive crown is eliminated and the joists are uniform in width. In some cases, a few passes with a power planer takes care of it; in extreme cases, it means ripping almost every joist on a table saw.
Photos by Emanuel Silva


