Sometimes, asking routine questions can lead to a less-than-typical solution. On a recent project, we simply asked, “How should we insulate the slab?” The foundation system for this high-performance home was to be slab-on-grade, and we were aiming to achieve R-15 to R-20 of slab insulation in our zone 5 climate. Additionally, the homeowner wanted 10-inch-wide plank flooring throughout most of the house, so the subfloor had to be solid and sealed from any moisture from below. A plus was that the 2×8 exterior walls supported a wooden roof-truss system, which meant that the floor area would not be obstructed by interior bearing partitions.
Tim Healey
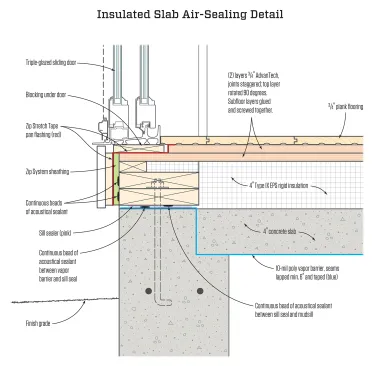
Instead of a conventional sleeper system to support the subflooring, an uninterrupted layer of foam sits directly on top of the concrete slab. Two layers of 3/4-inch OSB subflooring then float unattached on top of the foam to provide a solid and stable underpinning for the wide board wood floors. The foam butts against the mudsills for a complete thermal break. The polyethylene sheet becomes part of a continuous air barrier for the home. The top layer of subfloor steps back and gets a layer of peel-and-stick flashing tape to form pan flashing under the sliding doors.
Thinking Outside the Slab
One solution would have been installing rigid insulation under the slab, turning it up on the perimeter (to form a giant pan), and then casting the concrete slab inside the pan. A second solution would have been placing the slab and then building a sleeper system on top of it to support the floor. These strategies both seemed reasonable and were approaches that we’d used on previous projects. But when we looked at all the factors for this particular project, we wondered if there was a better way.
We knew that 4 inches of Type IX EPS would yield R-16.5, well within our target R-value for the slab. But to get the maximum performance from this insulation, we would need to install it in a continuous fashion, which meant that we needed to build the subfloor system above the surface of the rigid insulation. On previous projects, we had built what is called “a subfloor raft”: two layers of subfloor sheathing installed perpendicular to each other that simply floated on top of the insulation. The lack of interior partitions would make building this “raft” relatively easy. Another positive aspect of this plan was that the 4-inch edge of the insulation would butt against the two bottom plates of the exterior wall, providing a good thermal break between the wall plates and the floor assembly (see “Insulated Slab Air-Sealing Detail,” facing page).
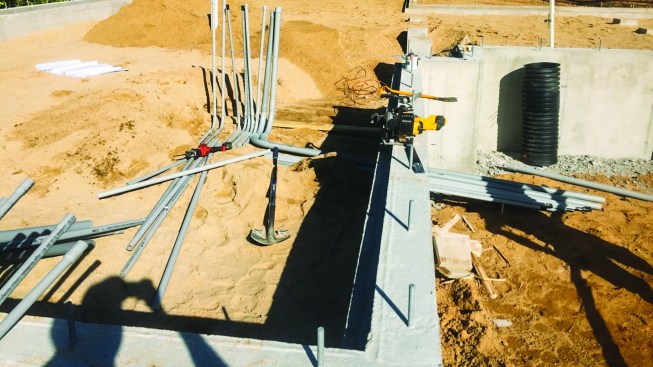
As this was a slab-on-grade system, all of the utilities and services had to be in place before the slab was poured.
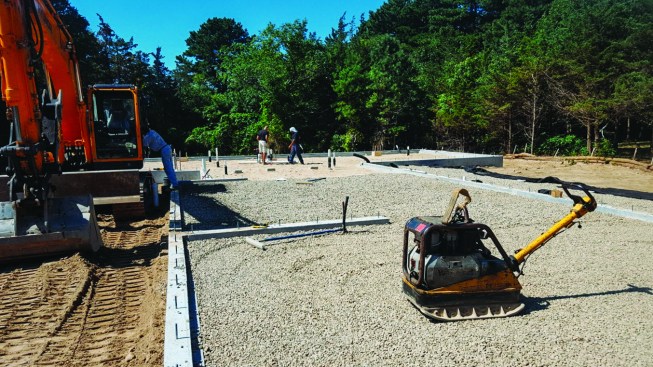
As with typical slab-on-grade construction, the next step was laying down and compacting a layer of crushed stone.
Frost Wall and Prep
With the slab-on-grade for this home, we started with a typical frost-wall foundation. This meant that we needed to properly position all the services coming up from below before placing the concrete. After the plumbing and utilities were set, the crew put down a layer of crushed stone and compacted it.
To control moisture migration into the slab, we installed 10-mil polyethylene sheeting on top of the crushed stone. Joints in the sheeting were properly lapped and taped to let the polyethylene also act as part of our air-barrier system. At the edges, we let the poly extend over the top of the frost wall.
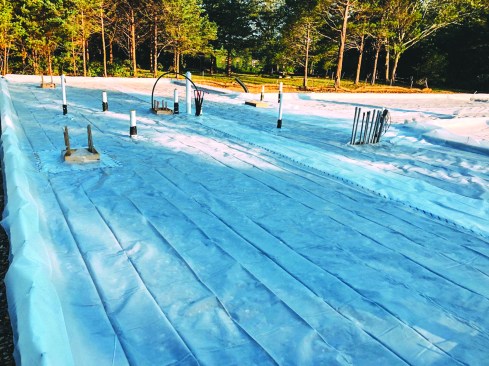
To help control moisture, the crew put down a layer of 10-mil polyethylene sheeting—which also acted as part of the air barrier—over the crushed stone.
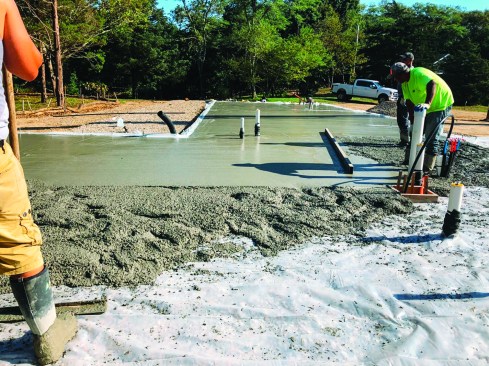
The slab was placed in the usual fashion over the poly with extra care to keep it absolutely flat.
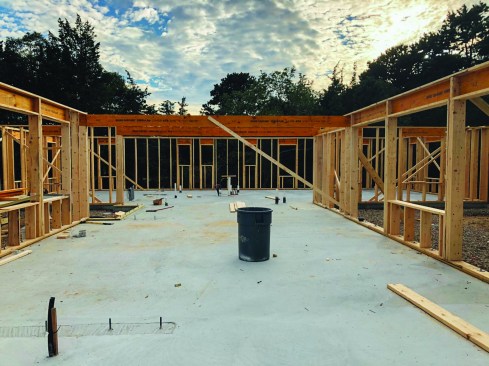
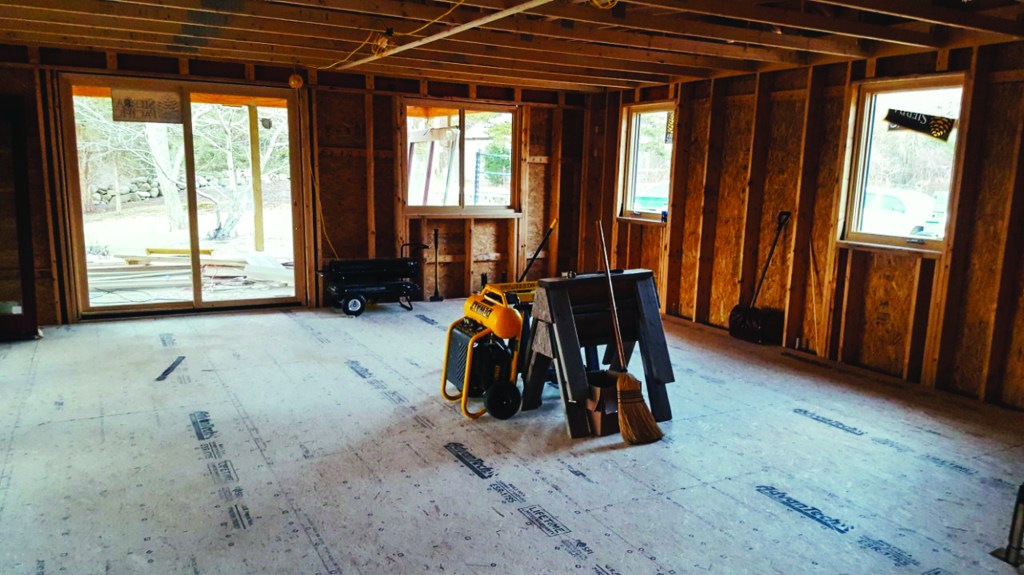
When the slab was finished, the framing crew built and raised the exterior walls to support the truss roof.
Insulation Next
Placing the 4-inch concrete slab was routine, and after the concrete had cured, framing the exterior walls could begin. It didn’t take long for the framers to build and raise the exterior walls. About the only out-of-the-ordinary thing for the framers was temporarily raising the threshold of the front entry with two 2-by layers. The raised threshold accommodated a temporary entry door that we used until the actual front door arrived. (For the entry door along with the other doors (large sliders) in the house, we used a different approach for sealing the opening that we will explain later).

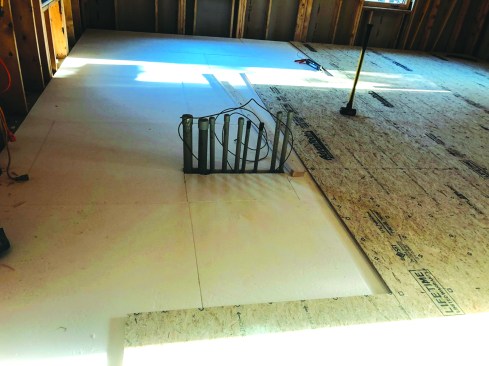
After the building had been dried in, the crew put down sheets of 4-inch EPS rigid foam insulation over the slab.
The insulation had to be cut out around all plumbing stub-ups through the slab.
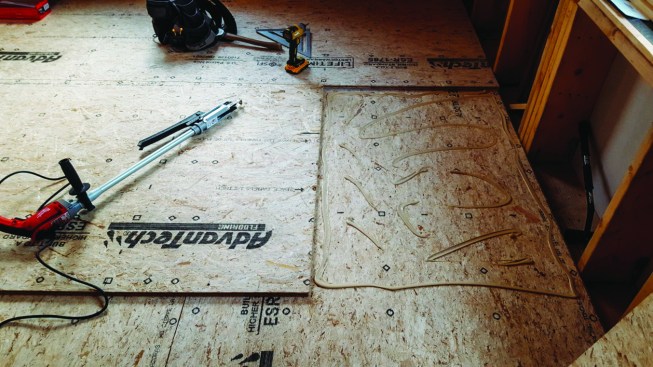
The roof truss system spanned the entire first floor, and once we sheathed and taped the roof, we’d created a nice working environment below for laying down the 4-inch EPS rigid insulation. The insulation came in 4×8 sheets that were easy to handle, so the installation progressed quickly and efficiently. As the crew installed the insulation across the floor, they had to cut out for the utilities—including tub drains, toilet waste lines, and the electrical service—protruding through the slab.
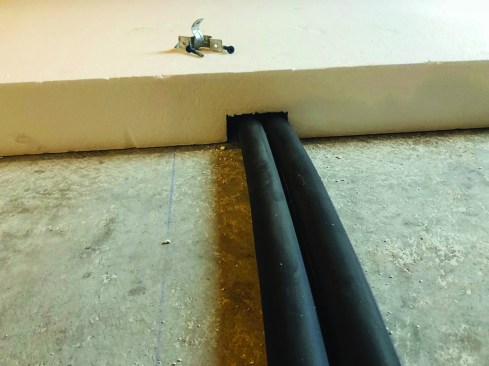
In a few places, the crew notched out the insulation to reposition some of the services.
They also cut out around structural columns that supported a space between sections of the house.
EPS cuts easily, so working around the utilities was pretty straightforward. In a couple of places, we needed to reposition the utilities from where they emerged from the slab. With the 4-inch depth of the rigid insulation, we simply carved out a small channel in the bottom surface of the insulation.
The house was built in two sections separated by a flat-roof area that would be supported by structural columns. The columns sat on raised bases on the concrete slab, and the crew had to cut and fit around them. There were also shear-wall sections built on foundations that were poured with the perimeter walls. The crew fit the insulation around these walls as well. We completed the insulation layer over the entire floor before starting the subfloor.
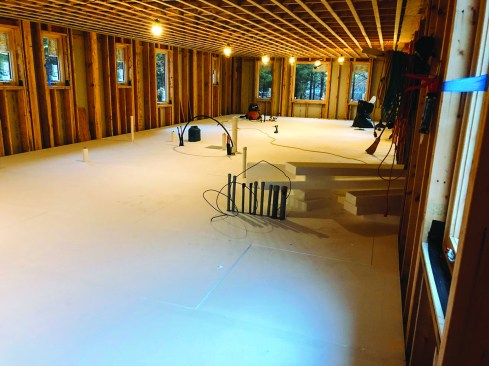
Clear-span trusses allowed the entire floor to be worked without having to deal with interior partitions.
Subfloor Raft
The flooring “raft” consisted of two layers of 3/4-inch AdvanTech subfloor sheathing that we screwed and laminated together and “floated” on top of the insulation. We considered using a single layer of thicker AdvanTech, but after a conversation with Huber’s engineers, we felt confident that two layers of the 3/4-inch thickness would give us a strong and stiff floor without our having to special order any material.
The first layer of subflooring was installed perpendicular to the foam, with the seams between the OSB sheets staggered above the seams in the foam.
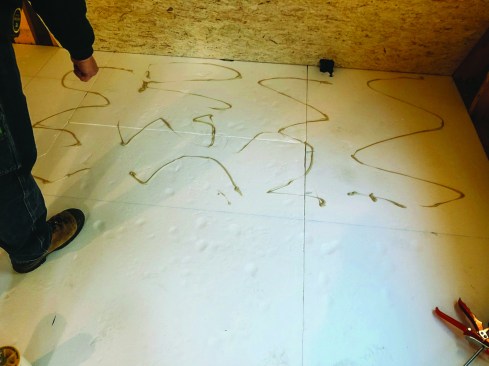
To keep the subfloor from sliding around on the foam, the crew squirted on some adhesive – just enough to aid in positioning; this wasn’t required for strength.
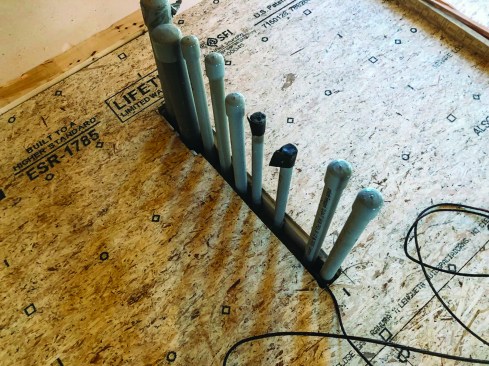
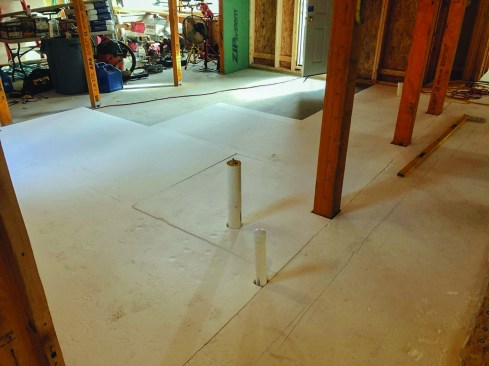
Where services came up through the slab, the crew left ample space around the pipes to be filled in with expanding foam later.
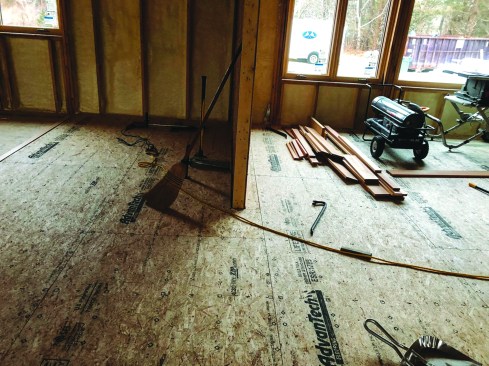
While there were no full partitions, the crew did have to fit around a couple of interior shear walls.
We put down the first subfloor layer running perpendicular to the sheets of EPS with the joints staggered between the layers. Applying adhesive between the EPS and the first layer of subfloor was not required, but the installation crew soon realized that a little adhesive on the EPS helped keep the subfloor sheets from moving around during the installation. As they tapped the sheets together, they paid close attention to leaving a 1/8-inch gap between the sheets on all sides, as Huber recommends.
The crew also made sure to leave some space around conduits and pipes when they installed the subfloor around the services that came up through the floor slab. This space made it easy to air-seal around the pipes with expanding foam later. In those places where we had built shear walls, the crew fit the subflooring around them, leaving the appropriate gap for movement.
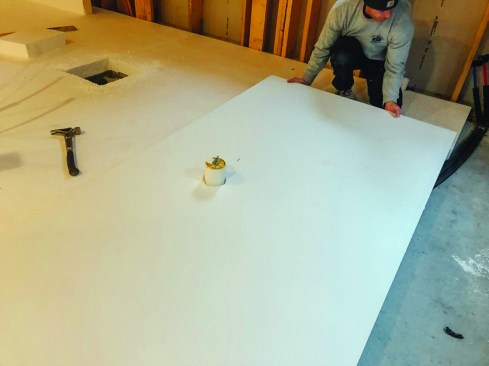
The crew installed the second layer of subflooring perpendicular to the first with joints staggered in both directions. They made sure to maintain 1/8-inch clearance between the sheets on all sides.
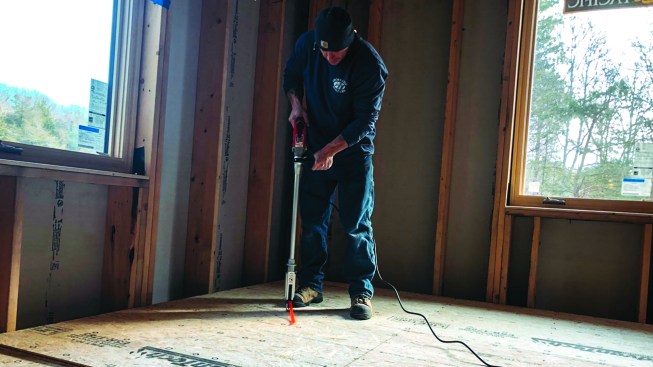
After tacking the sheets in place, one crew member screwed the subfloor layers together with an auto-feed screw gun, driving more than 12,000 screws.
The second layer of subflooring went down perpendicular to the first layer, again with the joints staggered in both directions between layers. The crew applied construction adhesive to the top face of the first layer before dropping each second-layer sheet. They tacked the second layer in place with a few screws, and then one crew member followed, screwing the two layers together on a 6-inch grid with an auto-feed screw gun equipped with an extension handle. In the end, he drove more than 12,000 screws in the floor.
As with the EPS installation, having no interior partitions allowed the installation of the subfloor sheathing to go quickly and efficiently. The sealed truss roof also meant that the subflooring was never exposed to weather-based degradation.
Sheathing Sill Pan for Sliders
At the doorways to the house, we were able to use the double-layer floor assembly to our advantage. This house was located next to a pond, so the beautiful views warranted the installation of five 7-foot sliding glass doors facing that direction. We extended the bottom subfloor layer through each door opening to the outside of the framing, then held back the second layer of subfloor 5 inches. We ran flashing tape up the exterior wall sheathing below each opening and up over the bottom subfloor layer. Finally, the flashing tape turns up and onto the second subfloor layer to create a flashed sill pan under all of the sliding glass doors. At the front entry, we removed the temporary threshold and repeated the sill-pan detail for the new front door when it arrived. This integral sill pan gave us a durable detail for all of the door sills.
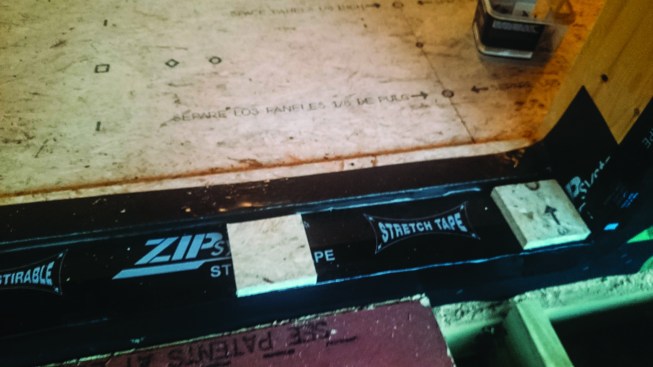
At the doorways, the crew held the top layer of sheathing back 5 inches. Flexible flashing tape laps onto the second layer of subfloor, forming a waterproof sill pan for each door.
We ultimately chose to insulate the slab the way we did because it gave us the flexibility to accommodate all of the situations particular to this project. Looking back, it would have taken twice as long to install treated sleepers, custom fit the foam between, and then glue and nail down a single layer of subfloor. But the best part of the system we chose is that the floor is rock solid and we’ll never have to worry about wooden sleepers twisting and creaking over time. Once the subfloor was installed, the interior wall partitions were attached directly to it and the floor was ready for wide-plank finished flooring.
Photos courtesy Shoreline Builders