Low cost, relatively long life, and wide availability make pressure-treated wood decking the go-to choice for many decks. The downside is that PT lumber can be the most difficult outdoor wood to finish properly. This is true for new PT lumber, which may or may not have had some proprietary water-repellent treatment applied to it at the mill, and for existing PT decking, whether it has a finish that’s failing or no finish at all.
My approach to refinishing wood decks applies to most of the widely available types of PT decking. While southern yellow pine is one species that is commonly pressure treated, here in Canada (and I believe in the northern states), spruce, pine, and fir are also milled into PT decking. This approach can be used with cedar and redwood decking too.
Coach Your Client
You might think you’re in the deck business, but that’s not entirely true. You’re actually in the business of making people happy (or happier) about their decks. The thing is, happiness won’t happen unless you explain two things that are probably new to most clients you deal with. Skip this teaching and it could come back to bite you.
First, new deck owners rarely realize how much effort and expense some finishes require to keep a wooden deck looking great in the long run. You need to explain. Decks fight a constant battle against UV, moisture, abrasion, and temperature swings. Outdoor conditions are hard on any finish, but deck finishes must withstand the additional challenges of foot traffic and a water-holding horizontal orientation.
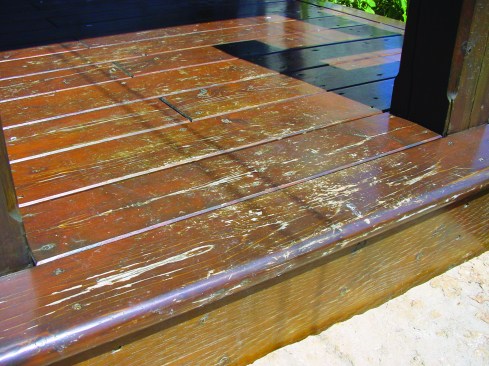
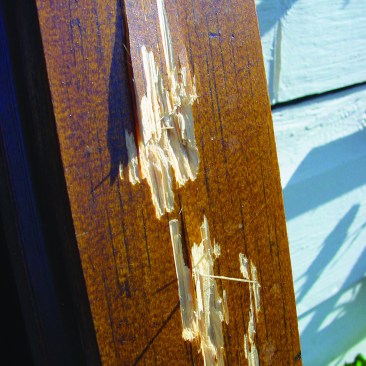
The film-forming finish on this white-cedar decking and PT rim joist is starting to fail.
The second client-coaching point concerns the range of effort involved in maintaining a deck depending on the finishing regimen. At the easy end of the spectrum, leaving a pressure-treated deck bare or simply cleaning and brightening it from time to time involves little work. At the other end of the maintenance spectrum, film-forming, furniture-grade deck finishes require complete stripping and refinishing every three or four years. This is especially true in full-sun locations .
Every deck finish has pros and cons. Laying those out ahead of time reduces the chance for client disappointment, call backs, and loss of profits. Here’s what you need to explain about the different families of deck finishes:
Clear finishes preserve the bright “natural” look of new or newly brightened wood, but clear finishes also have the shortest working life. Clients will need to refinish every year if they want to maintain the look of fresh lumber, with deck brightening necessary as the deck ages. Currently, the best clear product in my testing is Olympic Wood Protector Clear Waterproofing Sealant.
Soak-in stains add color to wood, but without a surface film that has the potential to peel. Lack of peeling makes refinishing easier, but it also reduces the ability of the finish to prevent surface cracking. Soak-in stains typically deliver for two or three years before they need to be reapplied. Wear from foot traffic and abrasion is what typically kills soak-in stain finishes. Cetol SRD is currently my favorite finish in this category.
Tinted film-forming finishes are like a varnish for decks. The protective film can look fabulous because it imparts color while also letting wood grain show through. If your client is aiming for a rich-looking deck, a film-forming finish is the way to go.
This was particularly true around knots.
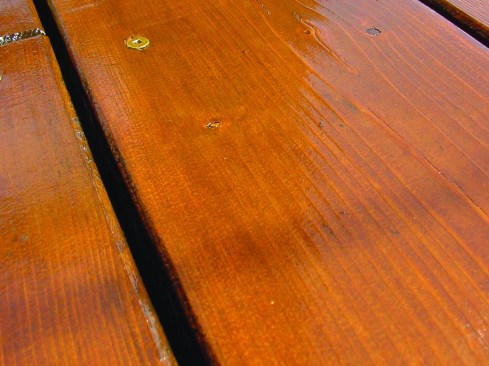
After removing the old finish and refinishing with Cetol Dek, the cedar decking looks just like new.
Just be sure to explain that all film-forming finishes eventually break down and peel. These finishes need to be stripped, the deck sanded, and the product reapplied when that happens. Any deck pro knows that stripping is especially time consuming on railings with closely spaced spindles, but you need to explain this to clients. The best film-forming finishes deliver three to five years of good looks in sunny locations. Sikkens Cetol Dek has been a long-standing favorite of mine in this category.
Opaque deck finishes are like paints for decks. They completely hide wood grain and that’s why some people don’t like them. On the plus side, paint-like deck stains offer the highest level of UV protection. That’s why the best products look good for five years or more. In my testing, I’ve found that Cabot Solid Color Oil Decking Stain performs well, but it’s currently available only in the central U.S. The acrylic version is available across North America, but it doesn’t last as long as the oil.
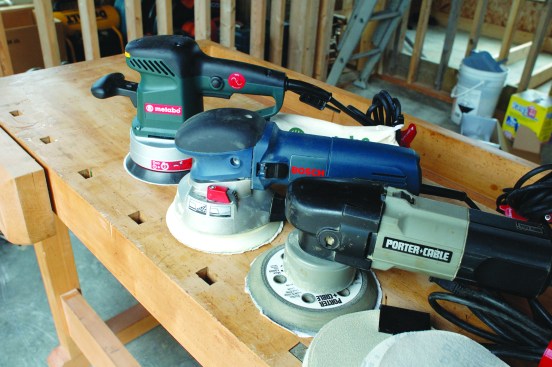
Sometimes a light sanding with a random-orbit sander is enough to prep decking for a new finish.
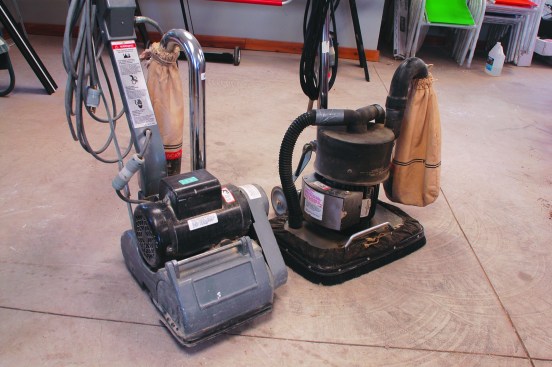
On large decks, you may want to rent a walk-behind drum or orbital sander.
Two-Step Prep for New PT
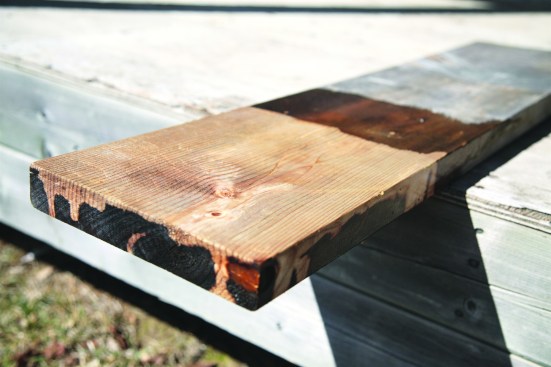
Pressure-treated lumber is the trickiest outdoor wood of all to finish well because different species and versions can have different types of treatment applied at the factory. In addition to the preservative chemicals within all PT lumber, some brands have surface treatments to repel water. You’ve probably seen how water beads up on these boards when they’re new. The idea is to make the wood perform better when bare, but surface treatments will cause premature finish failure unless you deal with them correctly.
No finish can bond to wood that has been treated to repel water. The solution is surface preparation that’s effective and reasonably fast. According to a five-year study by the deck-finish manufacturer Akzo Nobel, sanding does more to boost absorbency than any other deck surface treatment. Sanding alone, however, is slow, and it can’t get into all nooks and crannies of a deck.
This is where two-step prep comes in. Pressure washing with plain water followed by sanding with a 60- or 80-grit abrasive after the wood is thoroughly dry hits the sweet spot of efficiency and effectiveness when it comes to deck prep. —S.M.
Elastomeric coatings also fall into this category. Marketed as being a rejuvenating product for older pressure-treated decking with deep weathering and cracks, some coatings have certainly not performed up to expectations. For one thing, they are difficult to apply, and if the decking isn’t prepped properly—the substrate has to be bone dry, for example—they tend to fail quickly and dramatically. But I’ve been impressed with Duckback’s SuperDeck Deck and Dock elastomeric coating; I’m four or five years into a field test and have been pleased with the results so far.
Prepping the Decking
Refinishing an old deck is similar to finishing a new one, though there are important differences you need to recognize before settling on a strategy. The first is the condition of the existing finish. How bad is it? What kind of old finish are you dealing with? What type of new finish will be applied? Is the wood weathered and cracked?
If the deck finish has lasted decently over the last couple of years and is only beginning to fail, there’s no need to strip back to bare wood. Simply sand the surface lightly in preparation for a new top coat of whatever finish was previously applied to the decking. I’ve found that 120- or 180-grit abrasive in a 5- or 6-inch random-orbit sander works well. Don’t sand through the finish; just scuff the surface of the solid but failing finish so it accepts and holds a new finish.
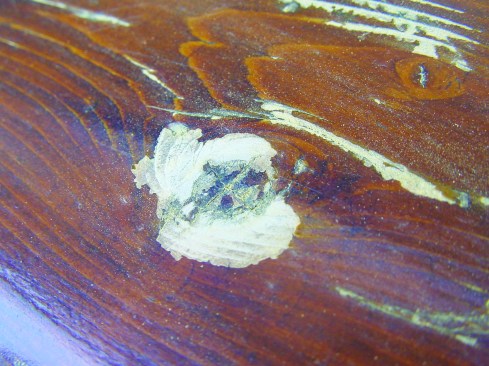
In those small areas where the finish has peeled down to bare wood (usually around knots), sand off any loose frazzles of finish. Nothing can be left loose. Vacuum up the dust, then recoat with the original product used previously. If the finish is still mostly in good shape, only one coat is necessary. If more than 20% of the surface is bare wood, apply two coats. Don’t coat more than twice since too much deck finish can encourage peeling by trapping moisture in the wood. In fact, over-coating is a common cause for deck-finish failure.
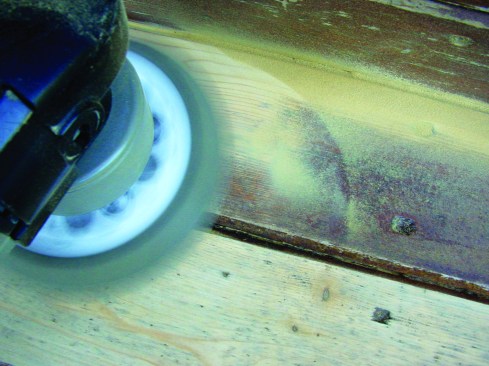
If fastener heads are flush with the surface, aggressive sanding can remove their protective coating.
By the time most deck owners get serious about refinishing, the decking is already suffering from a complete finish failure. To make the wood look good again, you’ll have to remove all traces of the old finish and gray wood. After that, the finishing process is the same as if you are dealing with new lumber.
Exactly how you strip off the old finish depends on the size of the deck and the equipment you have available. You could simply sand to remove the old finish, but the fastest approach usually involves a water-soluble chemical deck stripper, such as Extreme Solutions EFC-38 or Restore-A-Deck. Neither of these work perfectly, but they are relatively benign (especially compared with strippers that contain methylene chloride) and are about as good as strippers get. I apply these strippers with a brush or a roller, then clean them off with a pressure washer.
After scuff sanding, be sure to clean up all dust before recoating.
You’ll still need to finish up with sanding, and the end result should look pretty much like a deck made of new lumber. The only difference might be if there are deep cracks caused by weathering. If the gray color runs deep and persists after sanding, a traditional deck brightener can be used. In many cases, you’ll need to use a neutralizer afterward to balance the pH, as most brighteners contain oxalic acid. I’ve had good luck with an oxygen-based mold-stain remover called Duo Blast, which works exceptionally well on weathered wood with no need for neutralizing. It also poses no threat to plants, making it a good choice when the deck is surrounded by expensive landscaping.

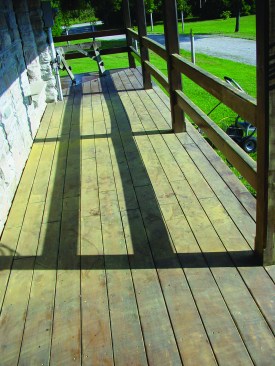
After removing the old finish, you may need to use a deck brightener to return color to weathered, gray decking.
Some brighteners contain oxalic acid and need to be neutralized afterward, but the author recommends Duo Blast, which isn’t harmful to plants and requires only a water rinse.
Pressure Washing
A pressure washer is a nice tool to have for preparing a new deck for finishing, but it’s virtually mandatory for stripping an old deck finish. Gasoline-powered versions speed up the work considerably because they deliver a greater volume of water at considerably higher pressures than electric models. At minimum, the pressure washer should put out at least 2,000 pounds per square inch (psi) of pressure; 3,000- to 4,000-psi units are even better.
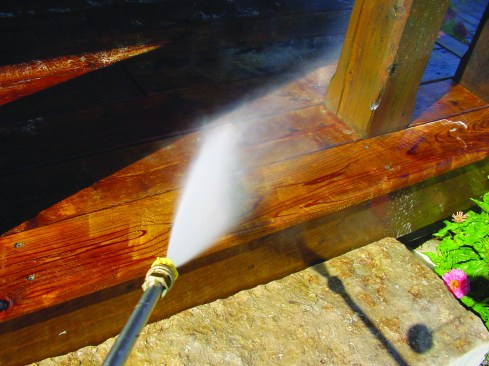
Pressure washing is effective at removing dirt and failing finishes.
John Paulin
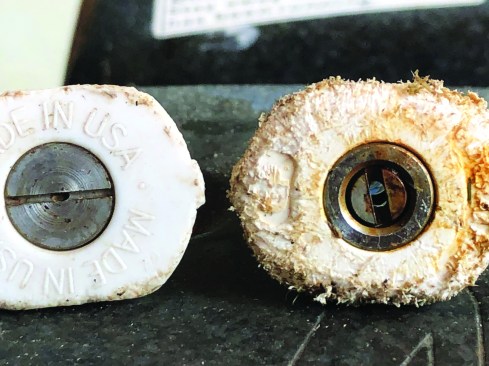
Be sure to match the tip size to the operating pressure of the unit.
Otherwise the wood could be damaged.
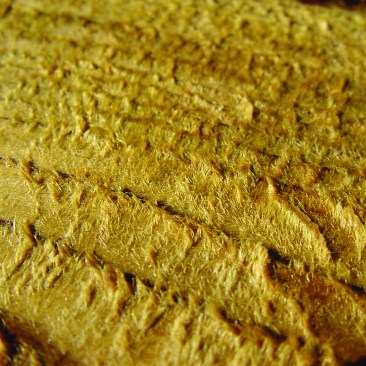
After power washing, use a sander to remove the fuzzy wood fibers that have been raised during the process.
Pressure washers can easily damage decking if you let the tip come too close to the wood. I recommend using the largest and lowest-pressure tip at first, holding the spray wand at least 18 inches away from the wood, and changing to a more aggressive tip incrementally and only if more power is needed.
Pressure washing removes grit (on old decks) and sawdust (on new decks). It also helps break down surface burnishing and repellent treatments that could impair finish absorption.
After pressure washing, a light sanding ensures full absorbency and gets rid of fuzzy wood fibers that might have been raised by the washing. For final cleanup after sanding and before finish application, a gas-powered leaf blower is a great tool.
Moisture Testing
Once upon a time, common wisdom said to wait a year before finishing a new deck, allowing time for even the wettest lumber to weather and dry out. But why wait when you don’t have to? Moisture meters are relatively inexpensive and effective at determining the moisture content of wood. Besides reducing the risk of premature finish failure, using a moisture meter makes you look more professional in the eyes of clients.
If you’re dealing with an older deck, a moisture meter will tell you if you’ve waited long enough after pressure-washing or wet weather to finish the deck safely. If you’re finishing a new pressure-treated deck, a moisture meter is even more important. Get the kind with pins that penetrate into the wood, and measure the moisture content on the fresh face of newly-sawn lumber samples. Wet wood can dry superficially and register an appropriate moisture content on the surface (15% or less), while excess moisture might still remain deep within the wood, ready to migrate out and cause finish failure.
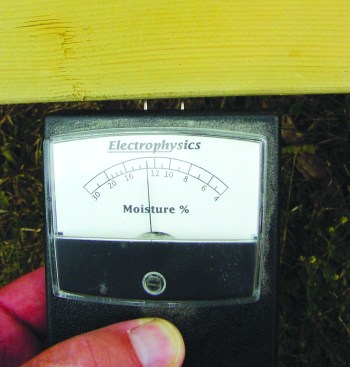
Measure, don’t guess. A moisture meter should be used before applying any finish to make sure the moisture content throughout the decking is within an acceptable range, typically less than 15%.
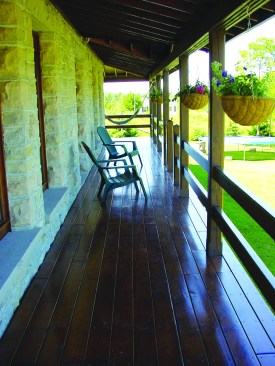
After being refinished with two coats of Cetol Dek, this decking has the patina of fine furniture. The first coat was with dark oak, while the second coat was a natural finish.
Use a Proven Finish
Unfortunately, most deck finishes on the market don’t perform well, so you need to be picky about what you recommend and use. Once you’ve educated your clients about the differences between deck finishes, reliable results ultimately come down to choosing the best product for your particular application (for a survey of 22 popular deck finishes, see “The Great Stain Shoot-Out”).
A Deck Finishing Myth
Many people believe that finishing a deck extends its working life and prevents rot. This isn’t as true as it seems. Keeping a deck finished will prevent surface cracks from forming in bare deck boards, but it won’t do anything to prevent ordinary rot. The rot resistance of a deck has more to do with a design that minimizes wood-to-wood contact areas in the structure than it does with deck coatings. The faster a deck dries out internally after rain, the less prone it is to rot. Finishing a deck just makes it look nicer. —S.M.
Generally speaking, deck finishes these days last longer and perform better than they did when I began testing them back in 1990. I’ve already mentioned several products that have performed well in my testing, but you can read a complete list of my recommended deck finishing options by going to my website, baileylineroad.com.
Regardless of which finish you choose, there are three crucial things to keep in mind during application: temperature, sunlight, and technique (Figure 6).
For maximum life, apply the finish as close to normal room temperature as possible. Anything colder than about 55ºF or 12ºC prevents proper drying, while temperatures that are hotter than 80ºF (or 27ºC) tend to evaporate crucial, volatile ingredients before the finish has cured.
Avoid applying deck stain in direct sunlight if possible. Sunshine can heat deck surfaces far beyond air temperature, boiling off those vital ingredients. Work during shady times of the day or cloudy weather.
As you work, maintain a wet edge if you’re applying any sort of finish that forms a surface film. This prevents brush marks and lap marks where one area meets another. The only exceptions to the “wet edge” rule are for Eco Wood Treatment and Minwax Exterior Teak Oil. Both can be applied in full sun, as temperature doesn’t seem to matter much, and there’s no need to maintain a wet edge.
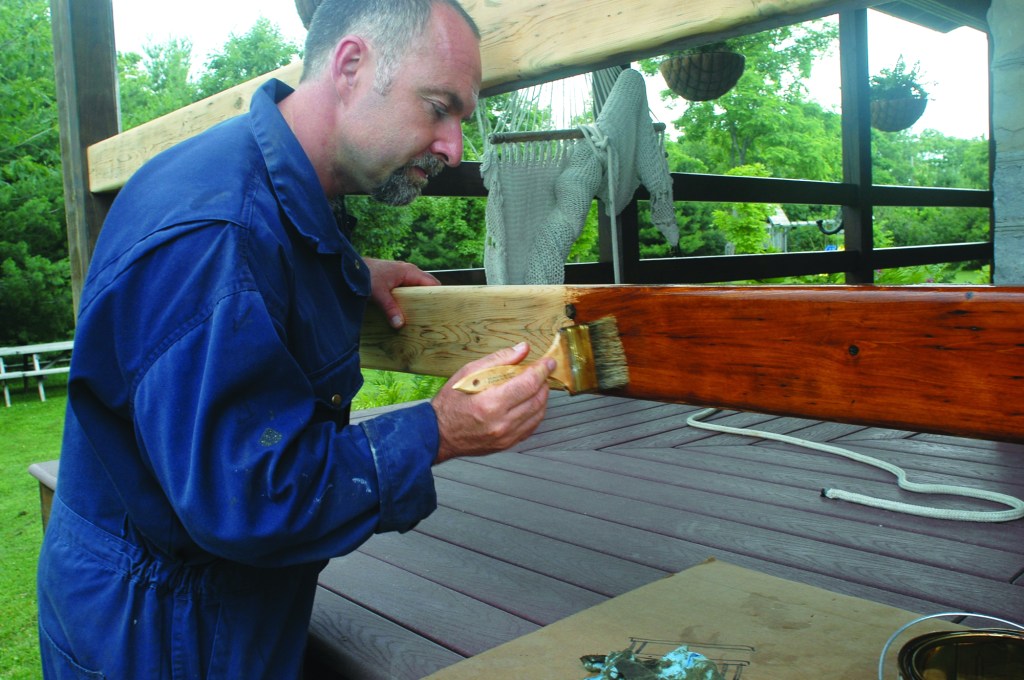
All else being equal, brush application of deck finishes results in longer life because the brushing action drives the finish deeper into the wood pores. This is especially true with any kind of film-forming deck finish.
Photos by Steve Maxwell


