
atelierjones
A CLT job is a logistics puzzle, and to do it profitably require…
In late 2014, my company had the opportunity to frame a 1,500-square-foot infill home in Seattle using a panelized building system called “cross laminated timber,” or CLT. We were one of the first residential builders in the U.S. to use it. Although we were familiar with a panelized approach, having used structural insulated panels, we found that CLTs have their own learning curve.
CLT panels are solid, made from 2-by stock bonded together under pressure with a thermosetting adhesive. The layers are cross-laminated, like plywood, with the grain on each layer running 90 degrees to the adjacent layers. Panels for commercial construction (the biggest market worldwide) can have as many as seven layers, but the ones we used for this project had three or four, depending on whether they were for walls or floors.
The panels were made by Structurlam, in British Columbia, from a combination of spruce, pine, and balsam fir, with blue-beetle-kill lodgepole pine in some of the interior laminations. The home required 67 panels, ranging in size from 2×10 feet to 8×35 feet and in weight from 200 to more than 2,800 pounds.
The architect and homeowner, Susan Jones of atelierjones in Seattle, chose my company because of its reputation for cutting-edge work, including the city’s first Passive House. She had identified CLT as a sustainable material with a potential niche in the high-end green-home market.
The material is well-suited to an energy-efficient home. The solid panels simplify making the building envelope airtight, and they provide hygrothermal mass—they absorb and re-emit moisture as well as heat, helping to moderate fluctuations in both. Thermal bridging through the panels can be controlled with continuous exterior insulation.
Fast, But Unforgiving
As one would expect with a panelized system, the job went quickly. The complex floor plan—designed to fit a narrow, triangular lot—took just three weeks to frame, compared with the eight or 10 weeks that stick framing would have required. We based our labor estimate on our experience with SIPs and ended up pretty close.
One caution: CLTs can be unforgiving. You can’t adjust dimensions on the fly. The foundation dimensions must fit the plan exactly, and the panels must fit together perfectly. Small modifications can be made in the field, but that work wasn’t part of our pricing, so we needed the panels to be the right sizes. The architect worked with Structurlam to create the panel order, then we reviewed the shop drawings before the panels were fabricated. This proved helpful, as we identified a couple of minor adjustments that needed to be made.
The ability to do that kind of review is crucial to success with this system. We have a lot of experience using CAD and reviewing shop drawings, but a builder without someone on staff with this experience may run into problems.
Staging the Site
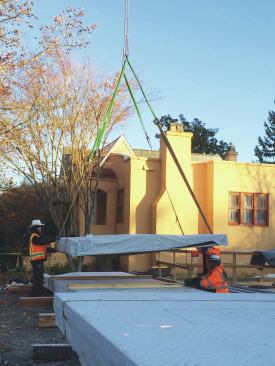
With CLTs, the job is a logistics puzzle, so good organization and planning are essential. We started by staging the panels. This was a small infill lot with room for just two stacks, so we arranged to have the first-floor wall and ceiling panels delivered first. After they were installed, we arranged delivery of the second-floor and roof panels.
Determining which panels go where isn’t complicated: They’re keyed to the plans and labeled 1a, 1b, 1c, and so on. Ideally, the panels would be stacked in order and oriented by the supplier in the position they’d be used. But that didn’t happen here, so before work could begin, we needed to sort them using the crane, which ate up some time.
Assembling The Puzzle
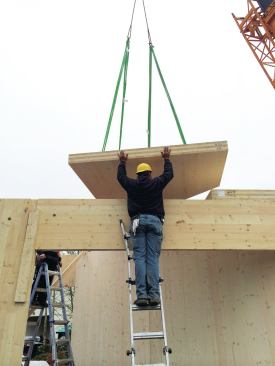
The wall panels had holes drilled through the upper portion. We put lifting straps through those holes, then had a worker or workers guide each panel into place.
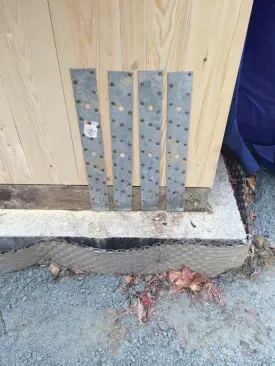
Like the foundation, the treated-wood sill plate must be perfect because of the fixed panel sizes. And of course bolts can’t protrude above the surface of the sill plate. All connections in a CLT project must be specified by a structural engineer; in this case the panels were fastened to the sill plate with vertical straps.
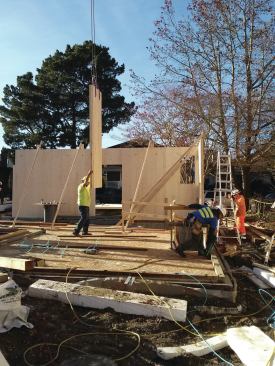
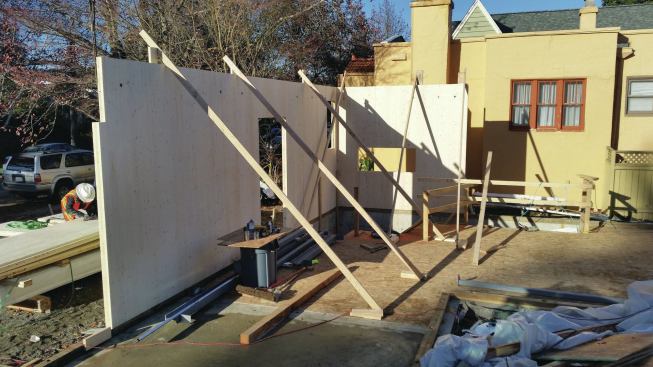
Once a wall panel is in place, it’s plumbed and braced the same as with any wall, though the panels are a lot stiffer than a stick frame and tend to need fewer braces. As with SIPs, the CLT wall panels were joined to one another with vertical splines: The last few inches at the edge of the panel were notched to receive a 1-inch-thick plywood spline.
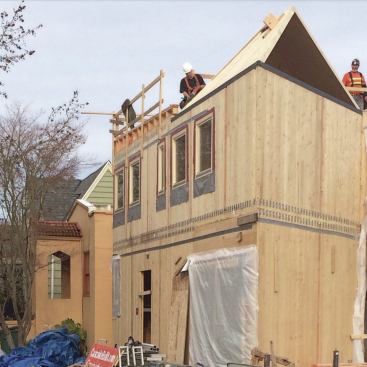
The second-story floor panels included what Structurlam calls Rampa connectors: threaded sockets embedded in the panels at key lifting locations. A harness bolts to these connections and to the crane’s lifting cable. After lowering the floor panels into place, we set and braced the second-story wall panels. Small Simpson clips—which, like the hold-down straps at the base of the wall, were specified by the engineer—held the first- and second-story wall panels to the intervening floor panel.
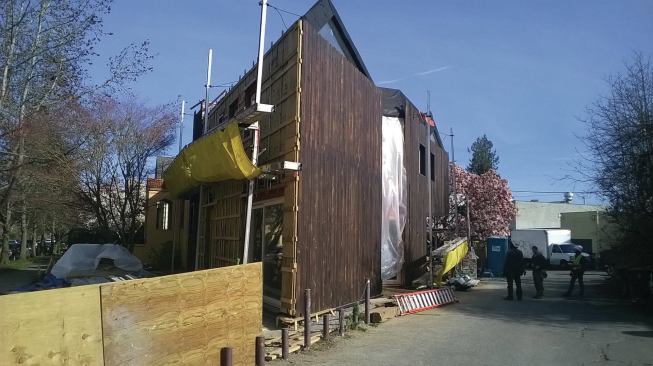
We flashed windows and doors with a fluid-applied flashing product called Prosoco FastFlash, wrapped the home with VaproShield WrapShield housewrap, then insulated it with Roxul Rockboard 80 panels. A grid of 1×4 treated battens formed a rainscreen that we covered with vertical board siding.
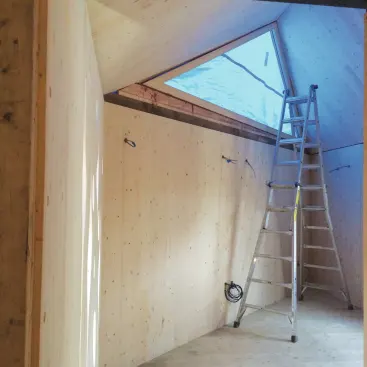
The roof was tricky. Although the home included roof panels, we framed over them with 2x8s so we could install polyisocyanurate insulation. We could have framed the roof without the panels, but the architect wanted the look of the CLTs on the inside.
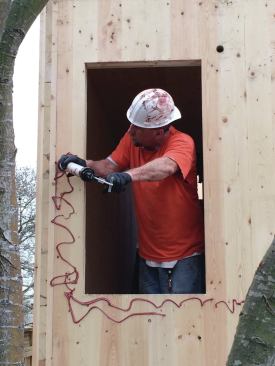
Our subcontractors had never seen this system, so in order to get accurate estimates, we worked closely with them to plan electrical and mechanicals. You can’t simply put pipes or wires inside the exterior walls. Our solution was to run outdoor-rated wire on the outside of the panels, then drill through the walls at each outlet location. We ran most of the plumbing in stick-framed interior partitions. In some places, we built chases for plumbing drops.
The overall lesson here is that a builder who has the opportunity to use CLTs needs to systematically think through everything. Given enough upfront planning, it’s a great system that creates a high-quality result. We would be happy to build with it again.
Sloan Ritchie owns Cascade Built, a Seattle custom builder that specializes in green construction.


