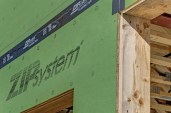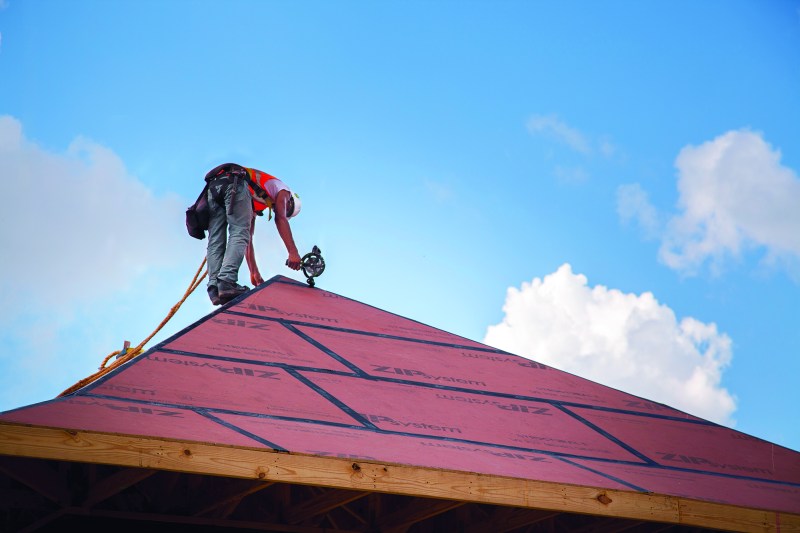
A high-performance roof deck can be a home’s first line of defense against high winds and wind-driven rain. An alternative to traditional sheathing and felt can provide a quick, sealed roof deck to help achieve dry-in. Today, integrated sheathing panels eliminate the need for housewrap on the walls and even felt on the roof. Third-party evaluation service report ESR-1473 documents ZIP System® sheathing and tape code compliance as a structural sheathing and roof underlayment. The system includes a built-in weather-resistive membrane on panels that come in popularly used 1/2- and 5/8-inch thicknesses for roof applications, and it is completed with an advanced acrylic seam sealing tape for a continuously sealed roof deck.
With an advanced sealed roof deck application, achieving quick installation and high performance depends on several critical details. Follow these tips for a smooth roof installation, when using sheathing with integrated underlayment.
Rigid Metal Flashing
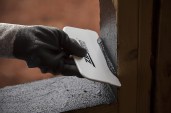
When transitioning to a rigid flashing from a vertical surface on integrated sheathing panels the easiest thing to do is to install the rigid flashing and then tape over the top of the rigid flashing for a proper shingling pattern to shed water. Installing step flashing on a dormer is the same as installing base flashing for brick or a weep screed on stucco: tape the horizontal edge and roll the tape to ensure the appropriate pressure is applied.
Roof Valleys
When taping in the valleys, you can use one strip of the 6-inch tape or two overlapping layers of the 3-3/4-inc tape. For two layers, install the second layer over the first, overlapping it a minimum of 1 inch. The 1-inch overlap should be centered over the valley.
In areas that require the use of an ice-barrier membrane in the valleys, does not replace that need, so continue to use ice-barrier membranes where required by code.
Vented Ridges
When dealing with vented ridges, it’s best to tape the ridge to protect against water intrusion during construction and then remove the tape later when the vent is installed. Like roof valleys, you can use one piece of 6-inch tape or two pieces of 3-¾-inch tape. For two pieces of 3-¾–inch tape, tape each side of the ridge so the two pieces meet in the center over the vent, overlapping at least 1 inch. For both tape sizes, be sure to roll the tape for the appropriate pressure.
By taping over the vented ridge, you get a rough dry-in and can begin the installation of HVAC, electrical and plumbing below. However, when it comes time to install the ridge vent, this piece of tape needs to be removed. To do that, simply take a utility knife and cut away the vent
For more information on how to achieve a resilient, sealed roof deck with ZIP System sheathing and tape, visit ZIPSystem.com/Roof.