Selecting Sheathing Panels
Sheathing should consist of performance-rated structural panels. These are made from plywood or oriented-strand board (OSB), and should carry a stamp (Figure 2-8) from APA-The Engineered Wood Association (formerly the American Plywood Association).
Panel Use Ratings
For framing, choose only from the following panel grades:
- Sheathing panels are designed for use on roof decks and walls;
- Structural 1 panels are designed for use on shear walls;
Panel Exposure Ratings
For framing, select panels with only the following exposure ratings:
- Exterior panels can be used outdoors;
- Exposure 1 panels can withstand moisture during normal construction delays — up to a full season, according to APA. However, the panels should be covered up as soon as possible.
Other exposure ratings for wood panels include:
- Exposure 2 panels are typically used for protected construction and industrial applications where the potential for high humidity and water leakage may exist for limited times;
- Interior panels are made with water-soluble interior-grade glues and are intended for interior applications only, not for framing.
Panel Span Ratings
Span ratings on sheathing grade stamps may have two numbers such as 24/16. The first indicates the allowable roof span (in this case, 24 in. o.c.) and the second indicates the subflooring span (16 in. o.c.). Span ratings for multipurpose panels are: 24/0, 24/16, 32/16, 40/20, and 48/24.
If a sheathing panel stamp includes only one span number, the panel is for use on walls only.
Panel Thickness
Plywood and OSB are always 1/32 in. smaller than their nominal sizes. For example, 1/2-in. plywood actually measures only 15/32 in.
Roof Panel Span
Roof panels should be a minimum of 1/2 in. thick for 16-in. o.c. framing, and 5/8 in. thick for 24-in. o.c. framing.
For roofs framed 24-in. o.c., use H-clips to support the edges of the sheathing at mid-span. Clips create the proper gap and help stiffen panel edges.
OSB
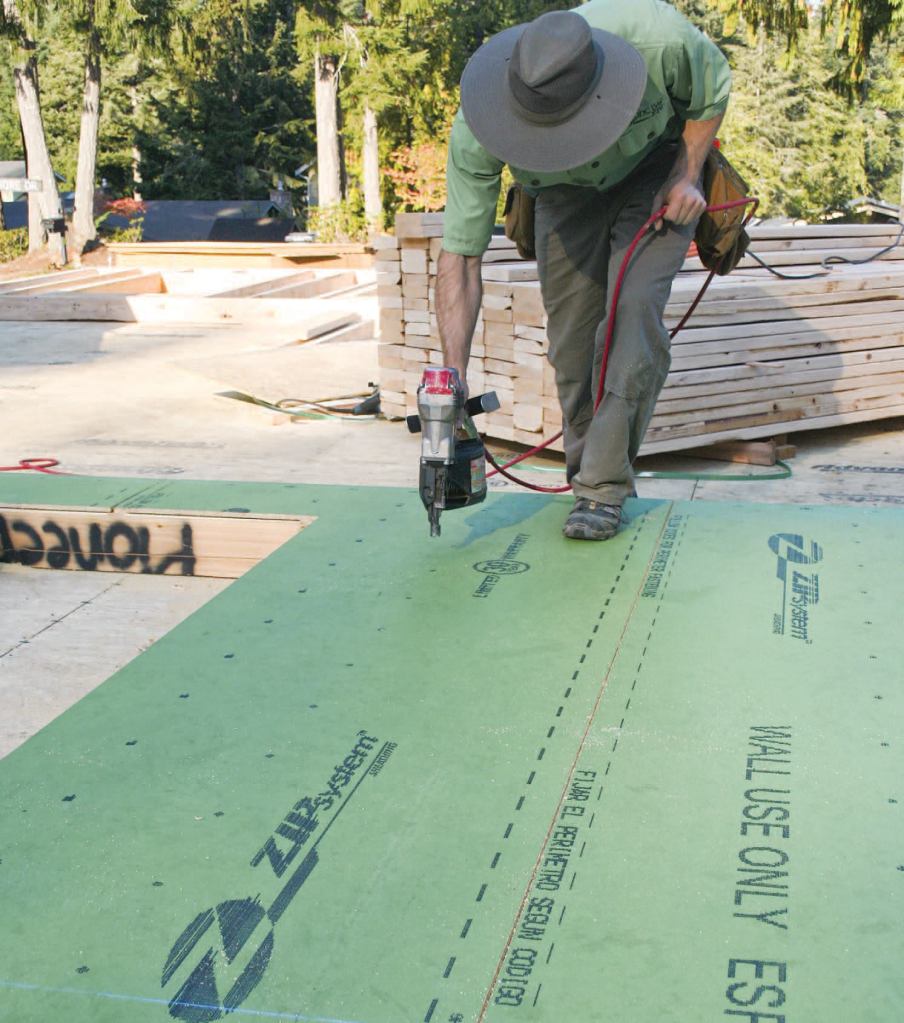
While the strength and nail-holding ability of OSB and plywood are equal for similarly rated panels, commodity-grade OSB may swell more when wet. Commodity-OSB panel manufacturers sometimes treat panels with a waxy finish to deter water absorption, but this coating deteriorates with exposure to ultraviolet light. The exception, of course, is integrated sheathing (such as Zip System), which includes an integral weather barrier and remains resist to water penetration for the life of the product.
Shear Walls
Continuous plywood across wall planes and tighter nailing schedules are crucial elements of structural design for seismic and high-wind areas.
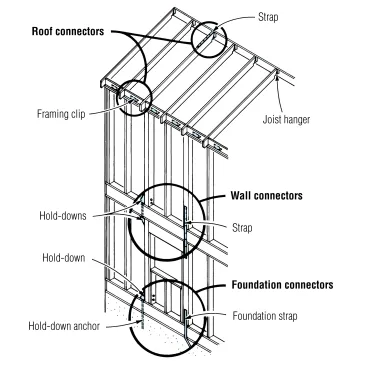
A variety of metal connectors are used to tie a house structure together and create a continuous “hold-down” path from roof to foundation.
Shear Wall Nailing
Shear walls are designed to resist racking. Both interior and exterior shear walls have rigorous nailing schedules, with nails spaced only 2- to 3-in. apart on panel edges (below). Nails must be held back 3/8 in. from the edges of sheathing panels and 3/8 in. in from the edges of framing members. Also, they must be staggered vertically (below).
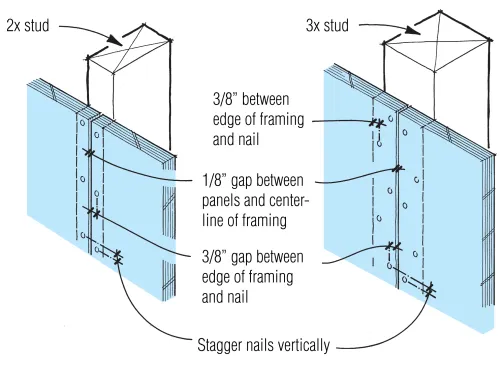
Where shear panels break on a stud (left), hold nails back 3/8 in. from the panel edges and 3/8 in. from the edge of the framing. Where nails are spaced closer than 6 in. o.c., code now requires minimum 3-by framing.
Nail types and sizes are also specified. While galvanized nails can be used, they have lower shear values and require larger nails or closer spacing.
Nail heads must be large enough and must not be overdriven (below). Overdriven fasteners can reduce the panel’s shear strength.
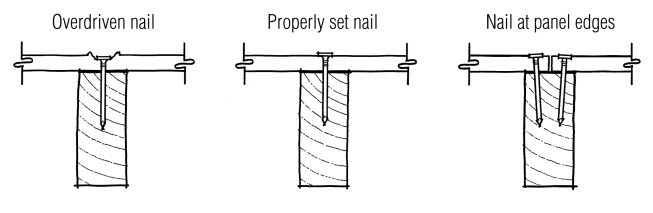
A nail that ruptures the outer plies of the panel (left) has less shear strength. A properly set nail should either sit snuggly on top of the plywood (center) or slightly dimple the outer ply. When panels break on a stud, set the nails at a slight angle to ensure proper embedment in the framing (right).
Shear Wall Blocking
Because shear forces are transferred at panel edges, all edges of plywood and other sheathing panels must be fastened to solid blocking. Many builders use 4×9 or 4×10 plywood panels installed vertically (Figure: Typical Shear Wall Details, above).
Where sheathing panels meet, each edge must have at least 1/2 in. of bearing on the stud, plate, or other member it is nailed to. Where the design shear exceeds 350 lbs. per foot (typically, where nails are spaced closer than 6 in. o.c.), the Uniform Building Code requires minimum 3x lumber at the joint. Most builders use 4x4s (below).

Where plywood edges fall within the shear wall boundary, 3-by framing is required to prevent splitting from the close nailing pattern. Where a plywood edge falls outside the shear wall boundary, however, as at the window opening, standard sheathing nailing is permitted.


