Most of us have worked on old homes where the exterior trim and siding were still in great shape: no cupping, bowing, twisting, or rot. As often as not, the wood is old-growth Doug fir, and none of it — the back of the siding, the back of the brick mold, the back and bottoms of the exterior jambs — is back-primed. In many cases, not even the bottoms of the doors were painted! Try that today.
Lumber these days is hardly even “new growth” — a lot of it is more like “instant growth.” Just look at the growth rings in a piece of siding or a 1×6 trim board. All this new-growth wood requires new building practices. We can no longer install doors without priming and finishing all six sides. In fact, most door manufacturers will no longer guarantee doors finished in dark colors or installed without adequate overhang protection.
New Products, Old Solution
The need for new building practices is most critical with siding and exterior trim — and not just because of new-growth lumber. There are also new manufactured lumber products on the market that perform differently than old-growth wood, and energy practices and housewrap technology have changed since those older homes were built.
Walls are no longer breathable cavities supported by let-in braces and wrapped with layers of felt paper. Instead, they’ve become sealed envelopes wrapped with plastic. Housewrap manufacturers are constantly improving their products by dimpling, creasing, and texturing them to encourage drainage. But the fractional stand-off space provided by bumps and wrinkles isn’t always enough to offset the quality of marginal building materials, poor design and detailing, or the pressure differentials that drive moisture vapor through siding and housewrap and into wall cavities.
Oddly enough, one of the most effective moisture-control techniques has been used — at least in part — for decades. What carpenters once called furring strips are used today to build “rain screen” walls, which are the best way to ensure long-lasting trim and siding installations.
But there’s more to a rain screen than simply nailing spacers on top of your housewrap. In this article, we’ll review the advantages of rain-screen walls and describe the details that make them work.
Reasons for Failure
Let’s begin by looking at the reasons modern siding and trim fail. Growth rings are only part of this puzzle. Read any recent article by building-science experts like Joe Lstiburek or Paul Fisette and you’ll learn that, except for vinyl siding, all exterior claddings are “reservoir” products. They absorb moisture even if they’re primed on all sides.
For a variety of reasons, moisture will find its way through minute cracks and crevices no matter how tightly the siding and trim are sealed. Poor water-shedding designs, failure to prime end cuts, installation directly against pressure-treated or high-moisture-content substrates, and installation too close to grade are all obvious reasons why moisture penetrates siding and trim.
There are also a couple of less visible causes, namely the air-pressure difference between the outside of the wall and the back of the siding, and the capillary action of water moving between materials tightly sandwiched together. Wind and wind-driven rain cause positive pressure against the exterior of a building — but there’s no pressure on the back of exterior cladding. This pressure difference creates a vacuumlike effect, so that moisture in the form of water vapor is both driven and sucked through capillary action into the exterior siding and trim. Even if proper water-shedding details are in place, capillary suction alone can draw water vertically up behind siding boards, and especially through small cracks at butt joints and even nail holes.
Once the exterior cladding absorbs enough moisture, the pressure differential can, in extreme cases, drive water vapor through the housewrap into the exterior sheathing and wall cavity. If this vapor ever reaches its dew-point temperature, it can condense inside the building envelope. Since liquid water cannot pass through plastic housewrap, it’s trapped in the wall, where it can cause rot and mold.
Felt paper is the only housewrap that will absorb water within the wall and allow it to dry toward the outside, but the force of positive pressure will often prevent that. At the very least, saturated housewrap and moisture-laden walls will accelerate the deterioration of exterior siding, trim, and paint.
A Ventilated Air Space
Rain-screen walls, sometimes referred to as pressure-equalized assemblies, solve these problems because they provide a ventilated air space that defeats the air-pressure difference. Properly detailed, they also provide a drainage plane — a way for any water that does get behind the siding to escape. And compared with the cost of replacing trim and siding that have failed prematurely, building a rain-screen wall is by no means prohibitively expensive.
The requirements for an effective rain screen are:
•a minimum 3/8-inch air gap between the back of the cladding and the drainage plane;
•ventilation to assist in drying and to partially equalize the pressure on the cladding;
•drainage at the bottom;
•a rigid drainage plane and air barrier.
In essence, a rain-screen wall — a ventilated gap or cavity providing drainage and a capillary break — works by promoting air circulation.
Prepping for Trim
As with most construction projects, the first step in building a rain screen is establishing the correct sequence. On the recent remodeling project shown here, we began by wrapping the wall, making sure that all window and door penetrations were properly flashed and sealed (see “Flashing a Flanged Window,” 6/05). The housewrap or drainage plane must be air- and watertight to prevent liquid water and air from passing through from outside to inside.
Rather than furring out the windows, which would create an offset in the drainage plane, we installed them against the sheathing and housewrap, then applied furring for trim and siding on top of the flashing. By leaving the trim — simple flat stock — slightly proud of the windows, we avoided creating a potential dam in the drainage plane.
To match the window trim, we chose to install a door with no brick mold; we added plinth blocks and flat casing afterward. This allowed us to run the drainage plane right onto the face of the door frame. Since we were using 1/2-inch-thick furring strips for the siding and furring blocks for the trim, we had to add 1/2-inch jamb extensions to the doors before installing the casing. We opted for the individual furring blocks instead of a continuous furring strip because we thought they would provide better air circulation behind the trim.
We covered the pressure-treated furring blocks with flashing or housewrap to isolate the trim from the blocks. We also sealed every cut and notch in the trim with two coats of oil-based acrylic primer.
The height of backing blocks above the doors and windows was determined by the upper trim detail, where head flashings were later installed.
Once the door and window trim was installed, we turned to the water table, where scant clearance to grade required special attention. Before wrapping the house, we applied a self-adhesive membrane at the bottom of the wall to protect the wood sheathing, then used PVC trim — a rotproof, nonreservoir material — for the water table.
After attaching the water table, we carefully sliced through the housewrap and inserted a custom-bent PVC flashing.
Vent Screening
We decided to use Cor-A-Vent (800/837-8368, www.cor-a-vent.com) at the top and bottom of the wall. First we attached a layer of ordinary window screening, and then we installed Cor-A-Vent SV-3, wrapping the window screen over the SV-3 to prevent bugs from infiltrating the rain-screen cavity.
We repeated the same steps at the top of the wall, but because this overhang had no soffit, we installed backing for the eaves trim beforehand. This allowed us to hide the ventilation strip behind the trim at the top of the wall.
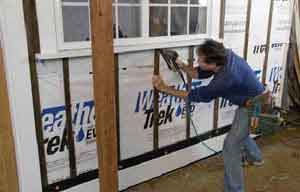
Finally, we installed corner boards and intervening furring strips (see photo on the top of this article), and the wall was ready for siding.
Well Worthwhile
Material and labor costs for the rain-screen wall were not excessive. On an average home, a rain screen might add $2,000 to the cost, but the savings in maintenance and the increased longevity of the exterior paint more than compensate for the additional investment.


