Most of my homes I build on spec—on single lots or in small tracts of land I develop—or I work for other developers. For all these projects, I have to deliver a solid, durable building with appealing finishes that will attract home buyers, and stairs are one of those interior finish details that buyers always notice. It doesn’t pay to skimp here, but with my business model, it also doesn’t pay to fuss over details, waste any time, or overspend on material; I have to work out efficient production systems and strive towards simple, elegant craftsmanship. With stairs, I have developed a system that provides a clean look and a rock-solid carriage. No squeaks allowed or my reputation dies.
Site-built solution. Arguably the fastest set of stairs would be prefab units, but these can be problematic. We can’t install them until the house is dried in, so we have to rely on ladders for the framing phase. Once installed, they must be protected, and wet boot traffic and falling point loads present ongoing risks. Any custom detail, such as having the first step wrap around the wall, is extremely difficult on prefab units, whether you try to preorder this level of detail or retrofit the unit in the field. Instead, we build the carriage at framing to use throughout the build, and then complete it during the finish phase. We typically build our stairs 3 feet 6 inches wide. This is wider than code requires but is more comfortable, and we don’t have to worry about a wall-mounted handrail projecting into the walk-line of the stair, which the inspector might flag as a violation.
We cut three stringers from 2×12 SPF. Each stringer that runs along the walls we secure to a 2×4 that runs along the rake of the stairs. This 2×4 creates a space so we can slide drywall and a skirtboard past the ends of the treads and risers—finishing off the stairs without having to scribe skirtboards. The skirts are simply ripped to width so the plumb cuts at the top of the stairs match the height of the baseboard used throughout the house.
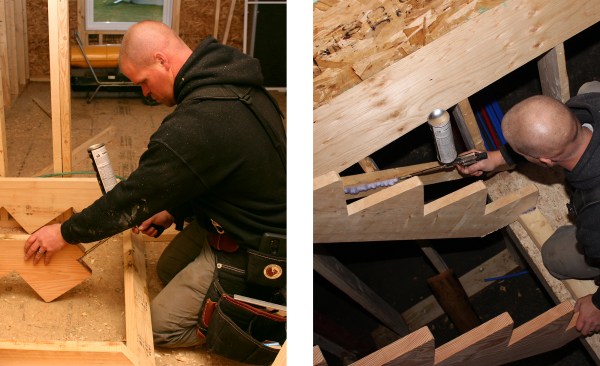
The author applies gel-foam adhesive to the cleat-to-stringer connection before lifting the stringer assembly into the rough stair well (above left). He also applies gel-foam adhesive on both sides of the 2×4 stringer spacer prior to fastening off the stringer assembly (above right).
Stair squeaks can happen with any wood-to-wood contact in the carriage. To eliminate these, all of the framing for the carriage—every wood-to-wood connection—is glued together with the same AdvanTech gel-foam adhesive we use for gluing down subfloor. This includes gluing the 2×4 runner to the studs and gluing the stringer to the 2×4, and gluing down our 3/4-inch AdvanTech subtreads to the rough stringers. We install these subtreads permanently. Yes, these are used throughout construction, but we don’t bother tearing them out when we’re ready for finish. Instead, we install our finish treads right over them.

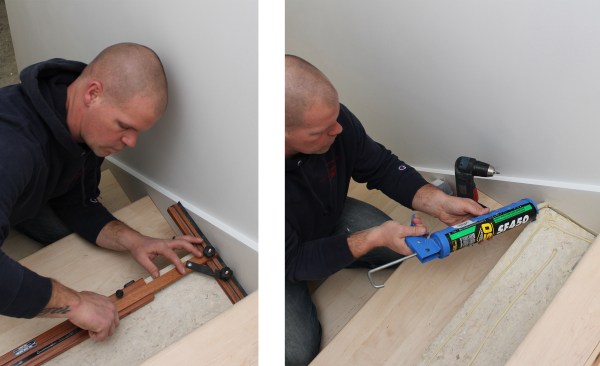
He uses the same adhesive on the carriage (above left) to secure subtreads before nailing them off (above right).
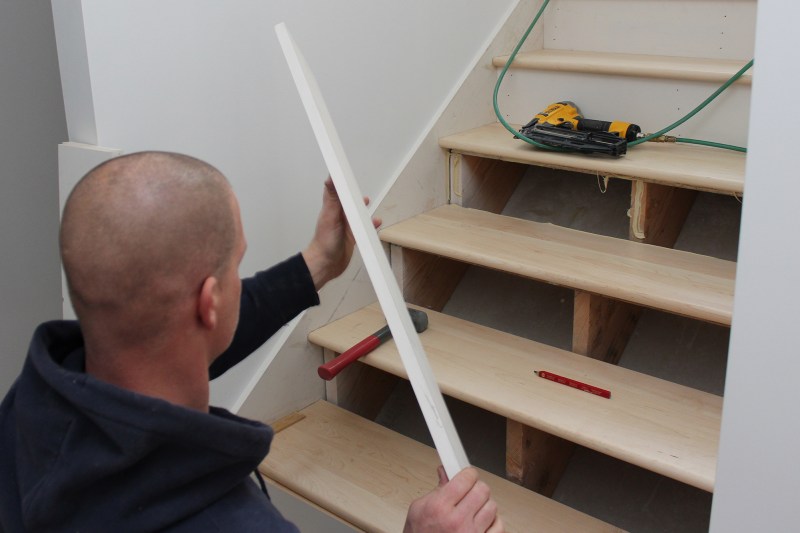
Fast finish. Finish treads and risers butt the skirtboard, which means we have to be dead-on with our end cuts. For this, we rely on the Stair Wizard (from DNB Tools for about $200 on Amazon). This is an adjustable template that has ends that swivel. It’s a precision tool with a lot of adjustment and nice, non-marring contacts, so we can create exact cuts to butt the painted skirtboards. We use well-seasoned, 1 1/8-inch maple treads, which the painter prefinishes with polyurethane. I have built stairs this way for years and never had a callback. I also built the stairs in my own house this way and have had the chance to watch them after several years of seasonal changes and have never witnessed joints opening up.
A Stair Wizard proves essential for laying out custom-cut treads between finish stringers (above left). Working from the top, he applies construction adhesive to the subtread prior to installing the finish tread (above right).
We secure the finish treads to the subtreads with either OSI SF450 or Loctite PL Premium construction adhesive. I prefer the Loctite if I can get it. We typically work from the top of the stairs, gluing the treads to subtreads and clamping them in place, then screwing from below through the subtread with a right-angle drill. We typically use epoxy-coated decking screws. Here, the screw finish doesn’t matter; we’re inside. But these screws slide in easily and are made to drill into the wood without predrilling.
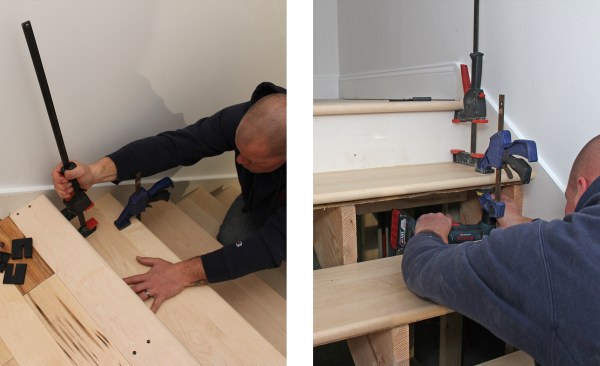
The finish treads are clamped in place (above left), then secured with screws from underneath using a right-angle drill. Fastening from underneath eliminates the time that would be needed to countersink, cut, and finish wood plugs (above right).
Prepainted risers go in after each tread. We glue these with construction adhesive, as well, before nailing them off.
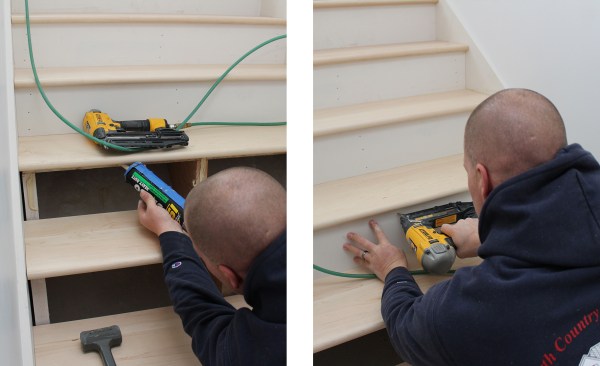
The finish paint-grade risers also get construction adhesive (above left) before they’re nailed in place (above right).
Securing treads from underneath saves all the time of having to countersink, cut, and install plugs, which can be a slow process if you pay attention to match and align the grain. I vastly prefer the clean look of no visible fasteners. Crisp, clean, and well executed is what we strive for throughout the house.
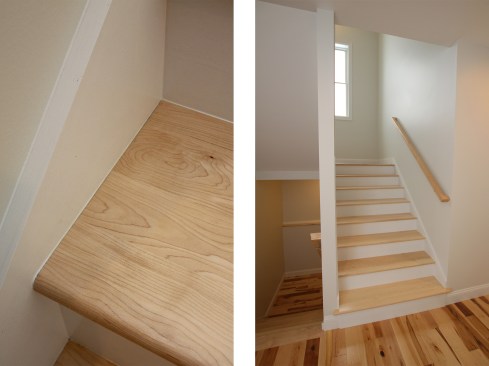
The result is a clean hardwood tread married seamlessly to painted trim and risers (above left). The marriage of hardwood to bright, painted surfaces carries through to the floor, handrail, and walls (above right).
Photos by Tim Healey


