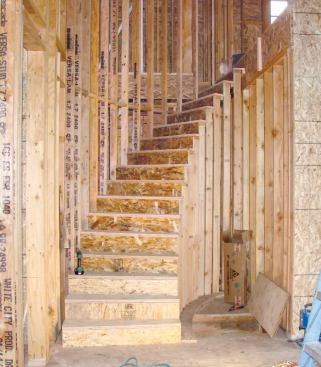

A local builder asked me to take a look at the stair design for a house he was framing. He wanted something beyond the conservative straight-run stairs the plans called for. Looking at the available rectangular space – an area about 7 feet wide by 10 feet long – it occurred to me that an elliptical stair might be a good solution.
I had framed a number of radius stairs using a method presented in JLC years ago (see “Framing a Radius Stair,” 2/93), in which pony walls fan out along the curve of the stair to support the treads. I knew if I could cut out the elliptical stair pattern in plan view that this approach would work well: It’s straightforward and strong, and not as fussy as a freestanding staircase. I suggested finishing the inside and outside walls with drywall and plaster, and using a custom metal handrail.
Building the Trammel
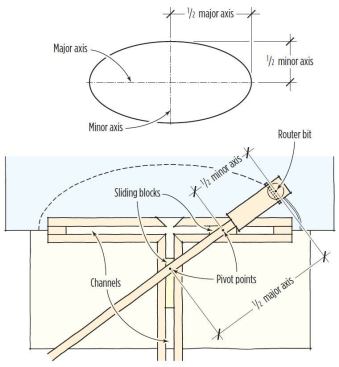
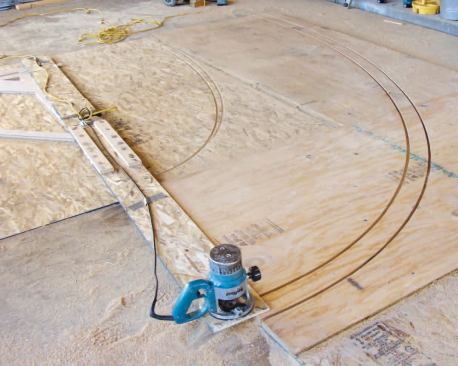
I did some research online and found plenty of information about the trammel of Archimedes – a device that uses sliding blocks attached to a pivoting arm to transcribe an ellipse. With a router attached to the end, I could scribe and cut the ellipse in one sweep.
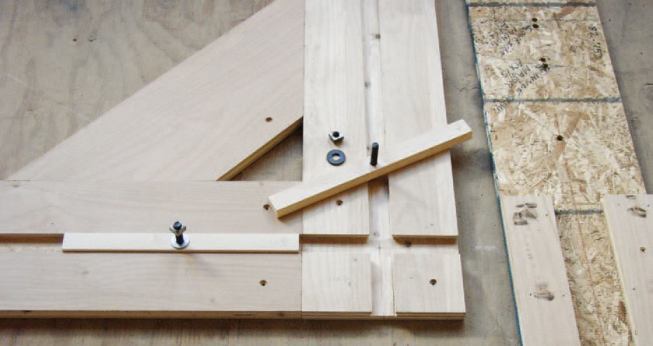
I made my trammel from 3/4-inch birch plywood scraps, some rock maple, and two 3/8-inch plow bolts with nuts and washers. I carefully cut the parts square, then glued and screwed them together. The wedge-shaped ways, ripped from the solid maple, were sanded smooth and had just enough play to slide freely. I also made them a little proud on top to prevent the trammel arm from clamping down against the plywood frame.
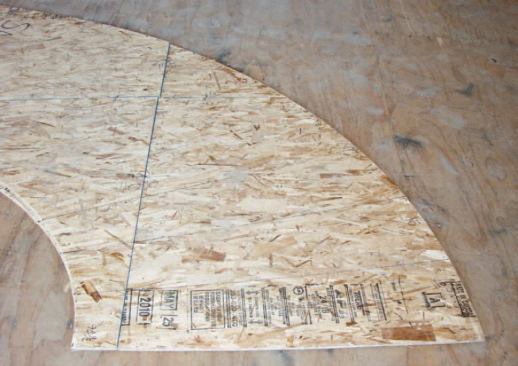
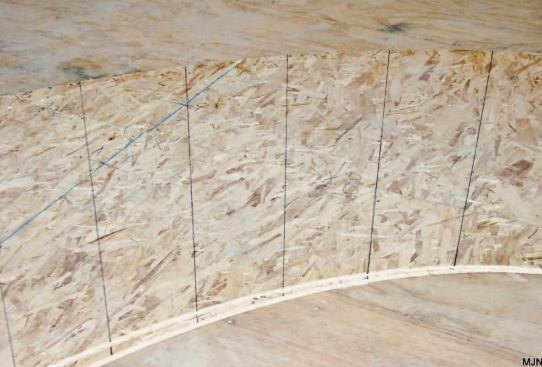
I first roughed out the stair pattern in OSB, setting the router to take light passes until I got the correct swing. As I repositioned the router from the inside perimeter to the outside perimeter of the stair, it took a little fussing to get the router bit exactly where I wanted it. I used math at first but found it was faster to simply position the router at the starting point in the OSB and drop the bit through exactly where it needed to go.
As I calculated the tread-riser relationship, it became obvious that in order to keep riser height to a safe 7 5/16 inches I would need one more step than would fit into the rectangular area. So I simply added a step at the bottom, meaning the stair is one tread more than a quarter ellipse. (Though my trammel was made to cut a quarter ellipse, it would be easy enough to make one to cut a half ellipse, for arches; see “Giant Jig for Big Ellipses,” On the Job, 9/08.)
There are a number of formulas you can use to determine the perimeter of an ellipse, which I needed to determine the width of the treads at the inside and outside of the stair. I broke out the math books and did the calculations on paper, but found that it was easy enough to hold my tape along the edges of the pattern and take the measurement. It turned out that the field measurement was very close to the calculations – within 1/8 inch overall.
Cutting the Plates
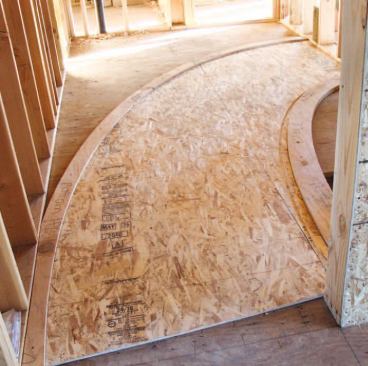
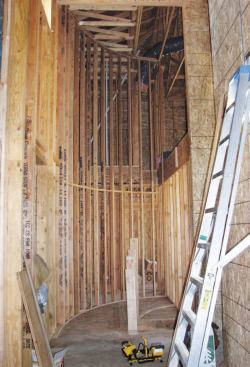
Once satisfied that I had a workable footprint and that the tread dimensions complied with our local code, I cut the plywood bottom plates for the walls that would enclose the stair. I set the OSB patterns in place in the stairwell, positioned the plywood plates, and transferred the tread locations from the OSB to the plates. The builder, Alex Abassinnia, made a duplicate of the outside plate and, using a laser for layout, attached it to the ceiling joists 20 feet overhead to facilitate the framing of the tall outer wall. Alex used engineered studs so the wall would be straight and plumb, and placed blocking at midspan; his framing followed the marks on the plates. This process required the use of pipe staging, and had to be completed before the stair could be built. A support post also had to be removed at this point, and a header reframed.


