
I’ve renovated professional sound studios and worked on a fair number of condos in which the party wall needed lots of attention to keep neighbors neighborly. But even in a single-family detached home, there are some relatively easy ways to control sound that will make life much more pleasant for the occupants. Whether it’s a media room, home office, master bedroom, meditation room, or home theater—on almost every home I build or remodel, my clients ask me to soundproof at least one room.
When you’re trying to limit sound transfer through a building assembly, the goal is to do two things: Limit vibration of building materials and limit air movement. Sound moves as waves through air. When the waves hit a wall, they vibrate the wall materials. The sound waves will also move through any cracks and gaps. So the two basic approaches to stopping sound are to isolate materials so vibrations can’t transfer from one to the other and to seal up air gaps to limit air movement.
To achieve these goals, here are the usual methods I employ—for example, between a master bedroom and an adjacent bedroom, or between a child’s room and the master bath.
Staggered studs. This is a common method of building a quiet wall. We use 2×6 top and bottom plates, and then fill in the studs with 2x4s on a 16-inch-on-center layout, offsetting the layout by 8 inches. You essentially get most of the benefits of two walls, but it is a lot easier to build. When sound hits one side of this double wall and starts vibrating the drywall and 2x4s, that vibration does not transfer to the other side. Sound can transfer only at the plates, an area that’s not very significant compared with the entire surface area of the wall.
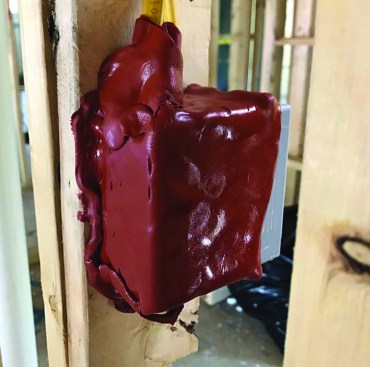
All the holes in electrical boxes in the wall must be sealed. Putty pads provide an easy way to do this quickly and effectively.
Sealing electrical boxes. With codes typically requiring outlets every 6 feet, it’s hard to have a bedroom wall without an outlet. But electrical boxes have a lot of holes in them for all the wires to poke through. You also end up with a hole in the drywall around the outlet. All those holes need to be sealed to prevent sound from freely passing through them.
For sealing outlet boxes, we use putty pads. These are made for fire stopping in commercial applications, but they work well for soundproofing electrical outlets. I like the thick red pads from Hilti (CP 617) the best. We get them at commercial supply houses or the Hilti store; they are much better than the thin ones sold at big box stores. The Hilti pads are 6 inches by 7 inches; we center them over the back of the boxes and fold the edges over the sides of the box. The material has a consistency like Silly Putty and effectively shuts down the air flowing through all those holes that might otherwise carry sound.
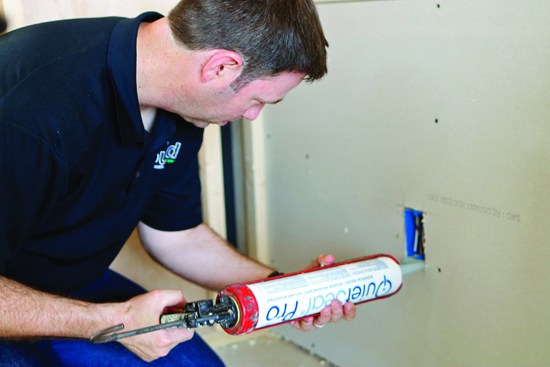
Once the drywall has been installed, you also have to go back and use an acoustical sealant to seal between the drywall and the box to complete the installation. We have had good luck with the Noiseproofing Sealant in St. Gobain’s Green Glue line or QuietSeal Pro, which is part of the QuietRock line. Acoustical sealant stays flexible; it won’t set up and get hard. This flexible seal not only stops airflow, but it also isolates the electrical box from sound vibration coming through the drywall.
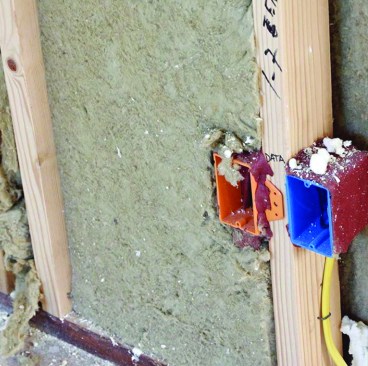
Insulation also helps absorb sound; Rockwool Safe'n’Sound batts work well.
Soundproofing batts. Before the wall is enclosed, we insulate the wall cavity. Fiberglass batts will work; wet-spray cellulose works better, but it’s not that common. We’ve had the best results with Rockwool (formerly Roxul) soundproofing batts, which are denser and specifically designed to absorb sound.
The three steps outlined above will do a lot to limit sound transfer through a wall assembly and can be done with minimal investment. To take sound control a step further—for that condo party wall or a home theater, for example—we will add a second layer of drywall that is acoustically separated from the first layer.
Double drywall. The most cost-effective way to add a second layer is with Green Glue (greengluecompany.com), a compound you squeeze out of a caulk gun in a zigzag pattern onto the back of the drywall. This material stays flexible over time and helps dissipate sound energy from one sheet of drywall to the next.
Green Glue can be effective, but you have to get the details right. You need to use two full tubes for each 4×8 sheet of drywall. You can’t skimp on the amount. You also need to do a careful job of sealing the edges of the first layer of drywall with an acoustical sealant. When applying the acoustical sealant, apply lots of pressure as you squeeze it out, pushing the sealant into the crack between adjacent sheets or between the first sheet and the subfloor. Here again, don’t skimp on material.
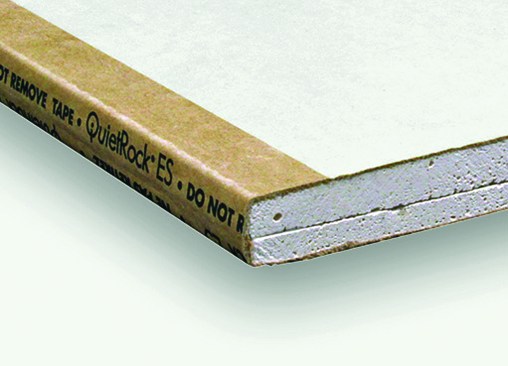
QuietRock panels provide one way to further decrease sound transmission.
I have also used QuietRock (quietrock.com) effectively. This system essentially uses double sheets that have been pre-bonded together, so you cut down on the installation time. Each sheet is installed with acoustical sealant around the perimeter, so it’s not as fast as installing one layer of conventional drywall, but it’s faster than bonding two layers with Green Glue.
All photos by Matt Risinger


