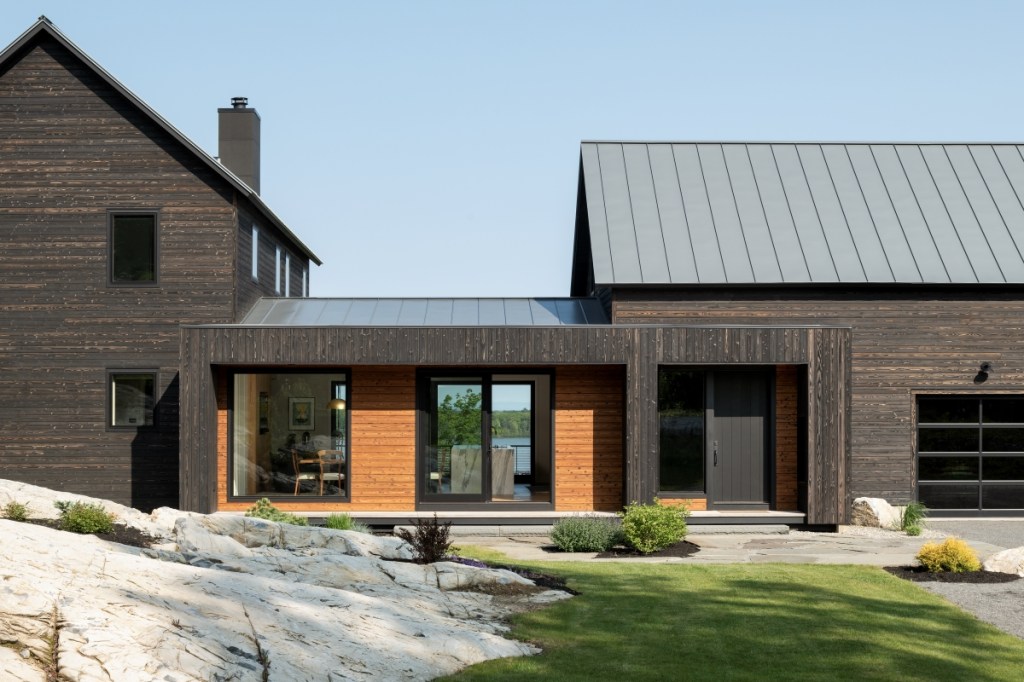
Flame-treated wood siding known as yakisugi in Japan (and sometimes shou sugi ban in other parts of the world) is a centuries-old material that’s gaining popularity in modern designs for its natural durability and timeless aesthetic beauty with low-to-no maintenance. For contractors working with yakisugi for the first time, a successful project depends on a few key considerations.
Material selection can be complex and nuanced
Choice of product will impact a range of variables:
- Sustainability (material and installation)
- Aggregate cost
- Siding aesthetics (color, tone, texture)
- How it weathers over time
- Maintenance
- Jobsite logistics
It is important to get samples and consider mockups before signoff. Start with a broad range of smaller-sized samples. As choices narrow, request larger swatches until the decisionmaker is satisfied. Keep in mind:
- Darker siding offers high contrast in the day and disappears at night.
- Many customers expect to purchase traditional black (unbrushed) yakisugi, but end up purchasing a brushed product that shows more wood grain.
- Optional coatings impact weathering on a range between more colorfast and an ever-evolving surface patina.
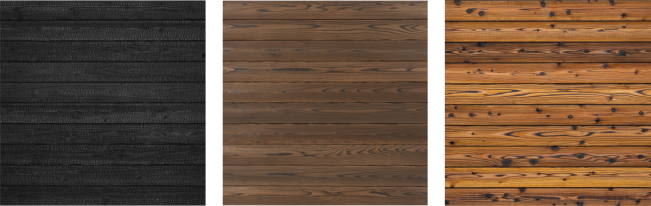
Three variations of Nakamoto Forestry’s yakisugi. From left: Suyaki (unbrushed), Gendai (brushed once), Pika-Pika (brushed twice).
Vent screen wall assemblies; use rigid furring
As with any cladding, modern sheathing and weather-resistive barriers (WRBs) necessitate a screen wall assembly. To prevent waviness in the wall plane and allow for future maintenance, it is also important to install yakisugi siding over rigid furring and to use headed face fasteners.
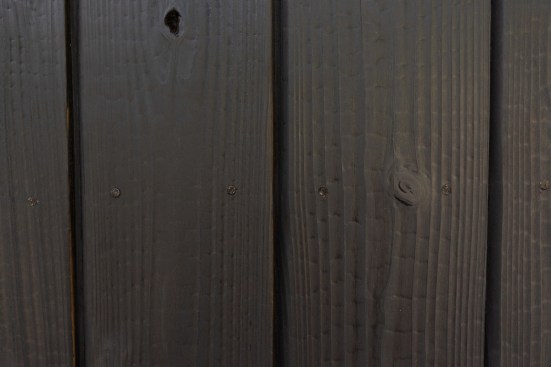
Photo by Nakamoto Forestry
Remember that venting is just as important as drainage; the screen wall airgap must be 3/8” or more. Mesh, dimple, or pleated drainage underlayments generally do not allow for sufficient venting and may cause waviness in the wall plane due to compression.
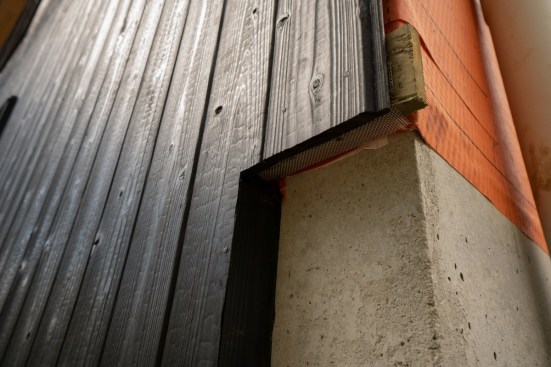
Photo by Nakamoto Forestry
Horizontal layouts are easy since vertical furring supports ventilation and siding attachment. Vertical layouts are typically more expensive. These require either engineered furring with cross ventilation, or double-strapped grid furring with a vertical furring bed for venting and a horizontal furring bed for siding attachment.
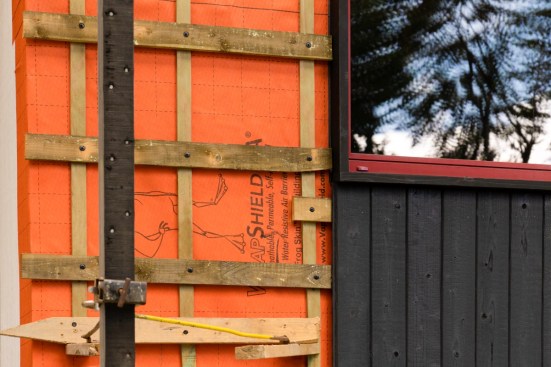
Photo by Nakamoto Forestry
Install the siding intentionally, one section at a time
Yakisugi should be acclimated onsite in the immediate installation area and stickered for ample airflow. Keep boards slip sheeted and out of the sun and rain until installation.
Plan bond lines and layout in advance, mapping out each wall section. Butt joint and bond line layout and details should be intentional. Every board has a unique color, tone, and grain pattern. Decide whether to mix tones for a more random appearance, or to sort sections by tone for a more uniform appearance.
- Paint field cuts, rips, and notches before installation.
Start each new wall section by tacking the boards in place, then nail off in a straight line. Install on the sequential setting; do not bump nail. Use a rubber nose bumper wrapped in electrical tape and keep an extra on hand. After a wall section is nailed, hand-tighten the siding to the furring with a hammer.
- Flush nail; minimize hammer moons. Screws can be used if preferred.
- Protect the walls from abrasions. Touch up blemishes after installation.
- The last step is washing the siding down with water to remove residual soot and sawdust.
Photo by Nakamoto Forestry
Visit Nakamoto Forestry to learn more about choosing and installing authentic yakisugi siding.