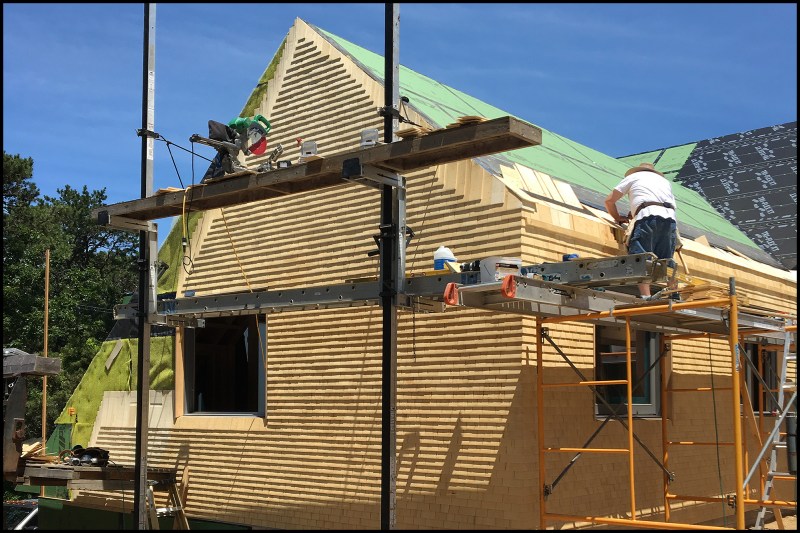
Two years ago, on a previous Cregg Sweeney Artisan Builders job, I swore I was shingling my final roof … until Cregg dangled this project, which was too cool to pass up. There was nothing ordinary about this decidedly architectural, oceanfront home, to be clad entirely in Alaskan yellow cedar shingles.
Cedar wall and roof shingles are typically installed with a standard 5-inch (or so) exposure, with window, door, fascia, and corner trim providing ready boundaries that allow the work to be completed in sections, and relatively quickly. In this case, however, the architects dispensed with all exterior trim, calling for every course to be continuous, from wall across roof and back again on the far side, with woven corners, rakes, and hips. Built-in gutters replaced roof overhangs. In addition, wall courses were called out at a mere 2 1/2-inch exposure on the plans—easier drawn than done (photo, above).
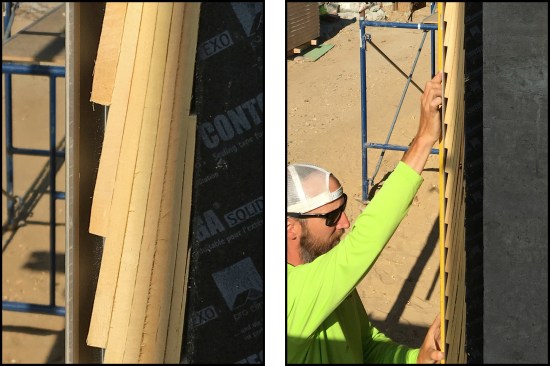
The wall shingles were installed over Zip System sheathing, a vapor-permeable house wrap (seams taped with a vapor-open tape), and a drainable rainscreen matrix. With a 2 1/2-inch exposure, each 18-inch-long shingle overlaps portions of six prior courses, constituting an unusually thick buildup (photo, above left). Stacked this deep, the pileup grew concave, requiring us to press each shingle hard into position while nailing. Otherwise, the nailer would often blow the brittle shingle apart. To ensure that the wall courses wrapped end-to-end true around the house, we relied on laser lines targeting a story pole with a common reference line (photo, above right).

Another peculiar requirement was to make sure the eaves line was equal to the plane of the interior ceiling, calling for beveled shingle butts and precise layout. Here, Cregg Sweeney and Tim Towle, of Artisan Builders, begin work on the roof’s starter course (photo, above left). Transitioning to the roof slope, the courses widened geometrically, to between 3 3/4 and 4 inches (photo, above right). However, since each roof course “inherited” and continued its adjacent wall course, no section of roof could advance beyond the highest completed wall section, so all areas had to come up in unison.
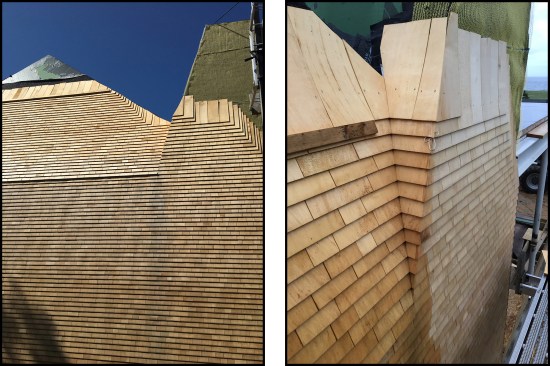
Further complicating the installation, a number of steep slopes at a gable-end wall and an adjacent flue enclosure needed to be shingled (photos, left and right).
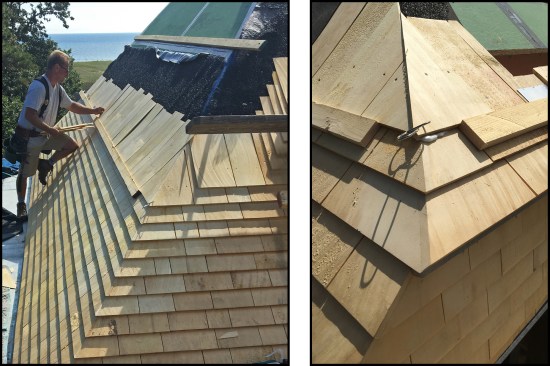
We installed the roof shingles over Zip System wall sheathing, synthetic roof underlayment, and a composite vapor-open waterproof membrane with a drainage matrix. Ice barrier membrane was installed along the eaves. We snapped lines for every course using white or yellow chalk lines, and, to avoid leaving nail holes, used 2-by shingle guides hung from thin aluminum flashing tabs, tacked with stainless staples above the exposure line (photo, above left). After a course is completed, the strip is driven downward, tearing the tabs free from the staples. It’s a neat trick. Wall corners and roof hips were woven, using white Gorilla glue, Collins clamps, and near-invisible stainless-steel pin-nails for reinforcement (photo, above right). The white Gorilla glue is waterproof and foams less, cures faster than the original formula.


