Building and remodeling contractor Jim Bradley of Caleb Contracting is doing a good business these days repairing and upgrading existing homes in northern Vermont. Bradley specializes in rehabilitation of underperforming homes with moisture problems, and in a recent conversation, he told JLC that he doesn’t expect to run out of work anytime soon. As an energy auditor, he said, “we see failure day in and day out.”
“I have to give the bad news to customers all the time,” said Bradley. “Even good, fair-minded contractors who want to do the right thing, because of not understanding proper building science and wanting to hit the lowest price point, are still creating ticking time bombs.”
Vermont’s current energy code requires an R-25 wall, Bradley explained. Builders typically accomplish that with R-21 batt insulation in the 2×6 cavities and an inch of rigid foam insulation outboard of the stud wall’s OSB sheathing. These walls are more energy-efficient and airtight than in the past, Bradley said—but he said many builders have not addressed the indoor humidity that comes along with the airtightness. The risk, Bradley argued, is mold and rot on the OSB sheathing, caused by condensation of indoor moisture during the long winter heating season and aggravated by the system’s inability to dry out readily during the rest of the year.
But most of the problematic wall systems Bradley encounters aren’t built to the latest code. Instead, they’re an assortment of assemblies constructed under earlier versions of the code, or even in the years before the state enforced any residential energy code at all. Last year, Bradley described his crew’s complete reconstruction of a double-stud wall that had experienced severe settling of its blown-in cellulose insulation (see: “Major Surgery for a Failing Fat Wall,” Jul/15). For this story, we followed the action as Bradley’s carpenters rebuilt two conventionally-built single stud walls—one framed with 2x4s and one framed with 2x6s, but both insulated originally with fiberglass batts.
Compared with the earlier double-wall house, these two examples are much more typical of recent construction. And while they didn’t show the catastrophic failure of last year’s double-wall example, they did have significant issues, Bradley found. In reconstructing the walls, Bradley followed an approach similar to last year’s example, using vapor-open gypsum board sheathing in the field, and plywood at the wall corners. But instead of blown cellulose insulation, he used Roxul mineral-wool insulation in the stud cavities, and he applied 3 more inches of Roxul over the structural sheathing—boosting the wall R-value while keeping the wall sheathing warm and still allowing vapor to escape to the outside.
STRIPPING AND REINSULATING
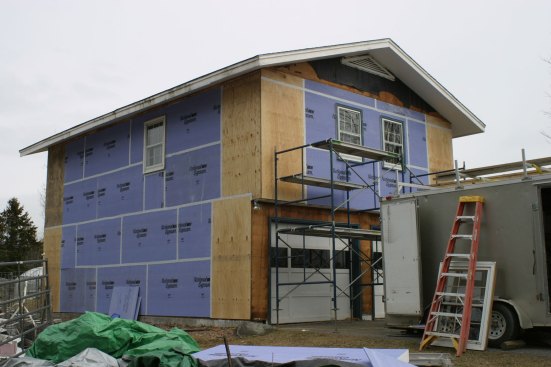
The first of our two cases is a modular house from the 1980s, factory-built with 2×4 walls, plywood sheathing, and fiberglass batt insulation in the stud bays. A few years earlier, Bradley’s crew had installed new Intus high-performance windows in one wall of the house. At that time, Bradley added a built-up exterior insulated assembly to just that wall. The customers liked the results. “They noticed such a difference over the next winter, they decided they should do the same thing to the rest of the house,” said Bradley.
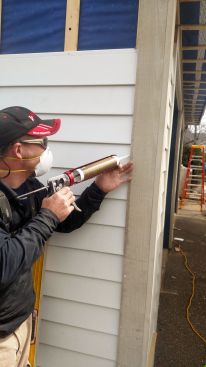
Bradley decided to remove the home’s siding and sheathing from the outside, pull out the cavity insulation, strip away any poly vapor barrier that he encountered, and reinsulate the wall cavities with Roxul mineral-wool batt insulation. Next he would resheathe the building with vapor-open materials, then apply more Roxul to the wall over the new sheathing. Then he would install a new vapor-open weather-resistive barrier (WRB) membrane (in this case, Siga Majvest), strap over that drainage plane, and attach new HardiePlank fiber-cement siding over the strapping. The result would be a vapor-open, well-insulated wall that could dry in either direction.
Before reinsulating the stud bays, Bradley’s crew did some point air-sealing of interior air leakage points such as drywall joints and electrical-box penetrations. “We didn’t really need to do that,” Bradley told JLC, “because when the wall was complete, this location would not communicate with the outdoors. “But we did it as an extra measure,” he said, “just to make sure that we reduced the potential convective effect at those points. Whenever you get a convective flow, you diminish the R-value of the assembly.”
After carefully reinsulating the stud cavities, Bradley’s crew resheathed the wall—not with OSB, but with plywood at the corners and Gold Bond eXP gypsum board sheathing in the field. The plywood at the wall corners is for structural bracing of the walls, Bradley explained, while the eXP gypsum board is chosen primarily for its vapor-transmission characteristics. Panel joints are taped for airtightness, but this step also is not strictly necessary, Bradley said, because the Siga Majvest applied later as a drainage plane, and sealed with tape at the seams, is substantially airtight.
A WARM, DRY BLANKET
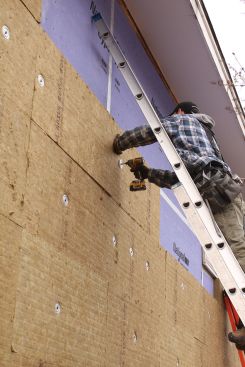
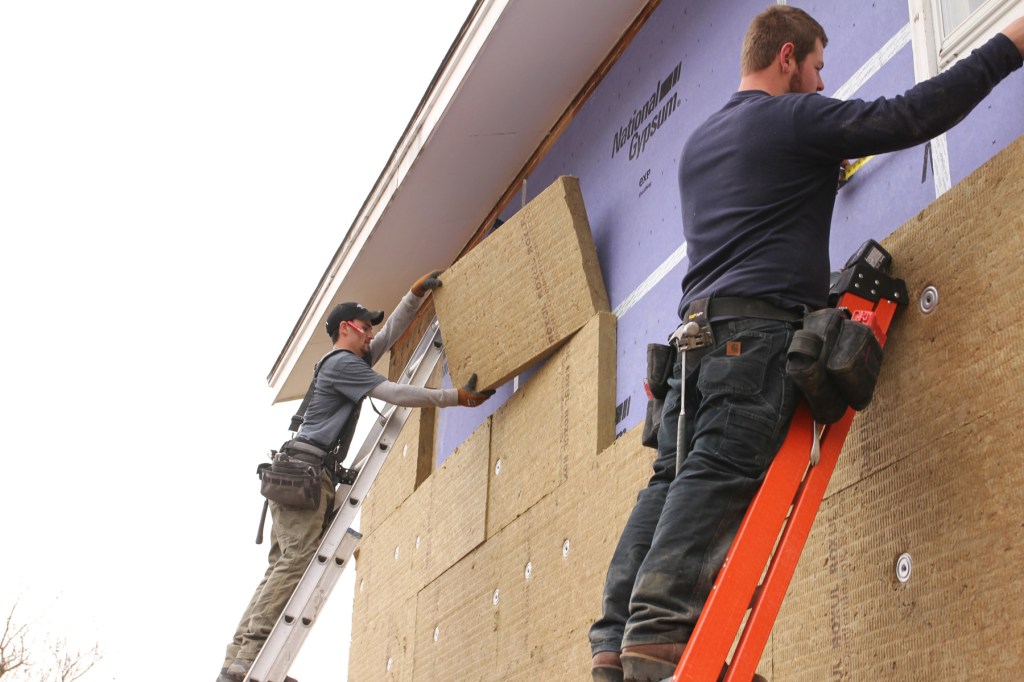
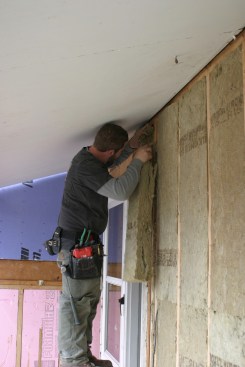
After reinsulating the stud cavities and resheathing the wall, Bradley’s crew applied another insulation layer: 3 inches of Roxul ComfortBoard. The crew fastened the ComfortBoard with long screws and washers, using just enough screws to hold the batts in place. Then they applied the Siga Majvest, taped the membrane’s seams with Siga Wigluv tape, and strapped out the wall with 1×4 strapping. To fasten the strapping, the carpenters used screws long enough to go through 3 inches of Roxul and the 5/8-inch sheathing, and sink 2 inches into the wall framing.
The Roxul in the walls’ 2×4 cavities is rated at R-15. The extra 3 inches of ComfortBoard, rated at R-4 per inch, boosts the wall’s R-value by R-12, for a total of R-27. The exterior ComfortBoard blanket also keeps the wall’s plywood and gypsum board sheathing warm, reducing or eliminating the risk of vapor condensation at the sheathing plane. And because the material is vapor-open, it allows moisture that passes through the plywood or gypsum board to continue outward and escape to the exterior. The watertight Siga Majvest membrane is also vapor-open: Rated at 68 perms, it is the most vapor-permeable material in the wall.
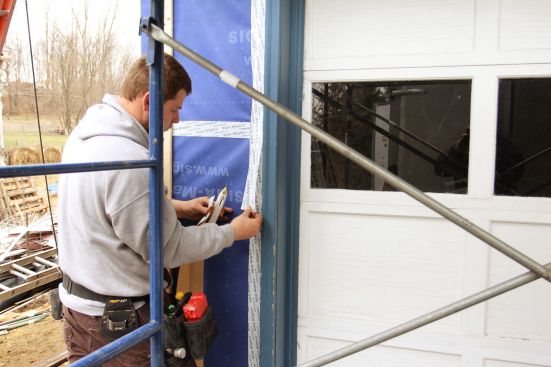
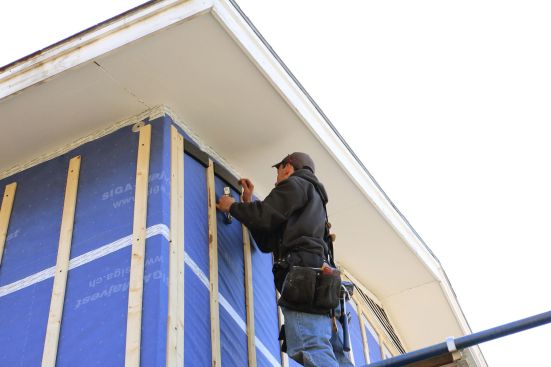
WINDOW BUCKS AND WINDOWS
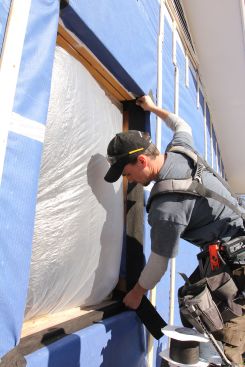
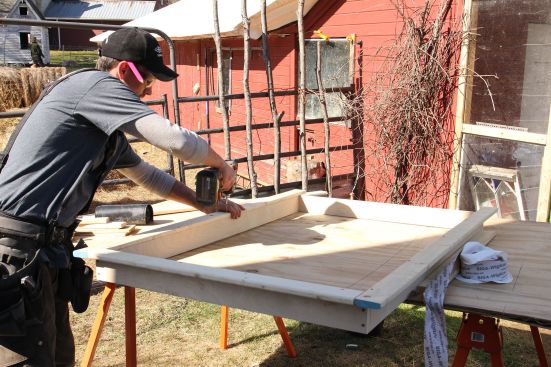
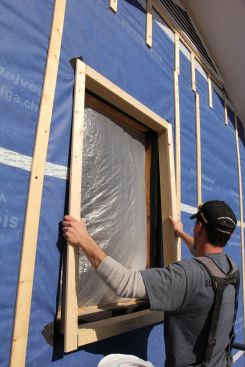

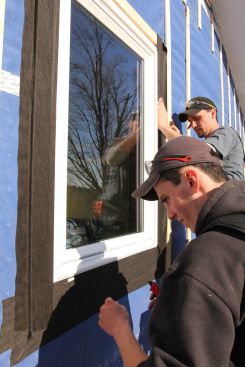
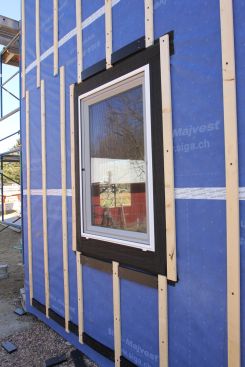
With the basic wall build-out complete, Bradley’s crew got ready to install windows. The first step was to wrap the Siga Majvest into the window openings and connect the membrane to the window’s rough framing with Siga Fentrim vapor-open waterproof tape. Next, the carpenters assembled window bucks from 1×4 stock and strapping and set the bucks into the rough openings. Then they set the window units into the openings and sealed the windows to the drainage plane with Fentrim tape.
For this project, Bradley chose Revolution windows from PVC Industries, manufactured in Clifton Park, N.Y. With triple glazing, the vinyl windows achieve an R-7 center-of-glass rating. Revolution windows have the Euro-style tilt-and-turn action that’s popular in the Passive House movement, but Bradley is able to order the units from PVC Industries with just a two-week or three-week lead time, not the months it can typically take to get high-performance European-made windows delivered to the United States. And Bradley said PVC Industries’ customer service has been first-rate: In one case, he said, the company replaced and reinstalled two orders at no charge when dual-glazed units were mistakenly shipped instead of the triple-glazed units Bradley had ordered.
Price was also a factor, Bradley said. “I have priced out double-glazed Andersen windows against the PVC Industries triple-glazed windows,” he explained, “and over a $25,000 project, the pricing between the two varied by only $300 in the total project cost.”
For this project, Bradley chose to install the windows flush to the outside face of the building. “It gives the customer a bigger windowsill on the inside,” he explained. “We have found that if we install the window more to the interior of the wall surface, and you have a bigger windowsill on the outside, it’s a great place for animals to sit. But, it gets dirty too. The building-science side is, if your window is more to the middle, it’s going to perform a little bit better. But that’s a negligible difference.”
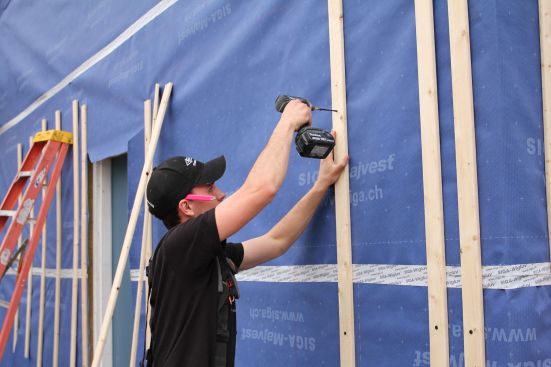
AIR GAP, SIDING, AND TRIM
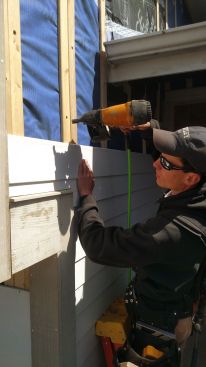
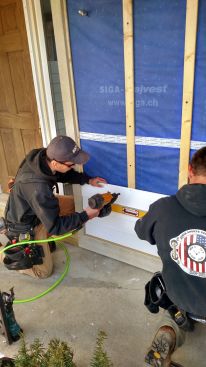
Over the strapping, Bradley’s crew applied Boral trim and HardiePlank fiber-cement siding. But first, the carpenters installed Cora-Vent at the tops and bottoms of the walls and also above and below the windows.
Bradley explained: “If your siding is directly against your house, it’s not going to allow for proper drying—whether water gets in from the outside, or vapor is coming out from the inside. It causes paint delamination and siding failure. So the rainscreen behind there is vitally important, whether you do anything else for efficiency or not. Even if you are just replacing your siding, you need to put a rainscreen in there.” Bradley recommends a minimum ¾-inch gap behind the siding to allow air convection. He installs the Cora-Vent to keep insects out, he explained: “It’s honeycombed through the vertical section, providing some structure with breathing channels, and it has felt on one edge. You install it with the felt side down at the bottom, and with the felt side up at the top.”
The HardiePlank is a prefinished, wide lap siding chosen by the customer, Bradley said. It’s important to follow the manufacturer’s instructions carefully when you install fiber cement, he noted: James Hardie’s specifications include caulking the ends of boards where they butt into the corner-board trim, but leaving an uncaulked gap, backed by flashing, at joints in the field.
For trim at the wall bases and corners, Bradley installed Boral, a composite product that is 70% recycled fly ash (a coal-burning power-plant byproduct), bound together with fiberglass and polyurethane.
Bradley likes the Boral for its water resistance, durability, and stability. “You can submerge it under water indefinitely, take it out, and cut it, and it’s still dry. It just does not absorb water. And it’s stable—a 16-foot section will only change its length by 1/16 inch no matter the temperature change. By comparison, I have a 20-foot piece of plastic trim on my house that shrinks a half inch on either side in the winter months.”
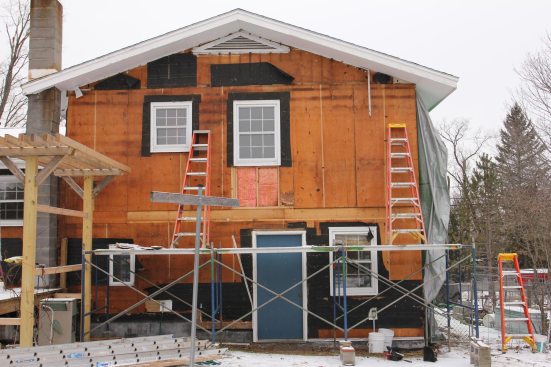
ANOTHER VERSION: INSIDE OUT
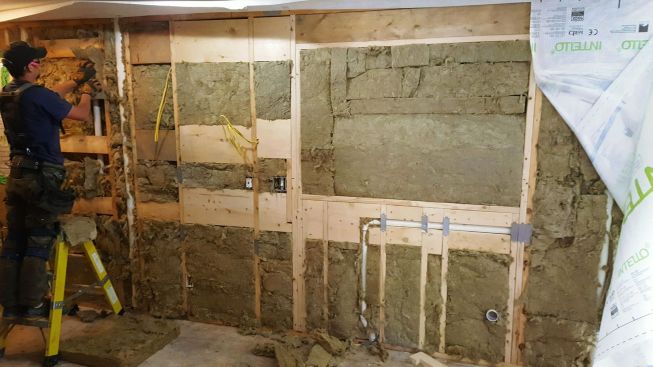
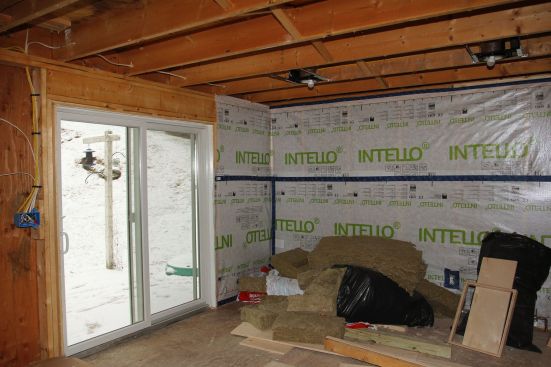
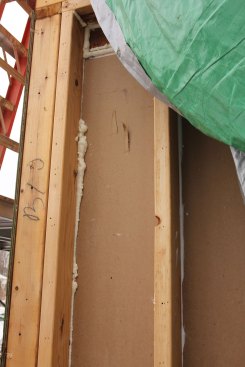
For a major remodel of another house, Bradley chose a different pathway: He gutted and reinsulated the walls from the inside out. The 2×6 wall had fiberglass in the cavities, building paper on the outside, and poly behind the drywall, Bradley reported, “and the area we opened up in the old section—and this was only 1989 construction—was full of black mold, and a lot of rodent activity as well.”
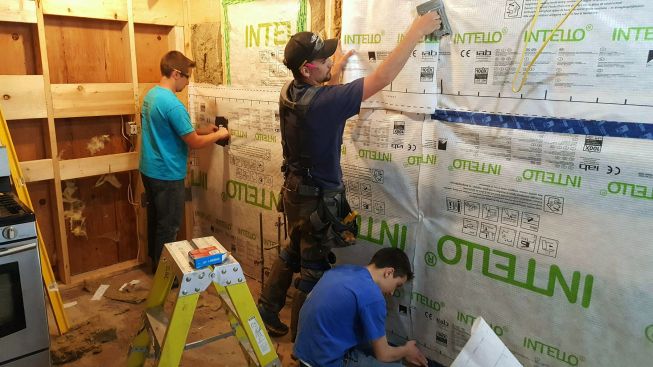
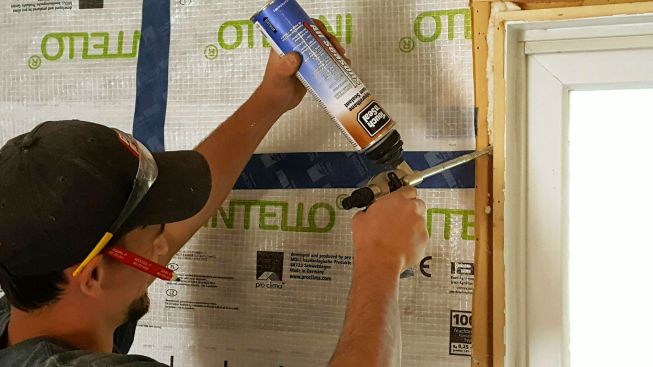
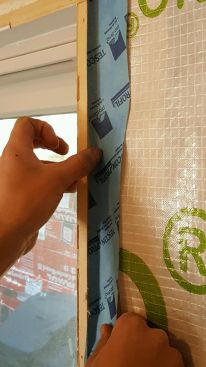
Bradley replaced only one section of plywood, which was badly damaged and behind a shower. The rest of the wall sheathing was cleaned and left in place. The cavities were reinsulated with Roxul. Then Bradley took advantage of the exposed interior to install Pro Clima Intello, a variable-permeability vapor-control membrane that adjusts to ambient conditions, keeping vapor out of the walls in winter but allowing vapor to escape into the house
during summer.
On the outside of the building, Bradley attached a continuous 3-inch layer of Roxul ComfortBoard, then covered the insulation with Pro Clima Solitex Mento 1000, a vapor-open WRB. He strapped over the Mento 1000, and then applied siding over the strapping.


