
Lee McGinley
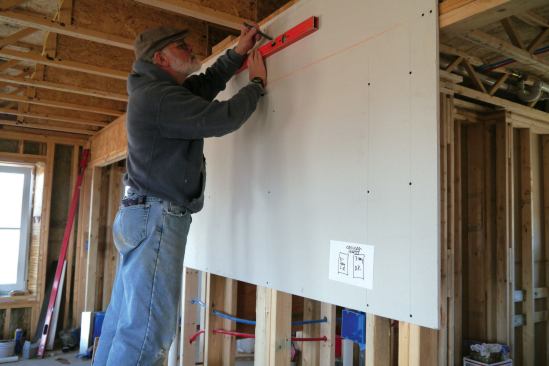
A level layout line marks the location for the bracket on which …
In 2013, Vermont homeowners installed 2,400 air-source heat pumps—or minisplits—nearly all of them in existing buildings. No doubt some people were motivated to reduce their carbon footprint, but probably, the overwhelming majority were interested in lowering their annual heating bills.
In other parts of the U.S., minisplits’ effectiveness at lowering energy bills is documented. The Pacific Northwest’s Bonneville Power Administration (bpa.gov) study showed up to 50% savings in electric consumption with minisplits when compared with zonal electric heaters. Efficiency Maine (efficiencymaine.com) promotes the installation of cold-climate heat pumps with a video featuring a couple who took advantage of Maine’s $500 incentive grant and saved 75% on their annual $2,900 fuel-oil costs when they switched to a ductless heat pump. Its website also has a chart comparing the cost of various heating options, including firewood, wood pellets, natural gas, propane, oil, baseboard electric, and minisplits.
I heated my previous Vermont house with a Buderus oil-fired boiler and panel radiators (see “Heating With Panel Radiators,” Sep/03). But with my new house, I wanted to avoid the expense of a boiler, fuel tank, and attendant pipes. And although wood heat is common in Vermont, I didn’t want the inconvenience of feeding a wood stove—or the worries about creosote build-up.
Cold-Climate Heat Pumps
Minisplits caught my attention. Also known as ductless heat pumps, they consist of an indoor “head” with a fan coil and an outdoor compressor connected by refrigerant lines. You’re probably familiar with the floor-mounted registers common to motels, the difference being that those appliances combine the compressor with the fan coils, whereas the minisplit separates—or splits—them, hence the name.
Minisplits are extremely efficient, capable of delivering—on a watt-for-watt basis—up to five times as much heat as a resistance heater. They achieve this because they do not create heat, but rather move heat from the outdoors to indoors. Since refrigerant is naturally much colder than even the coldest of outdoor temperatures, it absorbs heat from outdoors and transfers it to inside the house. In the summer, the process is reversed: Heat is transferred from inside your house to outside. Your electric bill reflects the amount of electricity used to run the compressor and fans.
Minisplits are available with a single indoor head—typically centrally located—or with multiple indoor heads serving individual rooms. I rejected the latter because they have a reputation for being inefficient (see “Ductless Heat Pumps,” Jul/12).
Online research showed me two heat pumps that would perform well in northern Vermont: Mitsubishi’s Hyper-Heat units (mitsubishicomfort.com) and Fujitsu’s Halcyon RLS2H Series (fujitsugeneral.com). The former is rated to -13°F, the latter to -15°F.
I chose the ductless Mitsubishi 12,000-Btu indoor wall unit (MSZ-FE12NA) paired with a 12,000-Btu outdoor unit (MUZ-FE12NA), in part because of its local popularity but also for its reputation as a solid product. (Since the time of my installation, Mitsubishi has released newer 12,000-Btu units—the indoor wall unit MSZ-FH12NA and the outdoor unit MUZ-FH12NA—which have minor differences from the units I installed.)
My super-insulated house has 1,910 square feet of conditioned space; R-45 walls; an R-45 floor above a crawlspace; and an R-80 attic. The calculations from the energy modeling software I use, Passive House Planning Package (passivehouse-international.org), showed a heat loss of 14,124 Btu per hour, when modeled with a heat load of -18°F.
While I could manage with two 9,000-Btu units, the 12,000-Btu units would generate nearly 5,000 Btu per hour in additional heat over the modeled heat load. Unlike with traditional AC systems, there’s no performance penalty for oversizing a minisplit system. Indeed, larger units become more efficient because the load is smaller.
My installation follows current best practices for two-story houses: Each floor has its own minisplit—consisting of an indoor head and outdoor compressor—rather than both floors being served by a single minisplit on the first floor that’s oversized to handle second-floor heating and cooling needs. This article covers the installation of the first-floor minisplit; my second-floor installation was nearly identical.
Instructions? What Instructions?
Typically, the indoor head for a single-head configuration is mounted on an outside wall with the refrigerant line set (consisting of two runs of insulated copper tubing) exiting directly behind the unit and running down the outside wall to the compressor. The condensate drain—which carries condensate (a natural byproduct of heat-pump design) away from the head—is typically bundled with the line set. Outside, this grouping is often covered with a decorative PVC line-set cover.
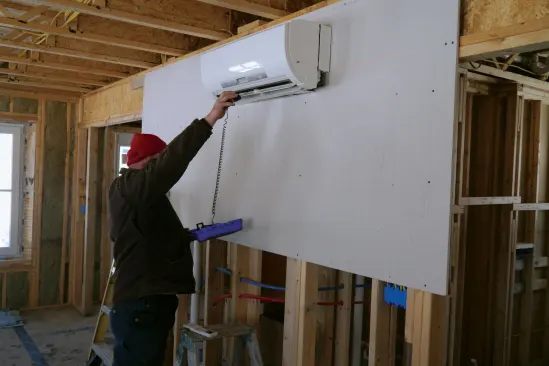
My setup was different. In order to get the best distribution for heating and cooling, I located the head on an interior wall. This presented two challenges: First, the 50-foot line set would run above the first-floor ceiling before exiting the house. Second, the condensate line would run independent of the line set and tie into the plumbing waste line, which would have to be trapped to keep sewer gases from escaping into the house.
Mitsubishi’s installation instructions don’t anticipate this alternative, and the online instructions weren’t consistent with those that came with the unit. Neither set of instructions was clear, and the drawings lacked detail and clarity. The good news is that a 15-minute phone call with my wholesaler cleared up my confusion.
I like to install mechanicals to accommodate future servicing, and I try to anticipate the most efficient way to access components that might be hidden.
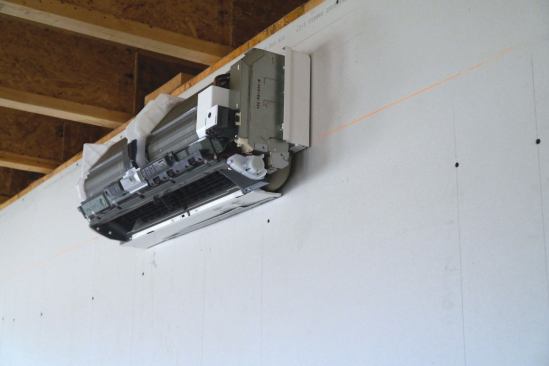
The interior head of the minisplit hangs on a metal plate attached to the wall, but the line-set connections have to be made to two copper stubs attached to the head. For an indoor head hung on an outside wall, the stubs are long enough to pass through the wall and bend downwards before connecting to the line set. First you hang the wall unit, and then make the connections.
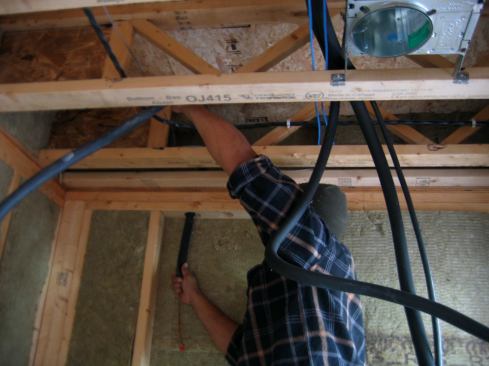
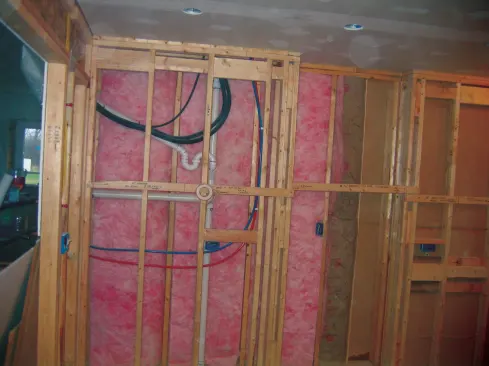
For my installation, however, the stub-to-line-set connections would need to be made before hanging the wall unit. This required two people—one to hold up the unit, one to make the flared connections. Fortunately, I’d framed a 16-inch-wide chase, built of two parallel 2×4 walls. It was intended to hide ERV ductwork and DWV pipes, but would also allow me to hang the wall head, poke the connected stubs through a partition wall, and make the rest of my connections with the head securely mounted to the wall. I left 2 feet slack in the line set so that if the unit needs to be removed for service or replacement, there will be no strain on or kinking of the copper tubing.
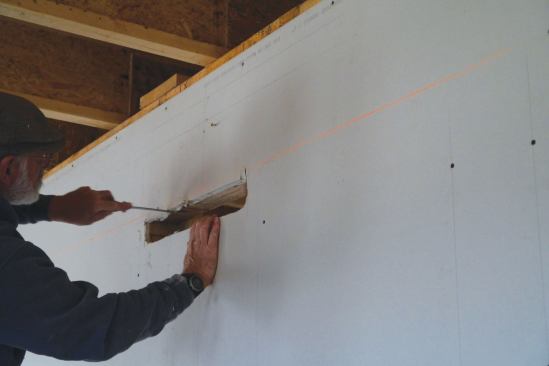
To achieve this, I broke away the knockout in the hanging plate. This allowed me to run the tubing stubs through the partition wall. I had already blocked between the studs for mounting-plate support and hung the drywall.
Running the Tubing
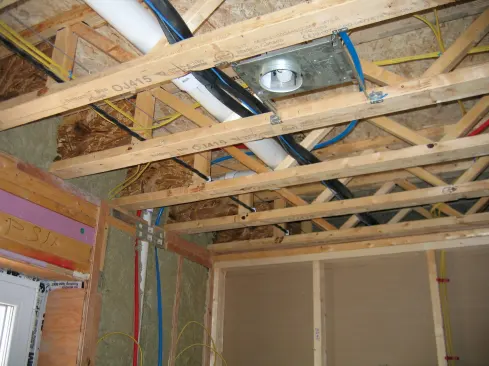
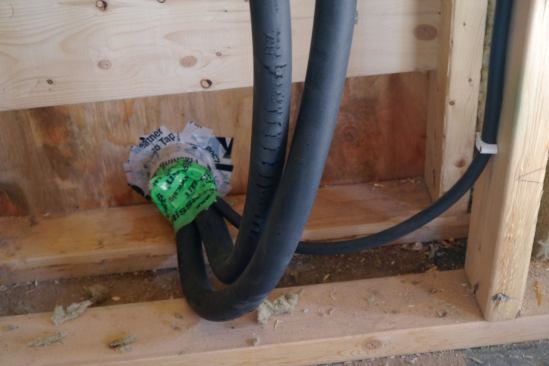
The 50-foot generic line set includes one ¼-inch flexible copper tubing and one 3/8-inch flexible copper tubing, both wrapped in 3/8-inch foam insulation. Without going into the physics of vaporizing and liquefying the refrigerant, the smaller tubing handles high-pressure liquid and the larger tubing carries low-pressure vapor. A helper and I snaked the pair through an open joist floor system to an outside wall, then bent the tubing downward before bending it again to exit the wall. We were careful not to kink the tubing. When the wrapped tubing dragged against framing members, the foam insulation easily tore; we used duct tape to make repairs.
Running in tandem with the line set is a 4-conductor wire that powers the indoor head from the outdoor compressor and allows communication between the two. I used zip ties to bundle together the tubing and wire. Where the tubing and wire passed through the wall sheathing, I sealed the wall penetration with Siga’s (siga.ch/en) impermeable, highly elastic Rissan tape.
Mitsubishi instructions call for the stubs to be insulated and wrapped with tape prior to commissioning the system. The tech that commissioned the system completed this.
Hung Up
Several considerations need to be taken into account when locating the outdoor compressor. Aesthetics is the first: Although the compressors are not unattractive, clients will not want one sitting in their front yard.
The next consideration is protection. It’s a good idea to locate the compressor on a gable end, safe from roof snow slides. If you must place it under eaves, consider a canopy roof above it for protection against falling snow and ice.
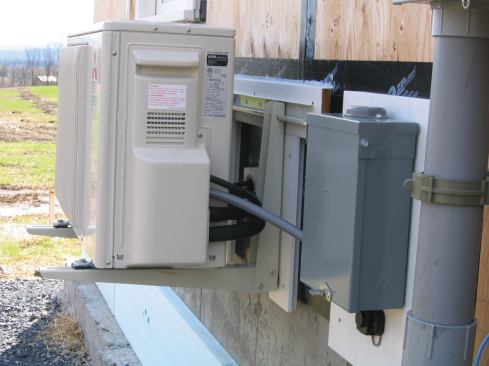
Finally, there’s a choice between placing the unit on the ground or hanging it off the wall aboveground. In snowy climates, I recommend the latter. Two feet above grade will reduce the chances of the compressor being covered with snow that interferes with its operation. If you decide to place the compressor on the ground, locate it away from a wet area and fasten it to 6×6 pressure-treated “logs” to keep it off the ground. Rubber and fiberglass risers are manufactured by Big Foot systems (bigfootsystems.com) and DiversiTech (diversitech.com).
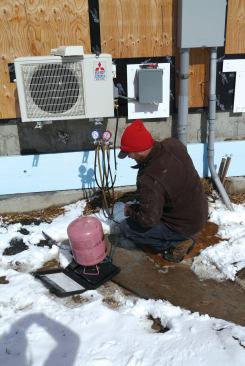
I hung my compressor on a gable end and used a bracket kit from Rectorseal (rectorseal.com). Because the compressors would be hung before the siding, I trimmed behind the brackets with 5/4 pine. I also used a through-wall sleeve (goductless.com) to tidy up the line-set wall penetration.
Typically, the condensate drain line exits the building with the line set and water trickles out when the minisplit is in air conditioning mode. (In winter, any condensate created is at the outside compressor, and it, too, empties to the ground.) Because my indoor head was located on an interior wall, I had to find another way to remove the condensate. I already had a 2-inch drain line in the 16-inch chase, so I tapped into that, installing a P-trap to keep sewer gases from entering the house.
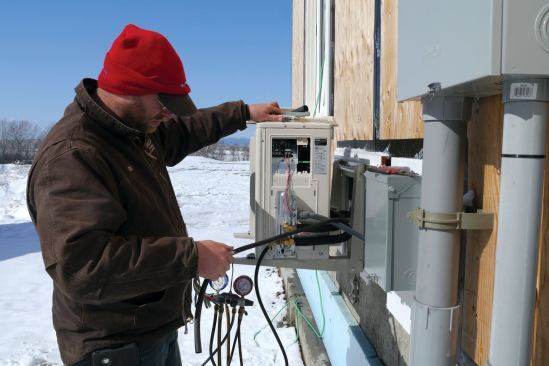
The National Electric Code requires that minisplits have their own sub-panel and that an outlet be within 25 feet of the sub-panel. Mine was sized (220V with two 20A circuits) to handle both compressors.
Saving on the Installation
Despite the initial learning curve, the units are easy to install: Mount the indoor head on a wall, run the line set, mount the outdoor compressor on a bracket. If I were to repeat my setup, it would require five to six hours (including the condensate drain), plus another half-hour for a helper to help run the line set overhead. A straight through-the-wall installation would reduce installation time by a couple of hours.
After mounting the major components, I called in a licensed refrigeration technician—required by code—to make the connections between the indoor head and line set and the outdoor compressor and line set, evacuate the lines, check the refrigerant level, and test-run the AC and heating operations. In my rural area, local qualified techs are hard to find, but my wholesaler knew a tech willing to travel and just do the commissioning, even though I hadn’t purchased the equipment from him.
Installation prices appear to vary widely, depending on location—Massachusetts and Maine seem to have lower installed prices than Vermont—and local competition. Where I live, my configuration would run between $5,000 and $6,000, not including electrical work. By purchasing the equipment myself and hanging the units, my cost, including my electrician’s bill, was slightly more than half of the lower end of this range. Compare that with a typical oil-fired hot-water heating system starting at $20,000, and the savings are impressive.
Staying Warm … and Cool
The first-floor minisplit was installed in April 2014 while I was still finishing the house’s interior, and when daytime highs were in the 30s and 40s. I wanted to evaluate the single minisplit’s performance before I installed a second one upstairs prior to moving in. From morning start-up and within three hours, the first-floor minisplit heated the downstairs to 70°F with the upstairs five degrees cooler. My super-insulated house held heat very well overnight when the minisplit was turned off. In the mornings, I walked into a 60°F, warm house.
We don’t have much humid weather in Vermont, but when we do, it’s nice to have a refuge. For two weeks in the summer of 2014—with humidity in the 90s and daytime temperatures not much lower—I set the standard-issue remote (you can also install a wireless thermostat to program heating operations) to 68°F and within a few hours I had reached the set point. But that was downstairs. As I climbed the stairs to the second floor, the humidity returned, confirming that a second minisplit upstairs was needed, at least for the summer.
Bottom Line?
My initial impressions are favorable. When heating or cooling, the indoor fan ramps up and down, and there’s a background hum, but it’s quieter than my new refrigerator. The outdoor compressor whirls away, similarly ramping up and down. Unless I open a window, I don’t hear it.
There’s some online chatter that the indoor wall-hung heads are unattractive, but they’re certainly less obtrusive than radiators or air vents throughout the house. An added benefit of the wall-hung unit is that it doesn’t interfere with furniture placement.
Aside from interpreting the instructions, the other hurdle was finding knowledgeable, local resources. Fortunately, I found someone who not only commissioned minisplits, but also had one in his house and was generous in sharing his experience.
I moved into the house in late 2014 and haven’t been in it long enough to determine annual operating costs. However, when nighttime temperatures have dropped into the single digits—and daytime temps hovered in the teens—I’ve been toasty warm. I haven’t noticed uncomfortable temperature differentials between rooms, helped by the fact that the house is virtually draft-free.
In a future article, I hope to report on operating and maintaining the minisplits, compare the advantages and disadvantages of the hand-held remote control versus the wall-mounted wireless controller, and identify hot and cold spots. I’ll also check in on cost savings compared with my previous house of about the same size. Preliminary modeling shows a significant savings.


