There is an old saying: Fools rush in where angels fear to tread. In other words, an inexperienced person often jumps into situations that a wiser, more experienced person might avoid or at least approach more cautiously. This concept is fitting for the tile industry—especially when it comes to glass tile. While glass is probably the fastest-growing segment of the tile market, it is also probably the least understood when it comes to using the right materials and techniques to create a long-lasting installation. However, with a little familiarity and a good grasp of the nuances of this amazing material, your chances of success can be greatly improved.
Glass tile has been around for millennia, and over the last hundred or so years, it has been mass produced for installation in homes. Twenty-five years ago, most of glass-tile installations that I did with my dad were straightforward, paper-faced 1×1 mosaics. And while that type of glass tile is still available, today glass tile is made in a staggering assortment of styles, colors, and sizes—each with its own specific requirements. The result is an explosion of creative and beautiful installations that could not have been conceived of just a short while ago.
I do hundreds of tile installations every year and a lot of them incorporate glass tile, used either as an accent or for all the tile in the project. I’ve worked with many varieties of glass tile, but even so, when I come across a new type or a different manufacturer for the first time, I always do my homework beforehand to make sure that the installation will be successful and that my clients will be happy with the end results.
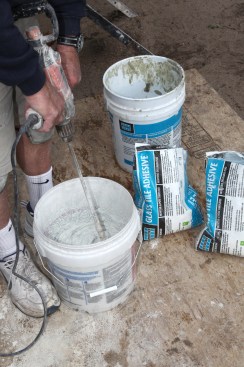
Choosing the proper mortar is never more important than with glass tile. Because of the resiliency of glass (its inability to absorb moisture) and because of the different configurations of glass tile, manufacturers usually require a specific glass-tile mortar for their particular tile.
Start With the Right Thinset
In the February 2017 issue of JLC, I answered a question about when to use latex-modified thinset mortar for installing tile. Choosing the proper thinset is never more important than with glass tile. Because of the resiliency of glass (its inability to absorb moisture) and because of the different configurations of glass tile, manufacturers usually require a specific glass-tile mortar for their particular tile. To ensure good adhesion and to maintain the warranty for the tile, always follow the tile manufacturer’s recommendations. If no specific glass-tile mortar is called for, check with the thinset manufacturer before using its product to be sure there are no issues.
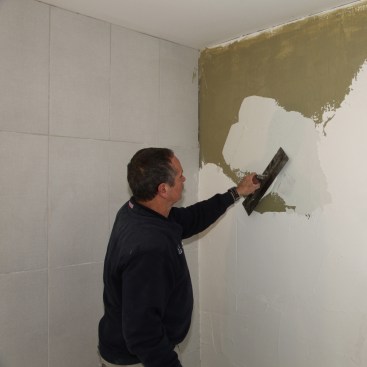
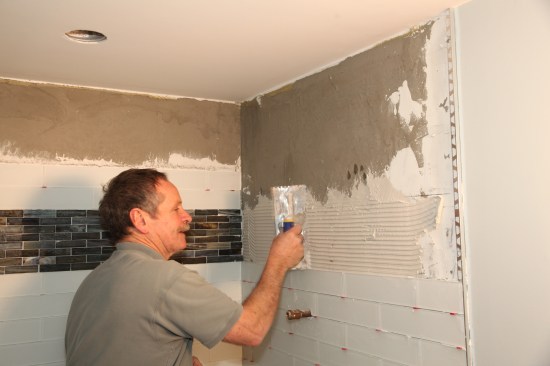
Wall prep for a glass-tile installation begins with a coating of a liquid stress-crack membrane (the dark tan layer). Then add a coating of glass tile mortar over that.
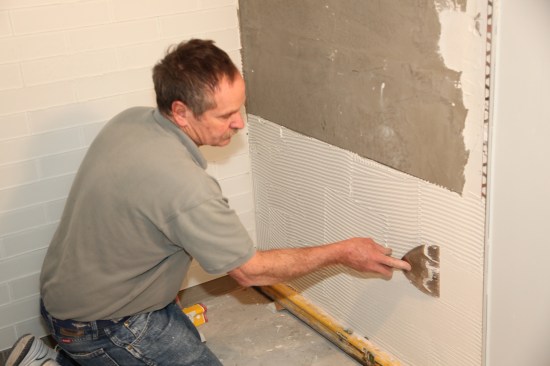
Sand down any high spots before proceeding with the installation.
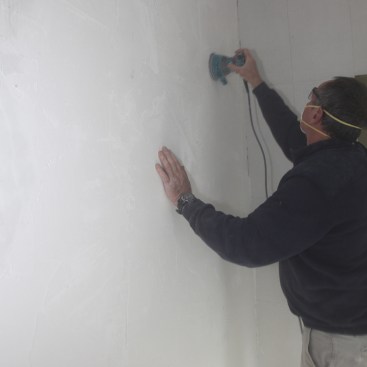
Prepping the Walls for Good Adhesion
Wall prep for a glass-tile installation begins with a coating of a liquid stress-crack membrane (the dark area in the photo), such as Hydro Ban. Tile can slip when installed on the membrane, so I add a skim coat of glass-tile mortar or latex-modified mortar. Then I sand down any high spots before proceeding with the installation.
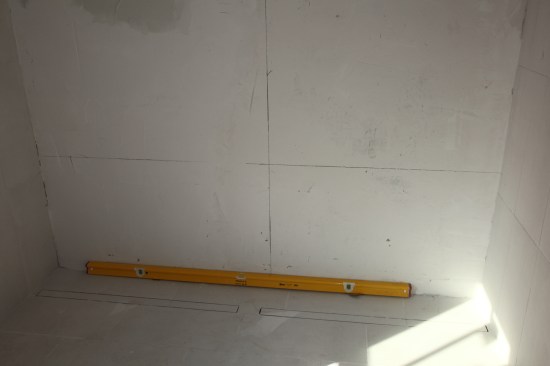
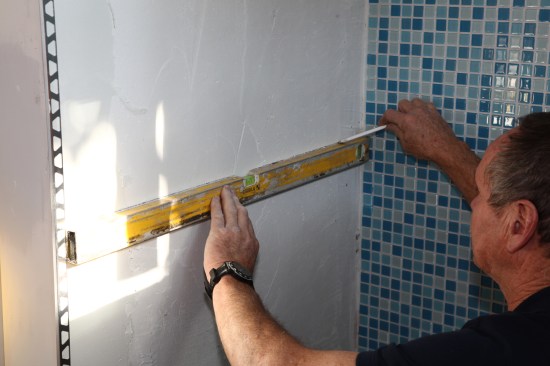
To complete the initial layout, set a level on the shower floor …
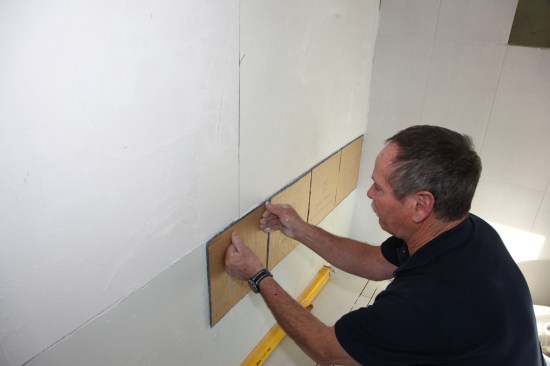
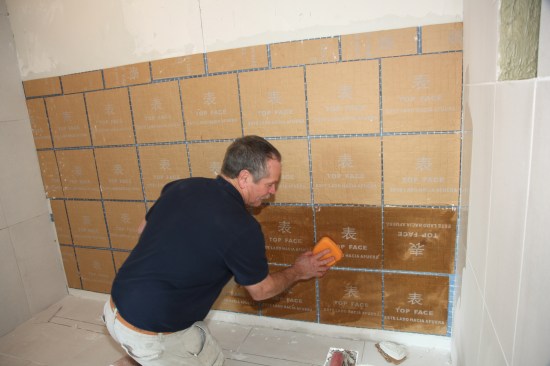
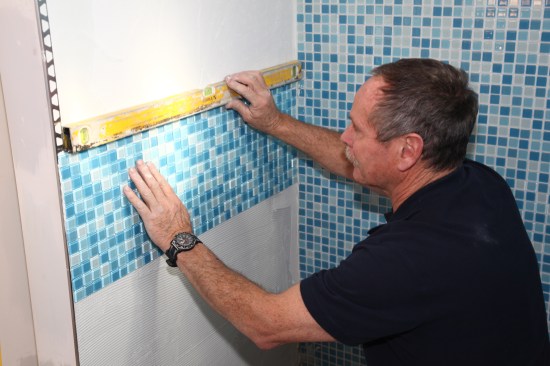
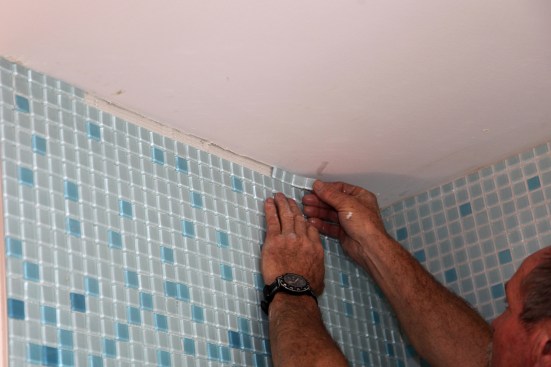
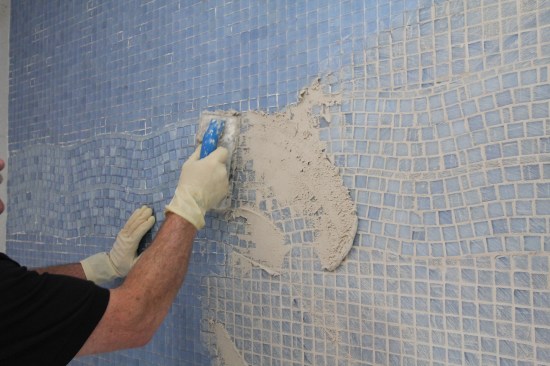
Installing Paper-Faced Translucent Mosaics
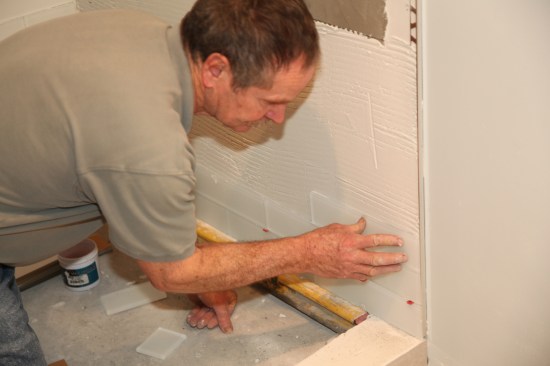
Sheets of small mosaics mounted on a paper face are one of the most common forms of glass tile. The tile is usually translucent, with no type of back layer applied. For this accent wall, the layout started with a vertical line in the center of the wall.
To complete the initial layout, set a level on the shower floor and measure up the distance of two full sheets of mosaics from the top of the level. A tile baseboard will fill in the space below the mosaic tiles after they are installed.
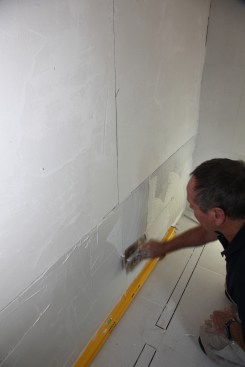
Using the flat edge of a trowel, coat the entire layout surface with glass-tile mortar before combing it with a 3/16-inch square-notched trowel. A 3/16-inch V-notched trowel would also work for this step. After combing the surface evenly, knock down the ridges left from the trowel using a flat-bladed taping knife.
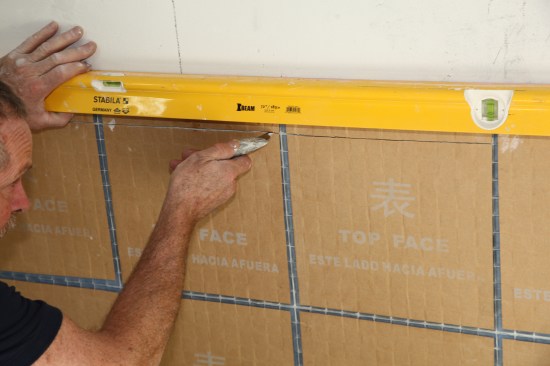
Knocking down the ridges made by the notched trowel ensures nearly 100% surface-area adhesion, which is crucial for most types of glass tile. Starting at the horizontal layout line, press sheets of the mosaic tile into the mortar, applying pressure to all parts of each sheet for good adhesion.
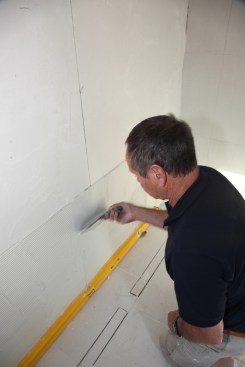
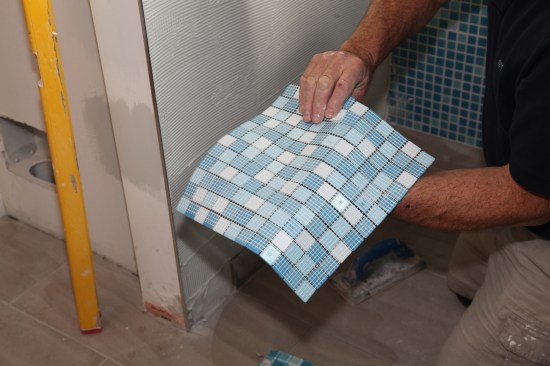
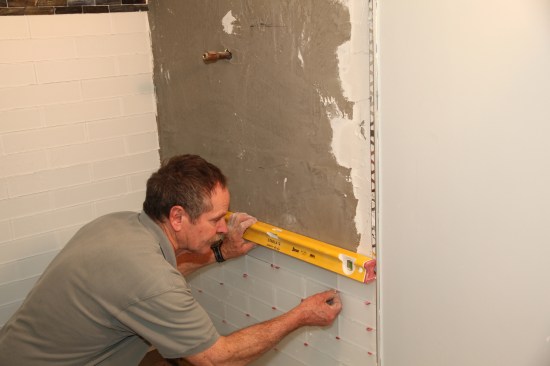
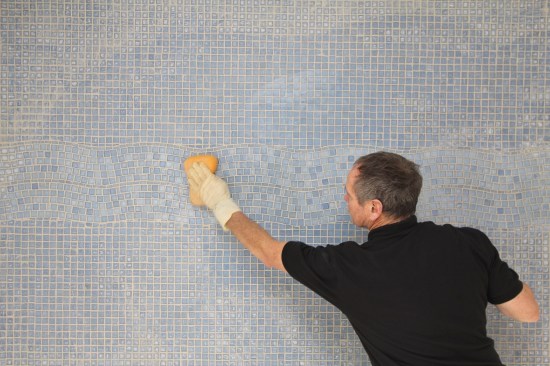
Sheets of mosaic glass tiles are often uneven or out of square, so after each section is pressed into the wet thinset, place a straightedge (in this case, a level) on the top edge of the tiles to make sure that they are aligned. If any tiles need adjusting, slit the paper with a razor knife and then either push the misaligned tiles up by hand or insert a flat-bladed taping knife into the slit to slide the row of tiles in unison. If the discrepancy is more than 1/16 inch, slit more than one row and spread the adjustment out evenly.
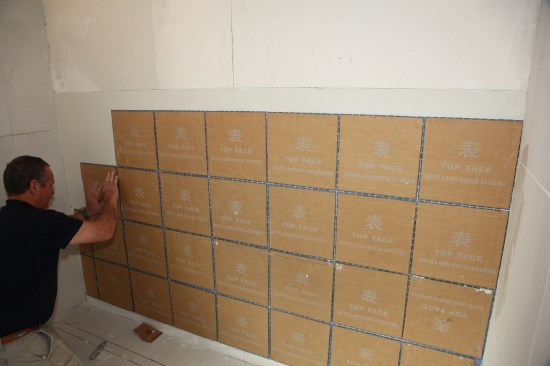
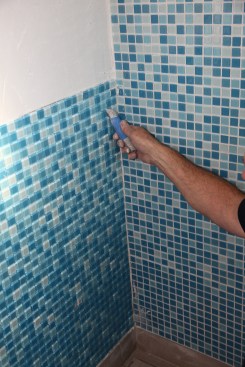
After lining up the top edge of a section, lay out the next section of tiles. In this case, the layout extended up to the edge of a decorative band, so the layout line landed two complete sheet courses plus four rows of mosaics above the finished courses below.
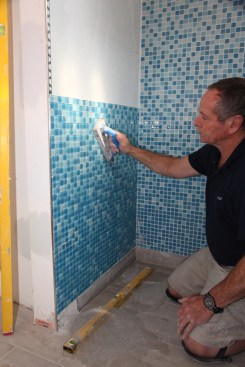
Spread the glass-tile mortar up to the line as before, combing it with a notched trowel and then knocking the ridges flat. Then press the next courses into the thinset. Note that staggering the seams of the sheets is not necessary but can be done. After each section is placed, go over it with a rubber grout float, gently tapping it flat against the tiles to completely embed them into the thinset.
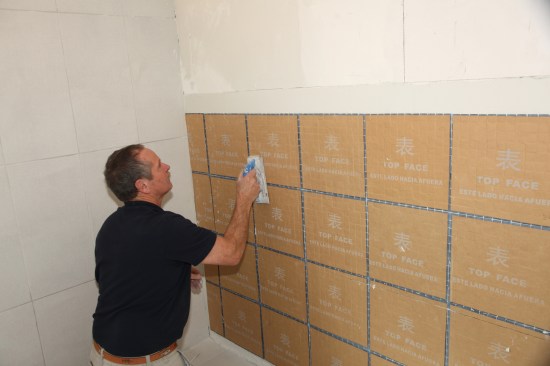
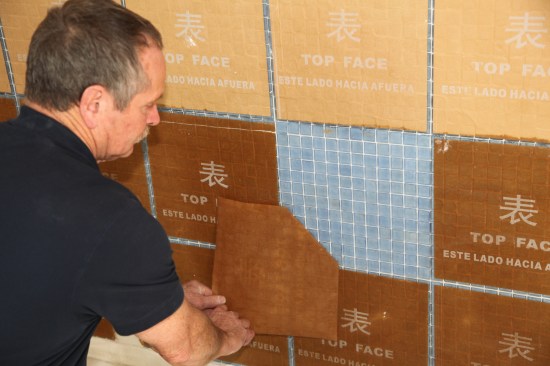
When the mortar starts to set (15 to 20 minutes after the initial installation), dampen, but do not drench, the paper face with a wrung-out sponge. Wait one to two minutes for the water to dissolve the glue, then peel off the paper. Peeling technique is critical. Start at one corner and slowly pull off the paper diagonally, keeping your hands close to the wall. Expect some tiles to come off with the paper. Butter the backs of those tiles and push them back into place.
The top of the third sheet from the bottom was used as the first…
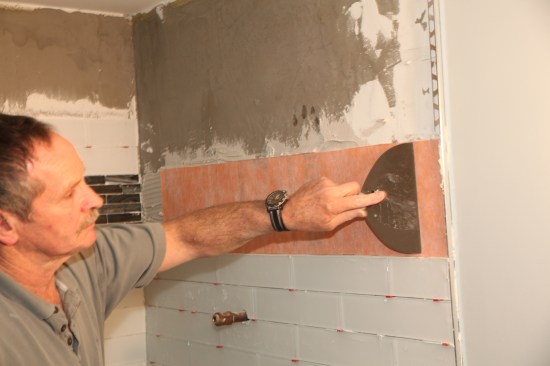
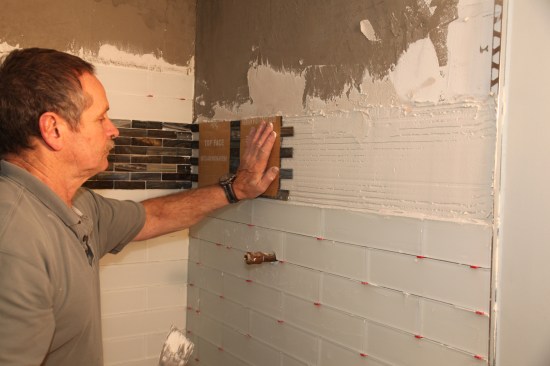
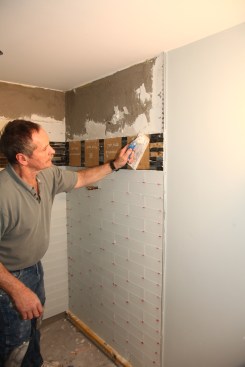
Installing Mesh-Backed Opaque Mosaics
The description “opaque” is a bit misleading for this type of glass tile. The tile itself is transparent—it’s the applied coating on the back of the tile that’s opaque. That coating also gives the tile its color.
The tile shown below comes in sets of eight vertical tile sheets; the bottom sheet of each set contains the most dark tiles while the top sheet has the most light ones. The color gradates slowly and randomly from dark to light from the bottom of the wall to the top, so it’s important to keep the numbered sheets in order during the installation.
Because the adjacent wall had the same tile, layout for this wall could be taken directly from the installed tile. The top of the third sheet from the bottom was used as the first layout line.
Apply the glass-tile mortar up to the layout line, spreading a thin layer and combing it with a 3/16-inch square-notch trowel. Because of the opaque backing and small size of the tile, I didn’t knock down the ridges, although doing so is fine.
Instead of paper, a lightweight plastic mesh holds these sheets together. Press each sheet into the thinset and move it side to side slightly to adhere it to the surface of the wall. As with paper-faced tile, check to be sure that the top edge of the tile is in a straight line. When all the tile
for a section is finished, go over the entire surface, tapping with a rubber trowel. This maximizes adhesion and helps to eliminate slippage where some tiles stick out farther than others.
To avoid cutting tiny glass slivers to fill in along a corner, adjust the tile spacing instead. First slice through the mesh backing with a razor knife. Then slide a row (or rows) of tiles over with a flat taping knife until an acceptable grout space is left along the corner. By slitting and adjusting several rows in this manner, it’s possible to make up for gaps as wide as 3/16 inch.
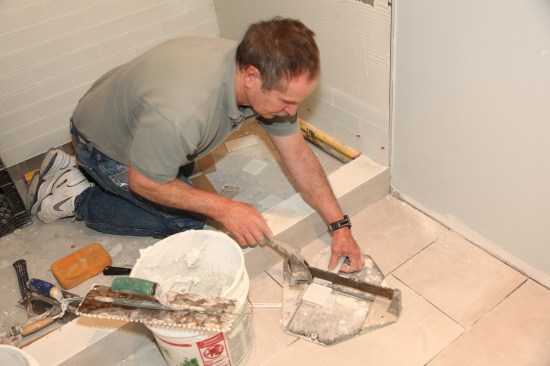
Cutting Mosaics
The best way to cut glass mosaic tile is with a wet saw. But using a glass-tile cutting blade is a must. These specialty blades can cost twice as much as a standard wet-saw blade but will give you the smoothest cuts.
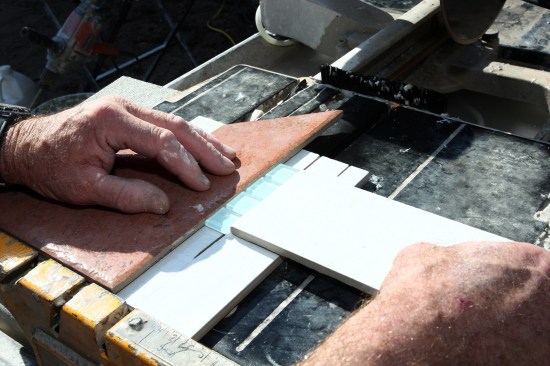
With mosaic tile, a site-built cutting jig can be helpful to support both sides of the cut and hold the tiles stationary. First, cut a saw kerf about two-thirds of the way through a porcelain tile, and use this as a base support. Then use the factory corner (red tile in this photo) to hold the mosaics parallel to the blade at the desired width, and hold the mosaics stationary with a third tile.
Don't try to cut too many mosaic tiles at once. Cutting tile for a ceiling strip, for instance, is best done a few tiles at a time.
To support both sides of the cut and hold the tiles stationary, a site-built cutting jig can be helpful. Cut a saw kerf about two-thirds of the way through a porcelain tile. Use a factory corner from another tile to hold the mosaics parallel to the blade at the desired width. Hold the mosaics stationary with a second tile.
Tip: Don’t try to cut too many mosaic tiles at once. Cutting tile for a ceiling strip, for instance, is best done a few tiles at a time.
Set the bottom of the story pole at the starting point of the la…
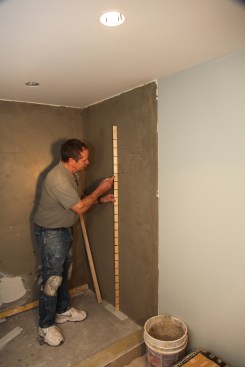
Working With Large-Format Glass Tile
When porcelain or ceramic tile is discussed, the term “large format” indicates tile that has one dimension of at least
15 inches. But with glass, because of its fragile nature, any tile with a dimension of 3 inches or more is considered large format. The tile for this shower project measured 3 inches by 12 inches and was installed in subway-tile fashion. A decorative band of smaller glass tile that mimicked green marble wrapped around the shower at chest height. The band’s location was determined by the layout of the tile below.
A story pole is the quickest way to check a layout. To make a story pole, line up and trace the edges of the tiles on a thin, straight piece of wood, leaving space for the desired grout line between the tiles. Set the bottom of the story pole at the starting point of the layout (a level straightedge) and mark the bottom position of the decorative band to break on a whole tile layout. Then set a sheet of the band tile in place and mark the top and bottom of the band.
Next check the distance from the band to the ceiling to be sure that the tiles along the ceiling will be close to the width of a full tile. Narrow slivers are undesirable from a visual standpoint as well as being problematic to cut and install. Before finalizing the layout, check the ceiling to make sure that it’s close to being level and that there aren’t any major discrepancies on the adjacent wall.
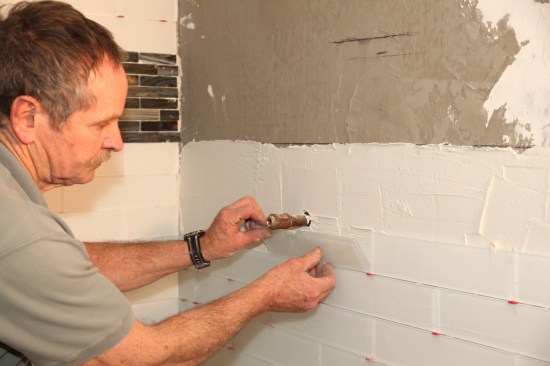
This large-format glass has a translucent applied backing, so any voids left in the mortar might show through as shadows after the mortar has set up. For this tile, spread an even layer of glass-tile mortar on the wall and comb it with a 1/4-inch square-notch trowel. As before, knock down the ridges with a taping knife. Butter the back of each tile with a thin layer of mortar, then press the tile into place, sliding it side to side slightly to embed it fully. The mortar on the back of the tile helps to fill any small voids in the mortar layer.
Only spread mortar for the number of courses you can install comfortably without the mortar beginning to set up. After setting the tile on a couple of courses, wipe off any excess mortar with a sponge, then insert tapered spacers to separate the tiles and leave the proper grout joint.

A score-and-snap tile cutter works well for cutting many large-f…
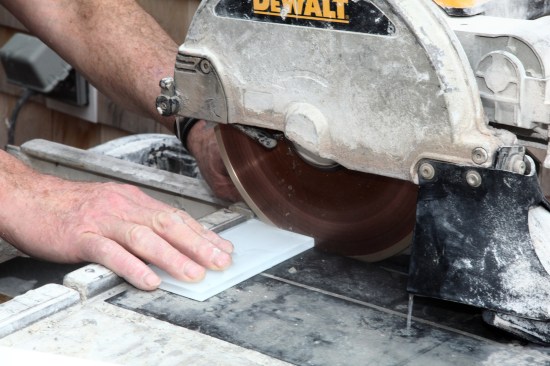
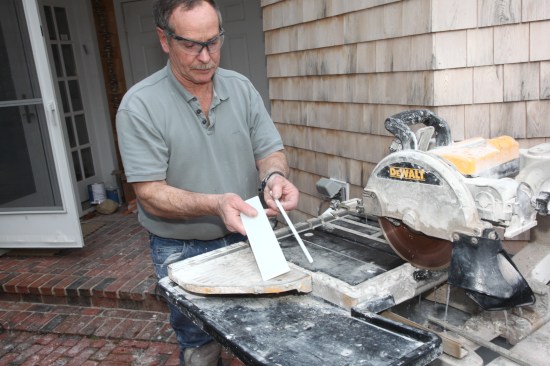
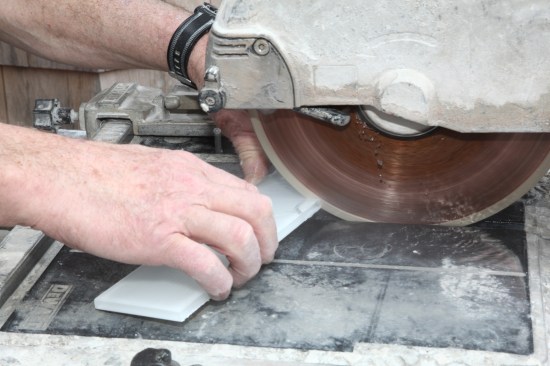
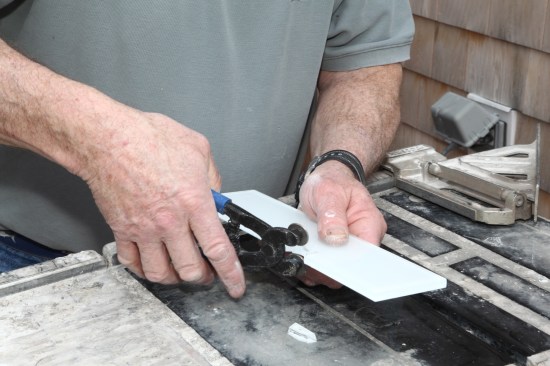
Cutting Large-Format Glass Tile
Though not suited to glass mosaics, a score-and-snap tile cutter works well for cutting many large-format glass tiles. For a subway-tile format, it’s efficient and convenient to set up the cutter next to the shower for cutting the half tiles that begin every other course and for cutting the tiles at the inside corners. A wet saw equipped with a glass-cutting blade also does a great job of cutting tile without chipping the applied backing.
Other Cuts in Large-Format Tile
The layout of the large-format glass tile in this shower left a partial-width tile at the ceiling. That width varied slightly because the ceiling was slightly out of level. To cut each tile to the proper width, place the tile against the ceiling in the area where it’s to be installed, and mark the amount that needs to be removed .
The best, and maybe the only, way to make a clean and straight cut down the length of a large-format glass tile is to use a wet saw equipped with a specialized glass-cutting blade. These blades have finer and more numerous diamonds and make a smooth cut through the glass and any backing without chipping or tear-out that can be visible once the tile is installed. After marking the width of the tile, carefully cut with the specialized blade. Thin rips in large-format glass tile such as this become fairly routine.
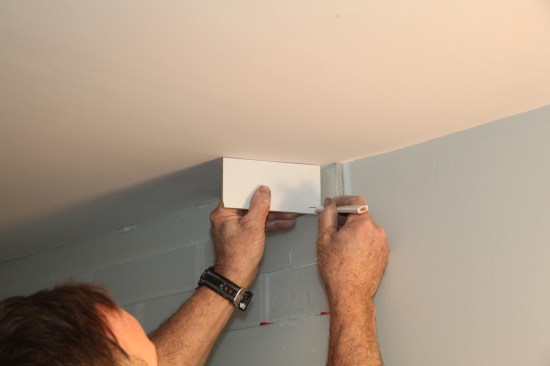
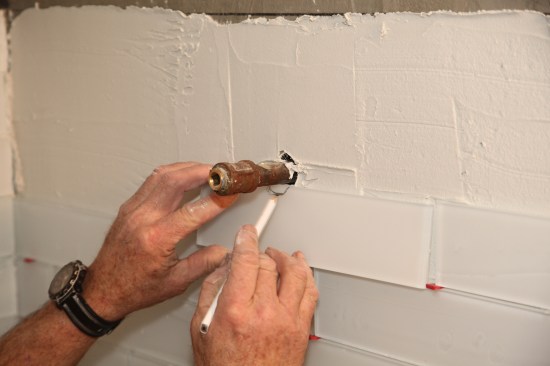
Cutouts for Plumbing
To make plumbing cuts for the shower controls and for the piping that supplies the shower head, the process is similar to that with ceramic or porcelain. The difference is that extra care must be taken so that the glass breaks out evenly without the applied coating chipping out beyond the cut. These cuts don’t have to be a perfect scribe to the pipe, but don’t assume that the plumbing flange will hide a bad cut.
When the cut falls on a seam between tiles, set the tile roughly in position and mark out the cut. At the wet saw, make several cuts to the cut lines. Using glass-tile nippers, carefully break out the glass over to the line, “nibbling” a little at a time until the cut is big enough for the pipe. Then back-butter the tile and set it in place.
If the pipe falls in the middle of a tile, drill the hole with a hollow-core diamond-coated bit with a water feed. Be sure to do the drilling on a solid surface that supports the tile evenly, and cut the hole slowly and carefully, letting the weight of the drill apply the pressure for the cut.

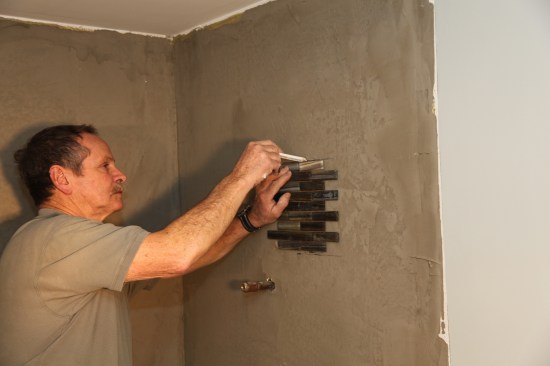
For a band like this one, comb out an even layer of mortar over …
Build-Out for Thinner-Profile Tile
When a decorative band is used on a glass-tile project, the tile for the band is often thinner than the field tile. The best strategy for building out the band is applying either 1/4-inch backerboard or a layer of membrane, depending on the amount of build-out needed. For a band like this one, comb out an even layer of mortar over the band area. Embed a piece of thick membrane (Kerdi was used here), smoothing the membrane with a taping knife. Apply a layer of glass-tile mortar over the membrane, comb it out with a notched trowel, and knock down the ridges with a taping knife. Press the band tile into place and tap it with a rubber trowel to embed it completely in the mortar. When the mortar has had 15 to 20 minutes to set up, dampen and remove the paper as with paper-faced glass mosaics.
Because glass tile does not absorb moisture, use a grout mixture that is much stiffer, with less water than usual.
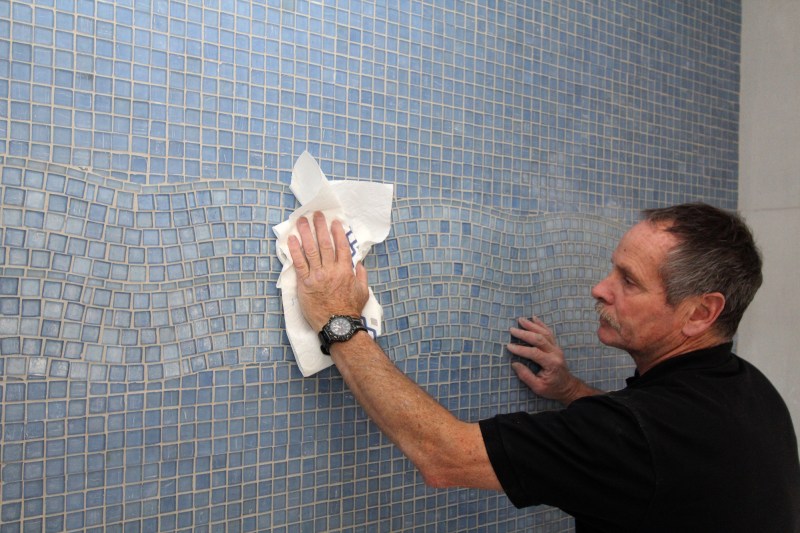
As with regular tile, remove excess grout with a clean sponge. After it dries, remove the grout haze with a terry cloth towel.
Grouting Glass
Grouting glass tile is much like grouting other tile, with no special materials required. However, because of the resilient (non–moisture absorbing) nature of glass, use a grout mixture that is much stiffer, with less water than usual. Float the grout with a rubber trowel, using diagonal strokes to fill the grout joints completely. Remove excess grout with a clean sponge, and wipe off the grout haze with a terry-cloth towel after it dries.