In 1973, at age 17, I signed on to help a local roofer in central Ohio. The job was a two-and-a-half-story Victorian with a carriage house, and by the time we finished the job, I was sure that ripping off shingles would not be my life’s work. One day at coffee time, I was feeling thankful to be walking on level ground but dreading having to carry two more squares up a 30-foot extension ladder, so I decided to look through the carriage barn of the newly purchased property instead.
In a box of junk in the barn, I found a small block plane with no iron. It was a low-angle Stanley 60-1/2, and I asked the new owner if I could have it. No problem; all the boxes were headed to the dump. At the hardware store in town, they even had one replacement iron left. I was set. I didn’t know then that I would be tuning up, resharpening, and using that same plane for the next 45 years.
Acquiring block planes. I have a number of block planes that I purchased at a large antique market held three times a year in Brimfield, Mass. I have never paid more than $25 for one. I recently checked E-Bay; at this moment there are more than 100 block planes of similar quality to mine for $25 to $50.
There are also good-quality, new Stanley block planes for around $45 each from catalogs like Woodworker’s Supply, which also sells a nice Sweetheart Stanley reproduction for $120. And Highland Hardware and other sites sell top-of-the-line block planes by Lie-Nielson for about $175. The only problem with these big-dollar planes is that sinking feeling you get when one slips from your hand and falls onto the driveway below while you’re planing a cedar shingle. I prefer an old plane in restorable condition. Call it my tip of the cap to the tradesman who came before me.
Only top-line planes are good to go right out of the box. All others, new or old, need a tune-up and sharpening first. The condition of the iron is the only deal breaker when I’m buying an old tool. If there’s no pitting (deep rust) for the first half inch, I make the purchase.
Two types. A standard block plane (like a Stanley 9-1/2) has a 1 5/8-inch-wide iron and a bedding angle of about 20 degrees. (Note that the bedding angle—not to be confused with the bevel angle of the iron—is the angle at which the iron sits in the carriage of the plane.) A low-angle block plane (like the Stanley 60-1/2) has a bedding angle of around 12 or 13 degrees and a narrower, 1 3/8-inch-wide iron. I prefer the low-angle version for trimming end grain and for how it fits my hand. The best models have an adjustable throat plate, which helps as a chip breaker to control the depth of cut.
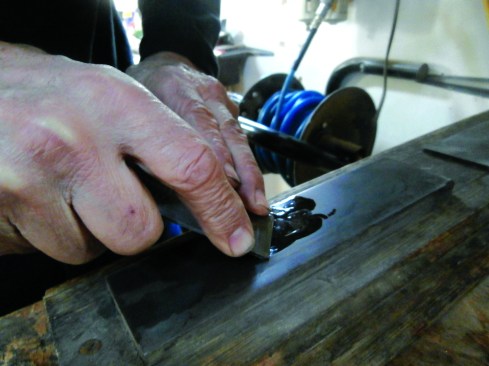
Tuning. Take the plane apart and clean and oil the depth adjusting screw. I then flatten and polish the sole of the plane on a sheet of sandpaper taped to the bed of my jointer. Roll or break all the edges of the plane body.
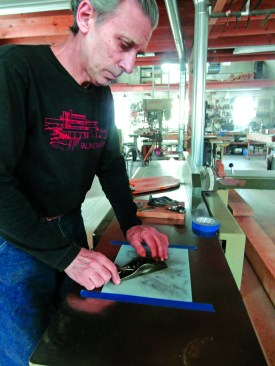
Start by flattening the back of the iron on a whetstone. I use an oil stone, but water or diamond stones are just as good. On a flat stone, it’s easy to tell when the back of the plane iron is flat, because the polish from the stone will be uniform.
To tune a plane, the author starts by flattening and polishing the sole on a sheet of sandpaper taped to the bed of his jointer. Roll or break all the edges of the plane body.
Sharpening. The next step is to create a new edge on the iron. I use a 10-inch Delta bench grinder. The more expensive, slow grinding systems are great but not critical. The important detail is having a quality wheel. I use a “friable” 100-grit aluminum-oxide wheel. The particles of a friable wheel break off easily and cut down on the chance of overheating the steel.
On a block-plane iron, the bevel (which faces up when the iron is in the carriage) should be 26 degrees to 30 degrees. Take your time and cool the iron frequently if you don’t want it to overheat. Overheating is called “bluing,” and it’s unmistakable when it happens. I keep an old coffee cup filled with water by the grinder to dunk the iron in and cool it down.
Remember: The more precision you have at the grinding wheel, the less time you’ll have at the whetstone. Remember, too, that a good grinding wheel is useless without a diamond dressing tool for flattening the wheel and creating a new, clean surface.
After grinding a 26° to 30° bevel on the iron, the author hones the edge on a whetstone to the same angle.
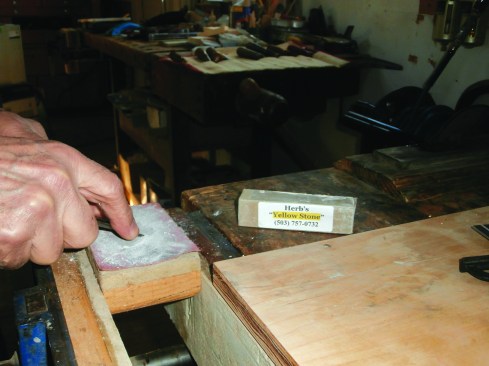
The last step is stropping on a piece of leather (rough side up) tacked to a block and loaded with Herb’s Yellow Stone compound.
Next, hone the cutting edge. While larger bench planes have a super-shallow arch profile across their cutting edge, block planes are ground straight across with a tiny slope at each corner of the iron. Take the new edge to your whetstone. Remove the burr from the flat side of the iron. Flip to the other side, find the bevel angle, and then raise the iron slightly. When you begin honing, this slight raise will create a 4-degree micro-bevel. This is your actual cutting edge. Some people hone in a straight line; others use a figure-eight pattern. I use both. At this point, you are only trying to remove micro nicks in the edge.
The last step requires a leather strop. You can buy one or make one by gluing a piece of leather—rough side up—to a hardwood block. I load the leather with a fine coating of Herb’s Yellow Stone compound (available on Amazon for $10). With the compound, the strop will give an old-school barber’s edge.
It’s now time to put your new-old plane back together. Setting the depth of cut is first done by eye. Flip the plane upside down and the blade will appear as a fine line. Set it for a light cut and test it on a scrap of wood.
Paring chisels. Putting a new edge on a chisel is basically the same process. I prefer old pattern-maker (longer) paring chisels. A good set of plastic-handle short carpenter’s chisels are fine for rough work and I always keep one in my roll. But paring chisels cut the same way as a block plane and should be sharpened to the same edge.
If you do a lot of paring of wood plugs or finishing door-hinge mortises, a back-bent paring chisel is a great tool. (By the way, another nice tool if you do lot of wood plugs is a Veritas flush-cut mini saw—a real time saver.) Old back-bent chisels are hard to find, but Woodcraft sells nice ones under its Wood River label. I think 1/2 inch wide is the best size; there’s no need for an entire set. I have a 3/8-inch Buck Brothers back-bent chisel that I have sharpened so many times that it is now too short for my grinder. I guess it’s one of the signs I’m getting old.
Photos by Mark Luzio