Concrete is a durable and cost-effective material for walkways, patios, and drives. While plain concrete is not particularly attractive, there are many ways to improve its looks: You can color it with pigment, texture it to look like something else, or cover it with brick or stone. One of the oldest — and best — methods for creating visually appealing concrete surfaces is to expose the aggregate.
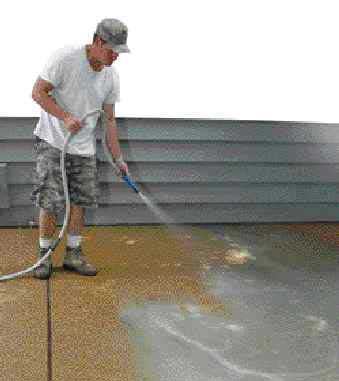
Aggregate is present in every concrete slab, but because it’s encased in a matrix of sand and cement it’s not usually visible. Removing the top layer of sand and cement to expose some of the aggregate makes the surface of the concrete look a lot better, and the process is not much more expensive than plain gray flatwork.
An aggregate finish is good for walks, driveways, and stairs because it is skid-resistant and wears well. And as long as the original aggregate is still available, the surface is easier to repair or add on to than stamped or integrally colored concrete.
My company specializes in patios that are a combination of exposed aggregate concrete, brick, and stone. The masonry is set flush to the surface of the slab and forms decorative borders and bands. This is less expensive than building the entire patio from brick or stone and it creates more visual interest.
It’s difficult to produce this kind of work if you have to bring in separate subs to do it. Most of the people on my crew started out as landscapers but have been trained to do masonry and concrete, which makes it easier to coordinate the work because we can do it with a single crew. Most of our jobs are in existing neighborhoods, so it helps that we can do enough landscaping to repair the yard at the end of a job.
Aggregate
The size and type of aggregate determines the look and color of the finished slab. It’s expensive to transport heavy material, so aggregate is usually made from locally available stone. We’re located in the St. Louis area; our concrete supplier carries a few types of local stone that look good and are hard enough to be exposed. We can get a white or a slightly darker glacial rock from Illinois or we can get a brown shiny gravel that comes from the Meramec River. Different types of aggregate are available in other parts of the country.
Our local stone is cheap enough to use throughout the mix, so it’s spread through the entire slab. If you expose the aggregate, this is the stone you will see. But it’s also possible to throw a thin layer of aggregate onto the freshly placed concrete and float it into the surface. This is called seeding and it’s the method we used when I was first starting out. Seeding allows you to use inexpensive aggregate in the mix and put the exotic aggregate on top where it will show.
These days, no one seeds unless they’re using an expensive decorative aggregate. We avoid seeding because it’s hard to put the stone on evenly, it adds another step to the process, and it requires extra labor. If you can buy a reasonably priced aggregate, it’s simpler and less expensive to put it in the mix.
Size. Some contractors like to use normal size (3/4-inch to 1 1/2-inch) stone when doing an exposed aggregate finish. I don’t like doing this because if the concrete is a little too wet, you can end up with areas where there is visibly more cement than aggregate. This can happen anytime you place concrete, but it’s noticeable with an aggregate finish.
We prefer to use a smaller size stone. Our local brown river stone is available as regular size aggregate or as a smaller size called Meramec torpedo. They’re the same type of stone but the torpedo has been passed through a finer screen. It’s small and very consistent in size, so it produces a smooth, uniform surface.
The mix. Concrete contains water, portland cement, graded aggregate, and sand. Technically, the sand is just a finer type of aggregate. The cement, water, and sand form a paste that fills voids and binds the aggregate together. Around here, most contractors use a four- to five-sack mix (four to five 90-pound bags of cement per yard of concrete) for residential flatwork. When we do an aggregate finish, we use a six- to six-and-a-half-sack mix and a little less sand. Reducing the sand makes the pebbles stand out more on the surface, while the extra cement makes for a stronger slab.
Placing the Slab
Prepping for an exposed aggregate slab is the same as prepping for any kind of concrete. Depending on the grade, drainage, and soil conditions, we may or may not put a layer of stone under the slab. In some cases, the stone will be an added expense that does nothing to increase the quality of the job. But most of the time it’s necessary to used crushed limestone to level the grade.
Formwork. Most of the patios we build have curved outer edges. We form them with 1/4-inch tempered Masonite because it’s easy to bend. For straight edges, we use 1x4s. We hold the forms in position by nailing them to wooden stakes. The top edge of the form functions as a screed strip, so we set its elevation with an optical level.
We used to rip our own Masonite and cut stakes from 1-by lumber, but we found it was less expensive to pay a supplier to do it. The stakes come 3,000 to a pallet and the strips of Masonite are 2 7/8 inches wide. We settled on a single width because it’s less complicated than keeping various sizes around. There’s no chance of running out of a certain size or having someone bring the wrong size to the job. The stakes and the Masonite are cheap enough to throw away after a single use.
Most of our patios are bordered and inlayed with brick or limestone bands. Parts of the slab must be lowered to accommodate the inset material, and the 27/8-inch strips are a good height for forming the drops. Brick is about 2 5/8 inches thick, so a 2 7/8-inch drop leaves room for a 1/4-inch bed of mortar. The limestone is around 2 1/4 inches thick, so it gets a thicker bed. If the edge needs to be thicker, we either double up the hardboard Masonite strips or allow some of the concrete to ooze beneath the bottom edge. The rough edge won’t be visible, because it gets buried when the yard is landscaped.
Reinforcing. Slabs are typically reinforced with 6-by-6-inch wire mesh; in some cases we will add #4 rebar. If the grade falls off badly, we dig holes for piers and cast a hidden grade beam to retain the fill below the slab. Narrow walkways don’t need reinforcing.
Control joints. Unless the slab is very small, it should have control or expansion joints to prevent it from cracking. Some contractors will pour areas up to 15 feet square without using control joints. We don’t like to go bigger than 10 feet square without a joint. We avoid slabs smaller than 5 feet square because they’re more likely to shift.
There are many ways to create expansion joints. Sometimes we’ll break up an area by casting 1×4 cedar boards into the slab. The cedar is set flush to the top of the forms, held in position with nails. It gets used as a screed strip when the concrete is placed and becomes a part of the design when the slab is finished.
Control joints can also be made by kerfing the slab when it’s partially cured or by pouring the concrete around a plastic or compressed fiber joint. The plastic is not very attractive, but it’s a good choice around pools because it can stand up to the constant wetting. Fiberboard, on the other hand, is ugly and rots a lot faster than wood. It’s typically used for commercial work and is covered by caulking the joint.
Cedar looks the best and holds up well as long as it remains tightly wedged in place. I’ve seen strips that look fine after 20 years, but if the concrete shifts, the cedar can rot out in four or five years. At that point, a repair can be made by inserting a new strip, shimming it tight to one side, and filling the remaining space with cement grout.


