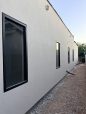
At first glance, installing a pocket-door kit might seem like a pretty simple task. But the truth is, messing one up is pretty simple, too. In this article, I’m going to share some of the lessons I’ve learned — the hard way — about pocket-door kits, along with some tips for improving their function and feel.
Pocket-door kits come in two types: good and bad. Inexpensive kits with light-duty track and carriage wheels (sometimes called “trucks”) are the bane of door-hangers and homeowners. Not only are they difficult to install, but in no time at all the track bends or the wheel bearings wear out. And everyone knows fixing a pocket door isn’t easy or cheap.
So whatever kind of door you’re using, invest in heavy-duty track and high-quality carriage wheels. Several makers have good kits, including Johnson (800/837-5664, www.johnsonhardware.com) and Hager (800/255-3590, www.hagerhinge.com). The kit shown in this article is a new one from Pemko (800/283-9988, www.pemko.com).
In addition to the split studs and track, which is mounted to the header frame, most pocket-door kits come with pretty much the same hardware: two door hangers, two roller carriages, two floor brackets, a rubber bumper, and a wrench.
Resizing the Header Frame
The first step when you’re installing one of these kits is to check the size of the rough opening and, since the kits are supplied for 36-inch doors, to cut down the head frame if the door is narrower. The width of the rough opening should measure two times the width of the door plus 1 inch. For Pemko’s Husky Heavy Door kit, the height of the RO should measure the door height plus 5 inches, though most other models require an additional 4 inches in header height.
For doors narrower than 36 inches, you have to do a little math. Start by doubling the difference between your door and a 3/0 door. For example, a 2/8 (32-inch) door is 4 inches smaller than a 3/0 door; 4 x 2 = 8 inches. Subtract that amount from the header-frame top cleat and from the aluminum track, but don’t cut anything just yet. A piece of masking tape makes it easier to see the mark on the aluminum frame.
When it comes to the two pieces of wood that cover the sides of the track, which are half as long as the header piece, you want to cut off only the difference between your door and a 3/0 door — 4 inches in this example. I use a jigsaw to cut the wood and a hacksaw to cut the track, then reinstall the end plate.
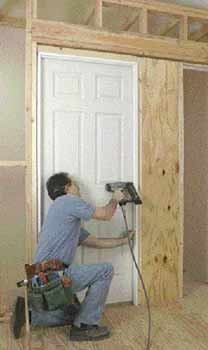
Installing the Frame
Cut out any bottom plate and snap lines on both sides of the opening. For 6/8 doors, measure up from the floor 81 1/4 inches on the jack and partially drive in a screw, centered on the stud. Don’t use a nail for this; it’s easy to relocate a screw if need be
With 80-inch-tall doors, 81 1/4 allows 1/2-inch clearance from the floor and automatically aligns the head jamb with existing prehung jambs so that the casings will line up around the room. Nothing looks worse or more unprofessional than a pocket door with casing that’s an inch taller than that of surrounding prehung doors. Site conditions vary considerably, so be sure to check your door and the jambs on your job before mounting the head track. For odd-size doors, locate the mounting screw by adding 1 1/4 inches to the door height.
Next, slip the header-frame end plates over the screws, check that the track is perfectly level (14), then snug up the end-plate screws and install the remaining screws.
Once the head is secure and level, insert one of the split-stud mounting plates into the bottom of a split stud, then insert the bottom of a second split stud on the other side of the plate. Note that the top of the split stud has two notches in the aluminum frame so that you can run screws through the face of the stud into the head frame.
Temporarily clamp the tops of the split studs to the header frame, then fasten with 11/2-inch screws. Plumb the split-stud pair to the floor, then fasten the plate, centered between the snap lines. Use Tapcons or anchors on concrete.
Install the second split-stud pair the same way. If possible, be kind to the drywallers and try to align the split studs with the cripple studs above. On a remodel, I’ll just center the second split-stud pair. Attach each stud to the head with screws, then plumb the bottom, making sure the studs are centered on the two snap lines.
It’s important, when drywall is installed before the door is hung, to stiffen the split-stud wall with a temporary brace. Otherwise, the drywall installers might bend the inner split studs and pinch the door. (If you hang your doors before drywall and leave them in the pocket, good luck!)