The Dutch Colonial style was brought to the New World by Dutch immigrants who settled along the Hudson River in New York State before scattering across Delaware, New Jersey, and Connecticut. Most of the original Dutch Colonial houses were built between 1625 and about 1720, when the Dutch were overwhelmed by English colonists. But the style didn’t enter the mainstream until the housing boom of the 1920s, when it emerged as part of the larger Colonial Revival movement.
The style remains popular today, partly because it’s a cost-effective way to add upstairs headroom without increasing a home’s overall height. And despite its advanced age, the Dutch Colonial still has plenty of design kick, especially in the solid and very satisfying trim that finishes off the traditional Dutch gambrel roof.
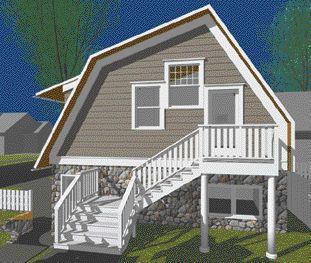
The traditional approach to trimming a gambrel lends an authentic feel even when the roof in question has a more contemporary look. We recently selected the Dutch Colonial style for an artist’s loft over a new two-stall garage, partly because the primary residence has a gambrel dormer, but also because the multiple roof angles allowed the north-facing glass necessary for a painter’s studio (see Figure 1). While the asymmetrical roof pitch is a bit more rakish than that of most Dutch Colonials, the split-faced granite base and cedar-shingle siding match more traditional homes in this older Minneapolis neighborhood.
Figure 1.The exterior detailing typical of traditional Dutch Colonial architecture relies on chunky trim dimensions, liberal use of bed molding, and a layered look where materials overlap. While most often associated with symmetrical roof forms, the same approach is also well suited to more contemporary roofs.
Like most Dutch Colonial structures, the basic form is essentially a simple box that gets its character from the distinctive roof. The detailing at the edges of this “barn roof” looks the way it does for a reason: As the leading seafaring power of the time, the Dutch built their houses the same way they built their ships, with plenty of water-shedding overlap where materials meet.
This shows up in the tendency to tuck one material under another. For example, cedar shingles are tucked under a trim board rather than butting into it (Figure 2). The result is a clean, solid detail that gives the shingles plenty of room to expand and contract. Elsewhere, the split-faced granite is also tucked under a trim band (Figure 3). Flares are another theme of Dutch Colonial architecture. On this design the shingles at the bottom of the wall flare out to deflect water from the masonry wall below (Figure 4).
Figure 2.Cedar shingles are tucked under 5/4×10-inch trim set on top of a 1-by spacer, providing a clean, substantial look. The soffit is 1×4 pine beadboard, varnished instead of painted to give the eave a warmer, almost nautical appearance. Once again, the beadboard is tucked into the fascia for a solid connection.
Figure 3.The ground-level garage is built of 4-inch concrete block with a veneer of split-faced granite, topped by a continuous 5/4×10-inch trim board. The same 1×4 trim board, run horizontally and bracketed by a bed mold, runs underneath the eave, providing a potential gap for ventilation. Note the narrow bed mold acting as a drip cap on the fascia.
Figure 4.The cedar-shingle siding flares slightly at the bottom of the wall to help deflect water from the foundation. This detail is fairly simple to build: A 1×4 sits on top of the continuous 5/4×10-inch trim band, eased by a bed mold. Shingles are nailed to blocking on the sheathing. The bottom courses of shingles require frequent repainting, as they take tremendous abuse from rain and sun.
Dimensions are solid and chunky throughout. When working in the Dutch Colonial style, always use a slightly thicker, wider, or heavier piece of trim than you ordinarily might, and you’ll most likely be on track. Robert Gerloff is an architect in Minneapolis.


