Not counting things like geodesic domes and igloos, all houses have at least four outside corners. These are important design elements, and the treatment they receive can have a big effect on a structure’s appearance. Let’s take a look at three common corner details used with wood siding: corner boards, woven corners, and mitered corners.
Corner Boards
The simplest and most popular approach to finishing outside corners is by installing corner boards. There’s good reason for this: Corner boards provide a visual break from the horizontal lines of siding, in much the same way that corner pilasters and columns do. The effect can be reinforced by painting or staining the corner boards a different color than the siding.
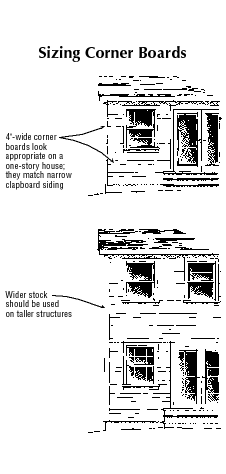
To achieve a pleasing sense of scale, corner boards should be sized with both the width of the siding and the overall height of the structure in mind. As with actual columns, increased height calls for added heft. The 4-inch corner boards that look just right on a single-story house sided with narrow clapboards may seem much too light and wimpy on an otherwise similar two-story house (see Figure 1).
Figure 1.The fairly narrow corner boards on this one-story house (top) are scaled to the height of the structure. Wider trim stock provides solid-looking corners on a taller house (bottom).
As strong visual elements, corner boards should also stand proud of the siding. This is most often done by using 5/4 trim stock. For an even stronger effect, the corner boards can be padded out to create a slot that encloses the ends of the siding or the edges of the shingles (Figure 2). This detail also provides some margin for error in fitting the siding, because there’s no visible butt joint between siding and trim.
Figure 2.Corner boards should stand proud of the siding to emphasize the contrast between the vertical and horizontal lines. Padding out the corner boards so the siding can be tucked into a slot between trim and sheathing creates a strong shadow line that adds to the effect.
Woven Corners
Corner boards are often omitted on ranch and prairie-style houses, which emphasize horizontal lines rather than verticals. The simplest way to turn the corner when using lap siding or cedar shingles is by constructing a woven corner (Figure 3).
Figure 3.Choosing woven or mitered corners rather than corner boards shifts the emphasis from the vertical to the horizontal. While this is a more time- consuming corner treatment, it can look great on ranch houses and other single-story styles.
In a woven corner — also known as a laced corner — each successive course of siding is mated with its counterpart on the adjoining wall. Traditionally, this involved fitting each course of siding, marking the overlap, and removing the marked piece to make the sloped cut corresponding to the bevel of the opposite course (Figure 4). A quicker and easier method of doing the same thing is to nail both courses in place before cutting off the excess material with a router.
Figure 4.In a woven corner, alternating courses butt against the matching course on the intersecting wall. With clapboards or other horizontal siding, the exposed end grain should be sealed to prevent the wood from absorbing moisture.
When either approach is used with clapboards or lap siding, the end grain of every other piece of siding is left exposed, so the wood must be carefully sealed to prevent it from absorbing moisture. And with either shingles or siding, accurate coursing is essential, because there’s no intervening corner board to conceal any slight irregularities in alignment.
Mitered Corners
A more elegant corner treatment that eliminates exposed end grain is the mitered corner. This can look great, but it’s more time consuming than constructing a woven corner. (Coursed sheet-metal corners were once used to conceal end grain without the need for mitering, but they’re seldom seen nowadays.)
To guarantee tight joints, mitered corners are laid up from the corner itself outward, using the same general approach a mason takes in building a brick wall. Once the corners are complete, the intervening field is filled in to finish the job (Figure 5).
Figure 5.Although mitered corners eliminate exposed end grain, sealing the cut ends of the siding before installation will help provide a longer-lasting finish. To achieve tight joints, the corners are installed first, and the field between corners is filled in later.
Alan Freysinger is an architect in Milwaukee, Wisc.


