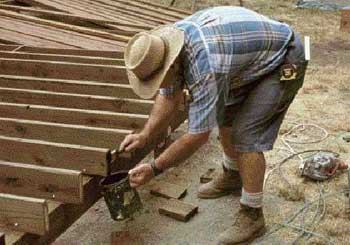
Rot-Resistant Deck Details - Continued
Attaching Ledgers
Another common building practice is to use flashing to keep
moisture from getting between the house and ledger. The Uniform
Building Code requires flashing, and many contractors meet the
requirement by installing an L-shaped piece of metal. The
horizontal leg covers the top of the ledger and the vertical
leg goes up the wall and is lapped by the building paper and
siding above. Most carpenters install the ledger in the same
plane as the joists, so the deck surface ends up an inch or
more higher than the horizontal leg of the flashing. This
creates a perfect collection zone, because if something falls
in toward the house, the flashing will prevent it from falling
through to the ground (Figure 4). If enough organic matter
collects on the flashing, it can induce rot in the adjoining
deck board or invade the siding above.

Figure 4.Although it's common practice to bring an
L-shaped flashing down the wall and kick it out over the
ledger, the resulting pocket can collect debris and rot both
the decking and the siding above.
There are many ways to deal with this problem, but whatever
you do, you still need to flash the connection. The simplest
method is to use a ledger that is taller than the joists and
install it so the top edge will be in the same plane as the
deck boards once they're installed. The flashing should come
down the wall from behind the siding and building paper, run
across the top of the ledger, and end in a lip that laps down
the face (Figure 5).
Figure 5.To avoid creating a collection zone
between the house and the deck, position the ledger flush to
the deck boards. There are two pieces of flashing, one behind
the ledger and another over the top of it.
Another option would be to space the ledger off the building
so that there is a minimum 1/2-inch gap between the ledger and
the wall. Most debris will fall through a 1/2-inch gap; any
leaf litter that doesn't can be cleaned out. (Since it's
impossible to eliminate every single collection zone, we tell
clients that if they want the deck to last, they will need to
maintain it by removing any leaf litter that collects.) This
type of connection is trickier than it looks, so we hire an
engineer to design it to support the necessary loads (see
"Load-Tested Deck Ledger Connections," 3/04).
Deck Boards
Many carpenters use 16-penny nails to space deck boards. This
creates a 1/8-inch-wide gap that forms a perfect collection
zone between boards and on top of every joist (Figure 6). It's
nearly impossible to remove leaf litter from such a narrow gap.
Once the organic matter gets in, it will start to rot the deck
boards and the joists below. Some contractors think they don't
have to worry about this because they use redwood or cedar
decking. Unfortunately, decking is no longer made from
old-growth lumber. Most of the deck boards you can buy now
contain a lot of sapwood, which, unlike heartwood, has very
little resistance to rot.
Figure 6.Most carpenters space deck boards too
tightly (top left), leaving enough room for debris to get in
but no way to clean it out. On this deck, organic matter
collected at every gap and joint (top right), as well as
between a rim joist and blocking that landed under a gap in the
deck boards (bottom).
The way around this problem is to install decking with a
larger gap. We never use a gap less than 1/4 inch wide; a
3/8-inch gap is preferable. Organic matter will not collect in
the larger space, but will fall through. Where it does collect
on top of joists, the space is wide enough to be raked clean
with a screwdriver or deck-cleaning tool. The larger space also
allows air to circulate and dry out the decking and structure
below.
The same rules apply to composite decking such as Trex.
Captured organic matter may not affect the deck boards, but it
will pile up on and rot the framing below.
Placement of boards. It's
amazing how much leaf litter will fall through a 1/4-inch gap
and land on top of a beam. It's good practice to plan where the
decking will land and position beams and joints so they are not
directly under a gap. Another way to minimize this collection
zone is by running the deck boards at a 45-degree angle to the
framing and beam. Less leaf litter will land on the beam
because the gaps that pass over it will be farther apart.
Maintenance. We tell clients
to maintain their decks by washing them with a deck-cleaning
product like Defy TimberWash or Sun Frog Deck Cleaner (see
"Sources,"). I recommend doing this twice a year after major
pollen events, which in this area land in October and
March.
Wood decks should be stained and sealed to prevent sun damage
and to repel moisture. To increase absorption, this work should
be done during the driest months of the year. We use Wolman
F&P Finish and Preservative, Sun Frog Deck Sealer, or one
of the TWP deck and furniture finishes.
Wood Railings
Many carpenters install 2x2 balusters by nailing them to the
rim joist and then lapping over them with a fascia. This is
easier than other methods, but it's poor practice, because it
creates two rot zones, one where the baluster hits the rim and
another where the baluster hits the fascia (Figure 7). There
are so many nails in the rim that it ends up looking like a
pincushion. The large number of fasteners can split the
balusters or rim and allow water to get into the wood.
Figure 7.
Nailing balusters to the rim joist
creates pockets that trap moisture and debris, which can cause
rot (below).
To prevent rot, it's better to install posts every 5 feet or
so and span between them with rails that support the balusters.
Avoid notching posts, but if a post must be notched where it
hits the rim, the notch should extend high enough to lap onto
the deck boards. This is better than butting deck boards into
the side of the post, because it takes what would have been a
vertical crack and turns it into a horizontal one that debris
has a hard time getting into. Lap or no lap, the joint between
the post and decking should be sealed with caulk.
Pressure-Treated Lumber
The substructure of a deck needs to survive the harshest
conditions, so in most cases it should be made from
pressure-treated lumber. Currently, alkaline copper quat (ACQ)
is the most common chemical for pressure-treating wood.
Pressure-treated lumber is graded on the basis of how much
chemical preservative is retained by the material. Retention is
measured in pounds per cubic foot (pcf); the higher the pcf of
preservative, the better the lumber will be able to resist rot.
With ACQ, standard practice is to use .25 pcf material above
ground, .40 pcf material for lumber that will be in contact
with the ground, and .60 pcf material for pilings and marine
applications.
To be on the safe side, we frequently frame substructures with
.60 pcf lumber. Even so, there is no guarantee that the
structural members won't rot. This is because the chemicals are
unlikely to penetrate all the way through the material,
especially large structural members like 4x4s, 4x6s, and 4x8s.
This problem is more common on the West Coast, where hem-fir is
used, but it can also happen with southern yellow pine.
To help the chemicals penetrate more deeply, the pressure
treaters incise (cut slits in) the surface of the lumber. But
wood expands and contracts as it gains and loses moisture, and
this can cause cracks to open and admit water and organic
matter to areas that aren't preserved. Under certain
conditions, the lumber will rot from the inside out.
Sealing cuts. There's not
much you can do about checking and cracking, but you can
protect the untreated wood that is exposed when you drill or
cut pressure-treated hem-fir. We treat cuts with a liquid
preservative that contains 9 percent copper naphthenate (Figure
8). There are many such products on the market. Two of the
better-known brands are Jasco Termin-8 Wood Preservative and
Wolman Wood End Cut Preservative. We brush this material onto
all end cuts and into any holes we drill in the wood.
Figure 8.It's a good idea to coat pressure-treated
yellow pine end cuts with extra preservative. With hem-fir,
which doesn't accept pressure treatment well, it's an absolute
necessity to do so.
Untreated lumber.
Pressure-treated lumber is not very attractive, so there are
times, especially for upper-level decks, when we use untreated
lumber for beams. You should do this only when there will be
enough airflow to discourage the growth of rot.
To prevent the material from rotting, we take a couple of
precautions. First, we contaminate the food source by treating
the wood with a borate product such as Tim-bor. Frequent
wetting may cause the borate to leach out of the wood, so it's
necessary to coat borate-treated surfaces with a
water-repellent sealant.
We also create a moisture barrier by sealing the top edges of
joists and beams with strips of torch-down roofing material
(Figure 9). Torch-down roofing is designed to stand up to UV
rays and will self-seal where nails penetrate it. We make the
membrane stick by heating it with a torch, and produce a drip
edge by allowing it to project about 1/2 inch beyond the edges
of the lumber. Grace Construction Products recently introduced
a product designed specifically for this purpose, Vycor Deck
Protector.
Figure 9.To keep this deck — which is framed
with untreated lumber — from rotting, the author coated
it with a borate preservative and covered the upper surfaces
with torch-down roofing membrane.
Other Details
Lumber won't rot if you keep it dry. We try to keep posts up
off the ground by installing them on piers formed with
Sonotubes. The piers extend 6 inches above grade; to prevent
moisture from wicking up the post, we seal the lower end with
torch-down roofing material. We also use this material to seal
the top ends of posts, especially when they're made from
untreated lumber.
It's important to create opportunities for airflow under
low-level decks. If the design calls for skirting, we enclose
the area below with open lattice or vertical boards with gaps
of at least 3/4 inch between them. To encourage airflow, we
space the deck boards 3/8 inch apart. When the deck is low and
air circulation is limited, we frame the substructure with .60
pcf treated lumber.
Kim Katwijkis a deck builder in Olympia,
Wash.