Glass Block Tips & Tricks
The phrase “attention to detail” is something of a cliche in the building trades. But if there’s one architectural element where it applies, it’s glass block. The difference between an acceptable installation and an excellent job — one that turns heads and that you can really be proud of — is all in the details. I have been installing glass block for over 14 years, and some of the techniques I’ve picked up along the way may help demystify what otherwise seems a difficult installation. With practice, any skilled tradesman can do a clean, well-laid-out, crisply executed job. Glass block has been around since the 1930s. In the past, it was commonly used where additional daylight was required but where security was a concern, such as in factories or commercial spaces. But because it’s attractive as well as durable, glass block has enjoyed a recent renaissance in residential and light commercial applications. Shower walls, kitchen and bath partitions, and workspaces in professional offices can all benefit from the thoughtful use of this material. I use only real glass block (Premier Series, Pittsburgh Corning, 800 Presque Isle Dr., Pittsburgh, PA 15239; 800/624-2120; www.pittsburghcorning.com) because it’s time-tested. I have my doubts about the long-term durability of acrylics, and I doubt if any synthetic could be as abrasion- or UV-resistant as glass. Glass block is not structural, so it must be set on a firm foundation, and no loads can be imposed upon the wall after installation.
Layout
There are four steps to any glass block installation: layout, setting, grouting, and cleaning. If you need to spend a little extra time anywhere in the process, it’s in the layout. If you don’t get the layout right, nothing else you do will save the job. Do the math. Before anything else, measure the opening where the block is to be installed and assess it relative to the size of block you’ll be using. Figure your mortar joints at 1/4 inch, and make sure your block stack comes out evenly, both vertically and horizontally, since there is no such thing as cutting glass block. If the arithmetic looks good (plus or minus 1/4 inch over 7 feet is acceptable), you can make small adjustments as you proceed. If it doesn’t look like you can keep evenly spaced joints (give yourself no more than 1/16 inch to play with), then you’ll have to adjust the width or height of the opening. If the opening isn’t right, correct it before you begin setting block. If you have to deal with a radius, lay it out now. About three or four courses from the top you can dry-stack a column of block to figure your final corrections (see Figure 1). I often dry-set the first course to get a visual sense of what I’m working with. Remember that unlike a window or door installation, there is no such thing as shimming with glass block, so check for plumb and level on all four sides of the opening.
Figure 1. Because glass block cannot be cut, layout is crucial. Here, the author dry-stacks the last few courses to make sure he ends up where he planned. |
On a radiused wall, such as the one pictured in this article, the vertical grout spaces will be pie-shaped (the face of the blocks will be tangent to the curve), so the joints will be wider at the outside of the curve than on the inside. It is important to make sure these joints are uniform on both sides of the wall — this is one place you can’t make any corrections after you’ve started. If you have a tight radius to work with, radiused blocks are available. I lay out tape lines with blue painter’s tape wherever the installation intersects a floor, wall, or ceiling. This helps keep transition lines straight and true. I’ll also sometimes tape down masking paper to protect adjoining surfaces, which helps with cleanup at the end of the job (Figure 2).
Figure 2. Masking adjoining surfaces at the beginning of a job saves a lot of cleanup time at the end. |
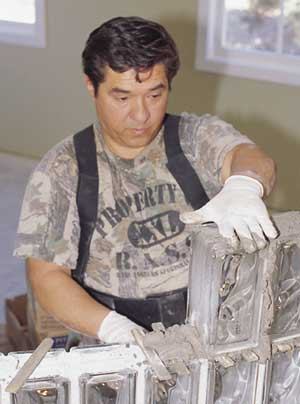
Setting the Block
One of the first things everybody asks about is the mortar. There are special proprietary glass block mortars available, but I don’t use them because they cost about $18 a bag and are unnecessary. For about $14 less I can buy a bag of Quikrete mortar mix (Quikrete, P.O. Box 2836, Norcross, GA 30093; 404/634-9100; www.quikrete.com). Fortified with about 1/2 cup of Quikrete Acrylic Fortifier per 3 gallons of mixed mortar, it works fine. I have done hundreds of installations, and I have never had a problem with the mortar. I mix it in a drywall bucket with a paddle mixer and a 1/2-inch drill motor at low speed (Figure 3). The mortar should be wet but not runny. If it’s too wet, it won’t stick to the block.
Figure 3. The author uses acrylic-fortified Quikrete mortar, which he mixes with an electric drill and paddle mixer. |


