Precise planning and workmanship at every stage of work ensures a trouble-free job
by Paul and Kathy McLellan
We run a family-owned custom glazing business on Cape Cod in Massachusetts. One of the things we specialize in is the installation of frameless shower enclosures. The high style of a frameless glass shower enclosure also comes at a high price — about $2,000 to $5,000 on average. A successful installation requires a high degree of precision, and the margin for profit is tight. If you can’t complete an average installation in a day, you’re probably not going to make any money. Perhaps this is why few glazers in our immediate area seem to take on these jobs. Most of our business comes by way of the homeowner, but we also work with several custom builders on a regular basis. These builders have become familiar with the important job-prep requirements for a frameless enclosure, which are the focus of this article. Because we can give important advice to both the homeowner and the builder, we prefer to get involved on the ground floor, before the shower surround has been framed, boarded, and received a finished surface, usually of marble, granite, or solid-surface material.
Job Prep
We’ll quote a job from plans or rough openings on the assumption that the walls and floor will end up being level, square, and true. However, we’ll only proceed with an order after taking final on-site measurements, after the finished wall surface has been installed. If we uncover any abnormalities, such as an out-of-plumb wall, we’ll have to make an adjustment to the price. But if we find that a supporting wall bows in or out, the whole enclosure might need to be redesigned. For example, we can’t use wall mount hinges on a bowed wall. The hinges must line up in a straight plane or they’ll work against each other. Most of the problems that arise can be dealt with, but the cost of imperfection can be significant. Once, we had to have a newly tiled surround rebuilt when unevenly installed tiles at the base interfered with the glass installation. So it’s best if everyone’s on the same page from the start of the job. The basic guidelines that govern a successful installation can be quickly summarized as “plumb, level and square.” No modification will make this type of enclosure inexpensive, but there are a few qualifiers to the guidelines that can have an effect on the appearance and performance of the enclosure, and on the economy of the job. The shower threshold should be dead-level side-to-side, but have a definite, minimum 5-degree slope to drain into the basin. It’s best if the framer establishes the slope, but the tile-installer can always shim the threshold to compensate.
Figure 1.Head channel joining plates for frameless enclosures come in fixed corners of 90- and 135-degrees (left). Off-angles, which drive the cost of an enclosure up, are handled with an adjustable corner (above). The authors measure, cut, and join the extruded header sections on site. |
Angles in the enclosure work best at 90 degrees and 135 degrees, because the proprietary joining brackets come in these fixed angles (see Figure 1). Off angles can be accommodated with an adjustable bracket, but the level of difficulty and therefore the cost, goes up. Likewise, glass can be cut to conform to out-of-plumb and out-of-square conditions, but there’s a penalty in the cost of fabrication. A neoangle surround is a popular configuration, and often incorporates a half-height buttress wall on one or both sides of the opening. Instead of leaving the open end of the wall square to itself, the job comes out much nicer if the builder defines the opening jamb with a 135-degree wall return. This eliminates the need for a weak, narrow glass panel to make the corner transition. Instead, the glass panel on top of the buttress wall receives a 45-degree beveled edge that meets in parallel with the square edge of the door (Figure 2).
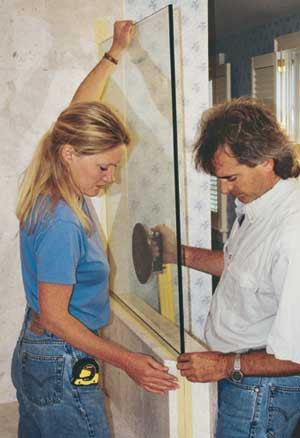
Figure 2. A 135-degree return at the end of a buttress wall makes a clean, attractive detail that simplifies the enclosure design. A 45-degree miter on the glass edge lines up with the wall termination, creating a continuous interface for a square-edged door. After the glass has been accurately dry-installed, it is marked to facilitate repositioning after it’s set in silicone caulk. |
Design
The job begins with the design. Kathy consults with the homeowner, the builder, and anyone else who may have input into the appearance of the final product. Our hardware supplier, C.R. Laurence (2503 E. Vernon Ave., Los Angeles, CA 90058; 800/421-6144; ), provides us with worksheet forms on which Kathy records the thickness of the glass, the style and finish of the hardware, the handle and towel bar selection, the width of the door, and which edge seals will be used. Matching the finish of the enclosure hardware to faucets and towel bars has a definite effect on the quote — brushed or polished nickel and antique gold finishes have been major factors behind some of our most expensive units.


