Prescriptive building codes provide some general requirements for installing all exterior siding types, including fiber cement. But those general provisions of the code spell out plainly that all installations “shall be in accordance with… the wall covering manufacturer’s instructions.”
For Mark Parlee, an exteriors replacement contractor who also provides expert-witness testimony for siding failures, the easiest way to stay out of hot water is to follow the specifications spelled out in the siding manufacturer’s Evaluation Service Report (ESR).
“It’s an easy document to obtain. Search online for ‘ESR’ and the product name,” he explains. “The ESR spells out in plain terms the basic installation requirements for the particular product, and this document serves as the code for that specific material.” Parlee always downloads copies of the ESR and the installation instructions and makes sure his installers have copies on site. “The basic requirements for all fiber-cement products are similar, but you can’t assume they are the same,” he cautions. “There are small differences in the dimensions that define where nails can be placed and what clearances are needed above adjacent surfaces.”
The most common mistakes involve fastening, but positioning, penetrations, and the treatment of butt joints rank high on the list as well. Here are ones to look out for:
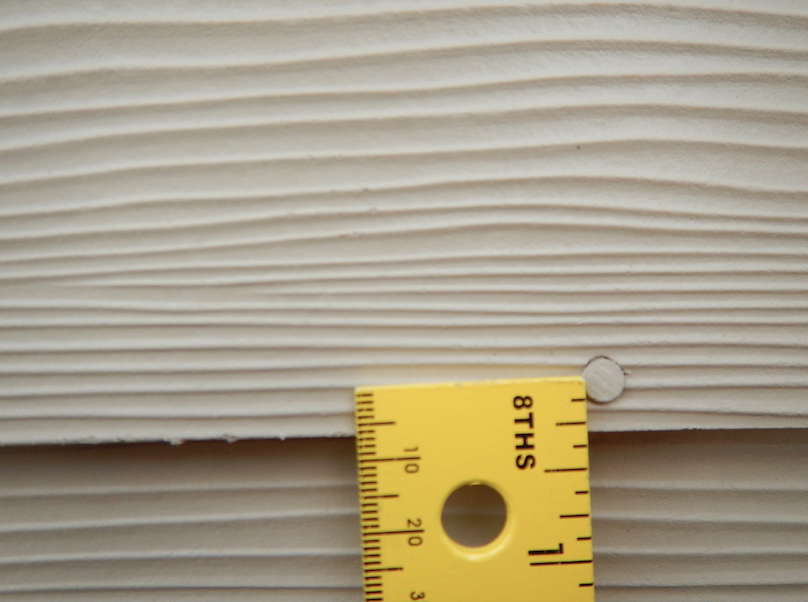
1. When face-nailed, exposed fasteners must be placed at least ¾ inch up from the bottom edge and usually no more than 1 inch, as the typical overlap (and the overlap specified in the IRC) is 1¼ inches.
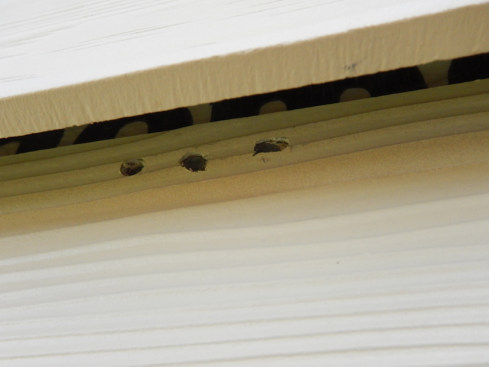
2. When blind-nailed, nails typically must be placed 1 inch down from the top and set with the nail head flush to the surface. The nails shown below are much too close to the edge and overdriven, so they are providing very little resistance to negative wind pressures or to the material’s tendency to move with changes in temperature.
Mark Parlee
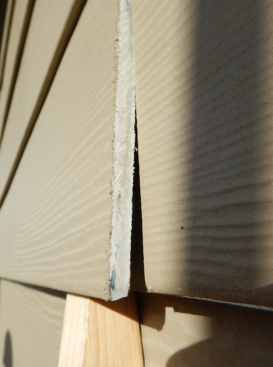
3. Fiber cement won’t rot, but it is not completely impervious to water. It can absorb water at unprimed ends and edges. The absorption and drying of water, combined with freezing and thawing, will gradually cause the material to deteriorate at vulnerable edges. Most fiber cement-siding manufacturers require that cut ends be primed.
Mark Parlee
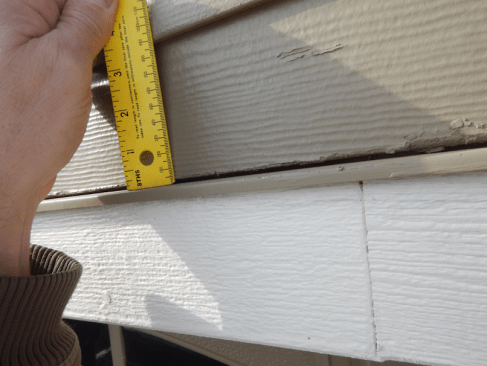
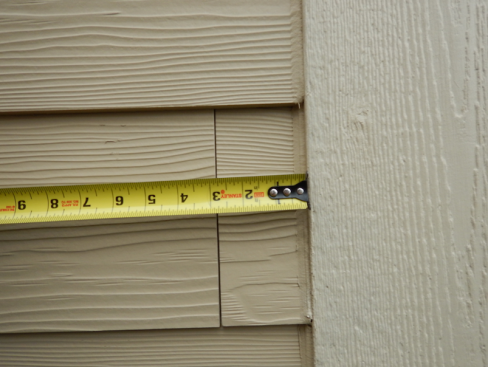
4. All fiber-cement manufacturers specify minimum clearances where siding hits a horizontal surface, such as above the head trim of an opening. At least ¼ inch is typically required, and this gap should remain uncaulked to allow water that gets behind the siding to drain out. (Equally important, though not shown, are the required clearances above slabs and decks—typically 2 inches—and the clearance above roof surfaces—typically 1 to 2 inches—at wall-roof intersections.)
Mark Parlee
5. Butt joints must typically be located over the studs—a detail spelled out in the ESR and in the code. Tiny pieces like this are doomed to fail. Elsewhere, this house was framed on 16-inch centers, while many of the butt joints were offset by 24 inches—a clear sign that many joints were unsupported.
Mark Parlee
6. Replacement installers will often just slot siding boards around penetrations. This is exceedingly poor practice because the only defense against a leak is the caulk, which is good for only a couple of years at best.

Mark Parlee
7. The correct way to detail any penetration is with a split mounting blocker or a product like those from PlyGem or StrudiMount. The top edge of a split block should be either beveled to drain downward or flashed. (Note here that this wall is being prepared for fiber-cement siding with StuccoWrap—a crinkled housewrap that provides a drainage space behind the siding.)

Mark Parlee