
Dave Prostko
I’m a general contractor who once focused on energy-efficient and sustainable green home construction, but I also have a passion for woodworking. In 2004, I built my first twig-style handrail using the twisted branches of mountain laurel, after seeing local installations that still looked great after 25 years or more.
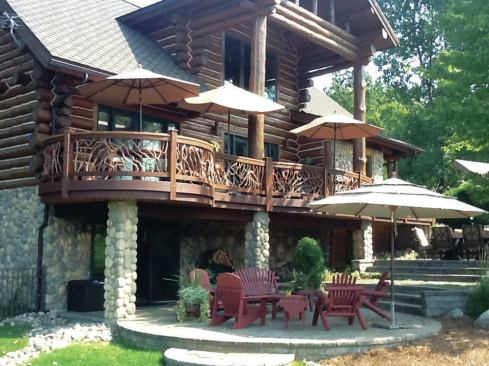
Here in the Smoky Mountains, where these evergreen shrubs can grow to tree-sized proportions, laurel railings are popular on rustic mountain homes. In 2010, as new construction and remodeling projects disappeared in my area, I shifted my focus to designing and building custom twig-style handrails and furniture, which I now sell both locally and nationally through my website.
Mountain Laurel
Mountain laurel has a somewhat rough and dark-reddish-brown bark. The branches are too twisted to be used for straight pickets, but the wood is dense and handles weather well (with an average annual rainfall of 90 inches, the area where this style originates, in and around Highlands, N.C., is considered a rainforest). I also occasionally use rhododendron branches, which have a smoother, light-brown bark, to build railings, but I prefer laurel, as it is denser and stronger.
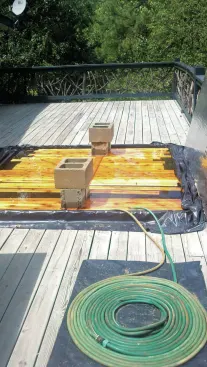
Left unfinished, the branches of both laurel and rhododendron will weather to a silver color similar to that of weathered cedar. Or, the original reddish or brown color of the branches can be preserved by applying a natural penetrating stain/sealer (but not varnish or polyurethane).
Code. Building codes vary by jurisdiction and can be very different from one place to the next. When I weave the branches together to build the railing sections, I make sure a 4-inch sphere can’t pass through any openings, a common building code requirement. Sections are also built to withstand 50 pounds per square foot, another common code requirement. Local inspectors haven’t had any issues with my railings, but I always tell customers who buy my prefabricated railings online that they should get approval from their building official.
Rails
If the posts will be 6x6s (or larger), I typically fasten the branches to smooth-sawn 2×4 western-red-cedar top and bottom rails when I assemble the sections in my shop. I’ve also made rails from rough-sawn cedar, rough-sawn pine, cypress, oak, yellow pine, black locust, barn wood, ipe, and teak. Later, on site, the installer will attach 1x4s to the top and bottom rails of the prefabricated sections to strengthen the assembly and hide the fasteners, along with a horizontal 2×6 (or wider) top rail. These can be left unfinished, or stained or painted to match other finishes.
When I’m working with 4×4 posts or building curved rails, I start with 1x4s, instead of 2x4s, for the top and bottom rails. This gives the railings a narrower 3-inch cross-section (3/4 inch + 1 1/2 inches for the branches + 3/4 inch), to fit the posts.
Another option is to make the top and bottom rails out of round logs, and fasten the mountain-laurel branches to them using mortise-and-tenon joints or by flush-cutting the sticks and nailing. Common species for logs include pine, poplar, and black locust.
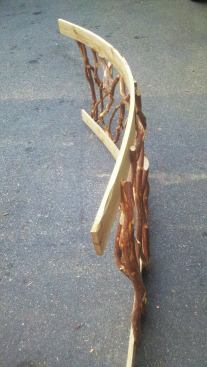
Curved Rails
The same approach can be used to build curved handrails. I begin with a plan of the deck, which contains the information I need—primarily the radius of the curve, but also the post locations—to set up my bending and building jigs.
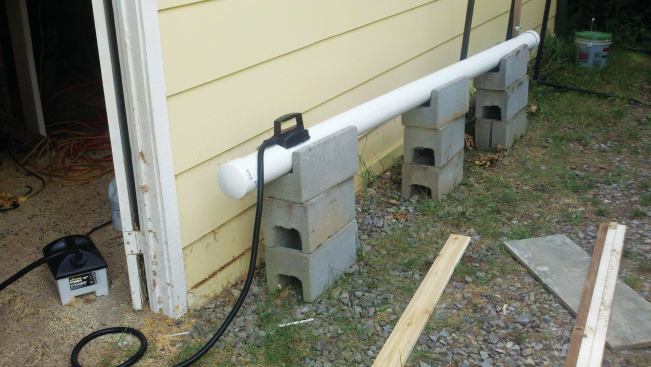
While I’m building the jigs, I soak the cedar 1×4 rail stock in water for a minimum of 48 hours. Then I heat the lumber in a steamer I built from 4-inch-diameter PVC pipe, using a wallpaper steamer as the heat source. The curve’s radius determines how long the rails remain in the steamer; for gentle curves, it takes about two hours before 1x4s are pliable enough, and for tighter curves, about four hours. The lumber is never warmer than 200°F, but it’s still pretty hot when it comes out of the steamer, so I work quickly and keep a good pair of work gloves on hand.
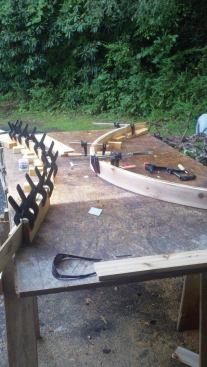
Bending jig. I draw the radius of the rail onto a sheet of plywood, then simply screw blocking to the plywood along that line. Immediately after a board has been steamed, I clamp it to 1/4-inch plywood strips that I’ve screwed to the blocking. I discovered a couple of things when I first attempted to steam-bend rails. One is that spring clamps don’t work as well as bar clamps; they’re quicker, but they don’t provide enough clamping pressure. The other is that boards sometimes break on a knot.
Building jig. I leave the rails clamped to the bending jig for at least 24 hours, then put them into storage while I put together my building jig. I keep the rails under pressure, usually with stacked concrete blocks and pieces of lumber, to help them hold their shape.
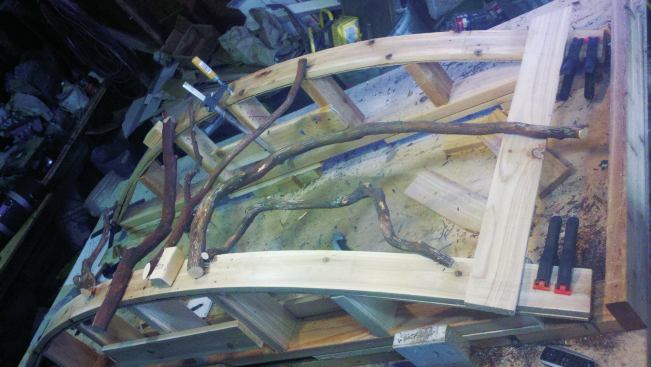
The building jigs are framed with 2x4s, like a small curved kneewall, but with a 1/4-inch plywood (instead of a 2-by) top plate. To make rail assembly easier, I place the jigs at bench height. Once the rails are securely clamped to a jig, I weave together the branches according to the 4-inch-sphere rule.
Usually I have a few very long or crooked sticks left over from a previous section. These more intricate branches become the starting point for a new section, sometimes as an “X” shape in the middle, sometimes as two or more long sticks with similar curves. After I’ve installed a few main sticks in a section, I fill in the spaces that are left. The trick here is to just use the sticks as they come; a stick either works in a particular spot, or it doesn’t.
I nail the sticks to the lumber with Paslode 16-gauge angled finish nailers. I keep three of them on hand, each loaded with a different size galvanized fastener: 1 1/2 inches, 2 inches, and 2 1/2 inches.
When I’m building railings with log top and bottom rails, attaching the branches requires coping out the ends to the curve of the log. I’ll also do this when joining two branches in the center of a piece.
Installation
Once a railing section is fabricated, it’s ready for installation. Since each one is custom-built to actual measurements, only a small amount of trimming is needed to install the rail sections and the second pair of curved 1×4 top and bottom rails that complete the railing assembly. The only component that’s missing is the horizontal 2-by top rail, which must be cut and installed on site.
James Pader is a general contractor who owns Winter Sun Construction in Highlands, N.C. His website is awoodrailing.com.


