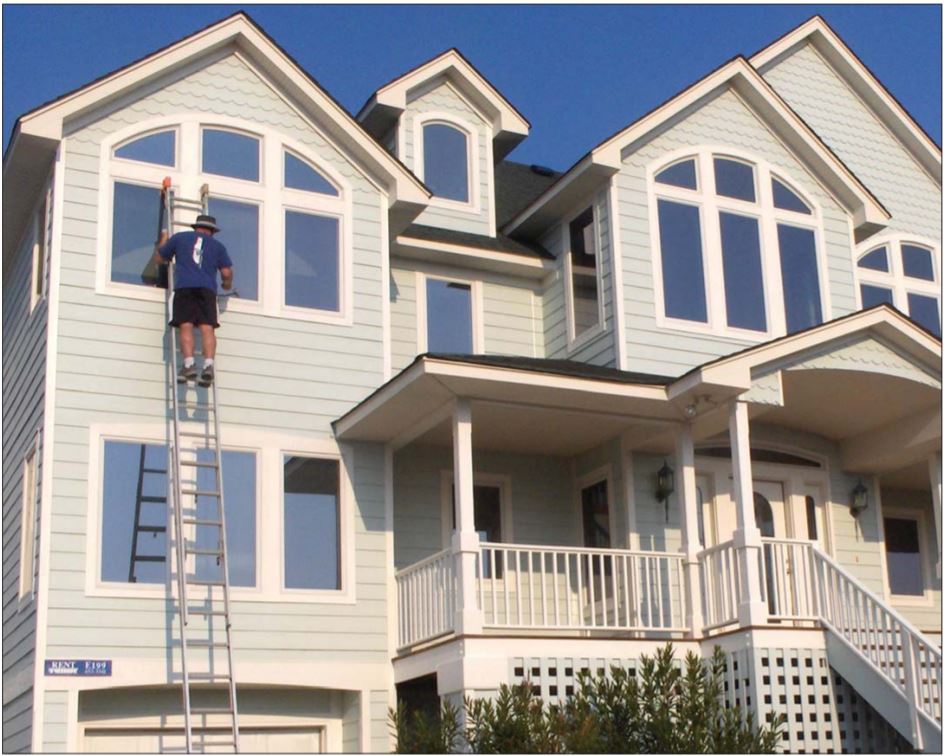
As a custom painting contractor in the Boston market, I’ve spent a good part of my lifetime studying the way paint works. That includes taking courses and seminars provided by the Painting and Decorating Contractors Association, which I think every professional painter ought to join (I’m the president of our local chapter’s residential forum; painters interested in best-practice solutions are encouraged to visit www.pcapainted.org).
While formal training for painters is certainly helpful, experience is still the best teacher. And when you think about it, painters are in a unique position to learn from experience, because we revisit projects years after construction is complete. Few builders have that opportunity; they might build a new project for a client, or they might have a punch list at the end of a job for minor mistakes or things that didn’t get finished. But builders don’t usually get a chance to go back after five years, seven years, forty years, even a hundred years to see what’s working and what isn’t working on a home. We painters do—in fact, that’s most of what we do: We come along and fix things that are failing, and we get to learn from that failure.
The Source of Most Problems
No coating lasts forever, especially on wood. Depending on the environment, you can expect a well-executed paint job to last somewhere between eight and 12 years. But often, paint begins to experience trouble long before that. And from what I’ve seen, that trouble is virtually never related to a flaw in the paint itself. Manufacturers have had years to perfect their formulas, and they do continual research and development. If you invest the dollars for good-quality paint, rather than the cheapest can on the shelf, you can expect excellent performance from the product.
So when I see problems, it’s because of things other than the paint or stain. Most commonly, problems can be traced back to the way the house was built. Less frequently, the issues relate to how the substrates—the wood trim, siding, or window and door frames—were prepped for paint. And least commonly, there was some problem with how the paint was applied. In any case, the prep and the painting are the painting contractor’s job. But things the carpenters do, before the painters even show up at the site, can make all the difference to the endurance of the coating.
These days, most of my company’s painting projects are likely to involve some carpentry as well. I now have a few well-rounded carpenters on my own payroll, and they sometimes spend days replacing siding and trim, or even remodeling a porch, before my prep crew starts to work. So the tips here aren’t just kibitzing—they’re what our own carpentry crew does in the field. If your carpenters do the same things on the next house you build or remodel, they’ll be helping to give the paint or stain a fighting chance.

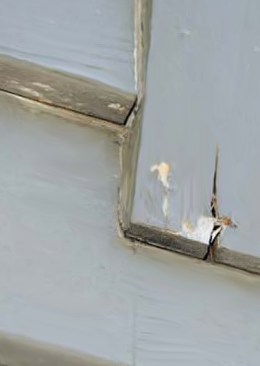
Moisture migrating from inside the home through the backs of the clapboards also attacks the adhesion of the paint or stain on the exterior wood surfaces, causing premature loss of the coating. The new preprimed clapboards at the lower right of this gable-end wall, installed as part of a window replacement, will perform much better in service.
Tips for Trouble-Free Paint
Use preprimed material. The minute you put wood up on a wall, the sun starts to attack its fibers, and the wood begins to experience swelling and shrinking as it gains and loses moisture to adjust to the surrounding air. To protect the wood, every piece of siding or trim that is nailed to a building should be primed first on six sides—that is, on all four faces and on both ends.
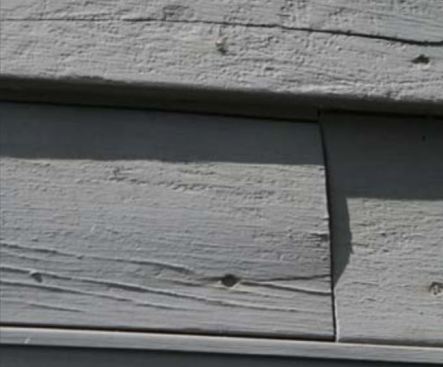
Without back-priming, daily and seasonal moisture cycling will soon cause beveled wood siding to cup and warp, as well as crack.
If you use unprimed material, you should prime it yourself before you nail it up. That includes priming the back face. Although it doesn’t face the weather, the back of a board is often attacked by moisture coming from within the house. Back-primed wood can resist that moisture, but wood that hasn’t been primed on the back will curl or cup. That unbalanced movement stresses the nailed connections, and moisture migrating toward the outdoors also attacks the bond between the coating and the wood, causing early peeling or wear.
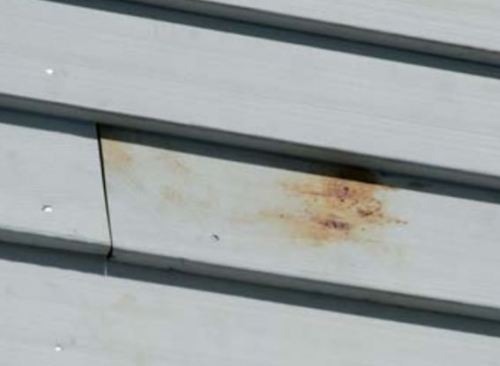
Factory primer usually will not block bleed-through by extractive oils in cedar, as shown above. It also will not provide the "tooth" that helps finish coats bind strongly to the material. The author touch-sands or power-washes the wall (or does both), spot-primes areas of bleed-through with an oil-based stain-blocking primer, then primes the entire wall with regular acrylic primer before applying a finish coat of paint or stain.
But don’t over-rely on the factory primer. A factory-installed primer serves to stabilize the wood during shipping and storage, and it provides temporary protection when siding, trim, or windows are first installed. But it’s not usually intended to be the primer for the material in service. That’s why the label on a new window or door will often warn you that the unit should be primed again before it’s painted. With those components, and also with preprimed clapboards and trim, we always reprep the surface and apply a field primer before we apply the finish coating of stain or paint.
In fact, even if wood is installed and primed, but then sits for an extended period before the finish coating is applied, it may need to be washed or even sanded again and primed again first. Primer is not supposed to serve as a finish coat; it is supposed to help the finish coat bond. And if it weathers before the finish coat goes on, you can’t count on it to do even that.
The one exception is factory-primed wood shingles. Many companies now apply both a permanent primer and a durable top coat to shingles, under ideal factory conditions and with controlled drying and curing. That’s the best coating a wood shingle or shake can get—better than any field-applied coating. If you’re going to use wood shingles, I’d advise you to go that route.
Field-prime all cut ends. Whether you use factory-primed material or prime it yourself, make sure to prime every cut end or edge. That’s easy to do—just keep a can of primer and a brush at the chop-saw station and have the carpenter who’s doing the cutting prime each end before he passes it to the carpenter who’s nailing.
If you don’t prime the cut ends, you’re leaving open the part of the wood that is most open to moisture entering: the end grain. Nature intended wood to draw water into the end grain. In service, unprimed ends will absorb water and swell, and paint will start to come off the wood at that location first. If painters arrive to paint or stain a house that is sided with clapboards whose cut ends are unprimed, or trimmed out with boards whose ends are unprimed, there is very little they can do to address the issue. So it’s up to the people installing that wood to make sure that the ends are primed.
Finger-jointed material. Many wood windows and doors are now assembled with finger-jointed wood. We also see a lot of finger-jointed siding and trim. If the wood has a factory primer applied, it may hide those joints, but it doesn’t protect them from the weather. So it’s important to prime finger-jointed material again as soon as possible after installing it. If those joints start to open up and let moisture in, they may not hold up the way they’re supposed to, and they’ll start to look bad as well.
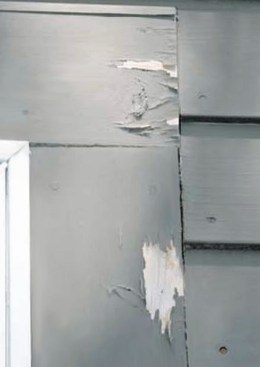
Here, carpenters have installed factory-primed window casing material without sealing the ends. Stain was applied without any sanding or repriming. Failure has begun at unprimed ends, flat grain, and unsealed knots.
Water has entered unprimed end grain and caused the piece to check. If the carpenters had primed all cut ends, and if the original painters had prepped the wood and applied a fresh field primer, the onset of failure could have been postponed for years.
Some finger-jointed material uses very small pieces of wood and lacks a good match between one section and the next. Pieces with different grain density and grain orientation move in different ways, and they also accept paint or stain in different ways. If you use this kind of material, you should make sure your customer can accept the way it looks; coatings on sections with flat grain will wear or come loose sooner, and the joints and variations may quickly become apparent to the eye. While the material may be economical, the results may not be to everyone’s liking.
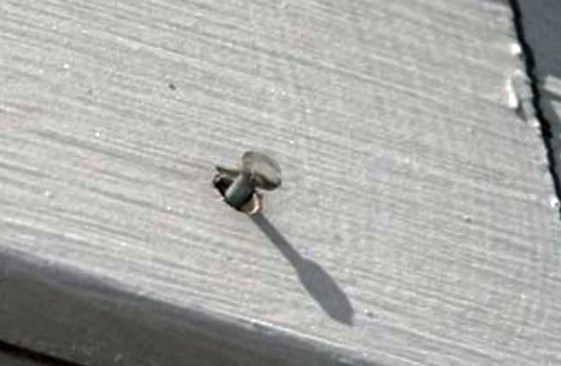
As wood expands and contracts with changes in moisture and temperature, smooth-shank nails may gradually work proud of the board surface.
Nails matter. Use ring-shank or spiral-shank nails. When siding and trim are nailed with smooth-shank nails—even galvanized nails—daily and seasonal wood movement can work the nails loose from the material over time, leaving nails standing proud. On repaint jobs, our prep crew usually has to pull a lot of nails that are high, and we always replace them with ring-shank nails (either hot-dipped galvanized or stainless steel). There’s no good reason for a carpenter in new construction not to use ring-shank nails in the first place. In my experience, I’ve never found a ring-shank nail that has worked its way high of the siding or trim.
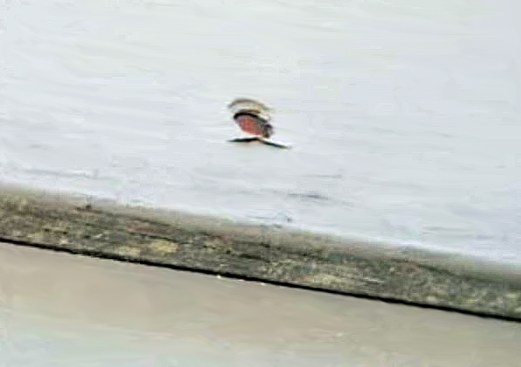
When carpenters overdrive gun nails beneath the surface of a board, water finds a place to collect and penetrate exposed wood fiber ends. Here, the coating has started to peel next to this nail hole, even on the shady north side of a house.
Be careful to drive nails just flush with the top surface of the wood, or perhaps just a hair lower. Good carpenters develop a feel for how to set the nails just right with the final tap of the hammer. But gun nails are harder to control, and carpenters may get in the habit of driving the nail heads into the wood. That’s bad practice—it provides a place for water to pool and attack end grain, and it creates a surface condition that is hard for primer to seal.
Tight joints. Open miters and wide gaps between siding or trim boards typically are caulked by the painter. But a caulk joint will not last more than a few years, and as it breaks down, the finish will, too. Paint lasts much longer when backed by primed wood.
Painter’s Purview
There’s a lot more to say about a durable paint job. Good surface prep and skilled application techniques are critical to the success of a coating. But those measures are the painter’s job to implement—and if you choose a well-qualified painting contractor, they’ll likely be done properly. And they’re no more important than the tips I’ve provided here. If your crews use the priming and nailing techniques I’ve described here when you’re working on the house, you could add years to the lifetime of the coating your painter applies.


