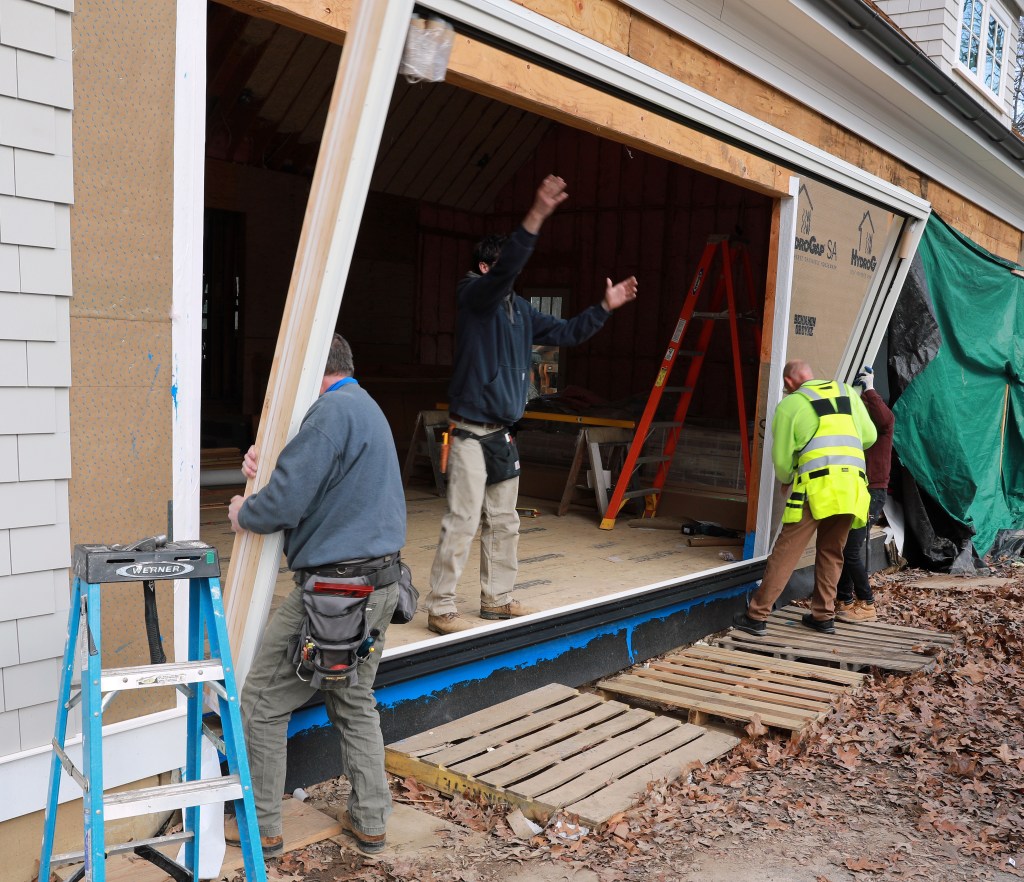
Doors and windows are getting bigger and bigger. As manufacturing technology advances, we are seeing new products that challenge our installation skills—the bi-fold exterior door is one example that’s becoming popular in today’s market. The first one I installed was 12 feet wide by 7 feet tall. Four contractors had declined the job before the homeowner found a colleague of mine, who called me and said he’d take the job if I worked with his crew on the install. I had the experience and the tools (at least, that’s what he thought), so I had to step up to the challenge. After obtaining the manufacturer’s instructions, I came up with a plan. The primary issue that the window salesman kept hammering me with was how precise our install had to be: plumb, level, and square to within 1/16 inch over 12 feet. That’s not a problem if you prep carefully, which we did. That job went very well.
The installation covered in this article came up as a result of our success installing two Weather Shield folding doors without a hiccup. Afterward, David Hauser of Morningstar Doors and Windows in Farmingdale, N.Y., called me. A client had bought three 5-panel units, and he wanted to make sure the install went well. Though the contractor on the job was highly skilled, there are a few things that can go awry even with the most experienced installer. My job was to be an installation consultant and carpenter for a day to install the first unit, assisting the contractor and his crew so they could take over and complete the installation of the remaining two units.
I checked out the job ahead of time to make sure I wasn’t getting into a situation I might not want to be involved with, and to make a material list for the contractor so we would have everything needed for the install. Requirements included a dead-level floor, a sufficiently plumb wall, and a square rough opening, as well as a header with adequate strength to support the assembly. The header is critical since the weight of the entire door hangs from it on trolley wheels. On this project, a huge engineered beam spanned the 15-foot-wide opening. All looked good, so I scheduled the install date.
Sill pan. Before assembling the door, I wanted to install a completely waterproof sill pan. I’m not a great fan of metal pans in high-efficiency homes; since metal conducts heat so well, here in the Northeast they will often sweat on the inside in the dead of winter.
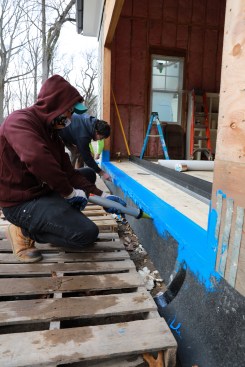
Prep work begins with creating a sill pan with liquid-applied flashing.
Instead, I used a liquid flashing from Benjamin Obdyke called HydroFlash LA. Prior to installing the liquid-applied sill pan, the carpenters had installed an ice-and-water membrane that dropped below the sill plate, and on the inside of the opening, they had installed a 3/4‑inch board that was the same height as the hydronic heat board that would be applied later. This allowed us to liquid-flash up the sides of the frame opening and the edge of the 3/4-inch board, creating a complete back dam behind the door. Liquid-applied flashing creates a one-piece sill pan that is completely waterproof and easy for anyone to install without much fuss.
Normally, liquid flashing will cure in two to three hours, but in cold weather, it can take longer. In that case, it’s best to do this prep a day before the install to give the HydroFlash plenty of time to cure.
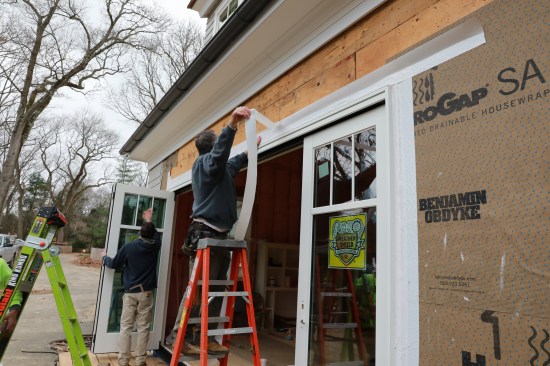
Complete water-resistant barrier (WRB). I like to have a good seal around the opening so water can’t get behind the weather barrier. One side of the door already had a loosely applied Hydrogap weather barrier, which we sealed down with a peel-and-stick flashing tape. The other side of the opening had not yet been covered, so I brought a roll of the newer self-adhering HydroGap SA to use there. I don’t like folding ordinary housewrap into an opening because doing that creates a sneaky space behind the wrap that can transfer water and air behind the entire system. Using either a peel-and-stick flashing tape or a self-adhered housewrap eliminates this possibility. I am shooting for zero defects here—I sure don’t want to come back to troubleshoot even the smallest leak.
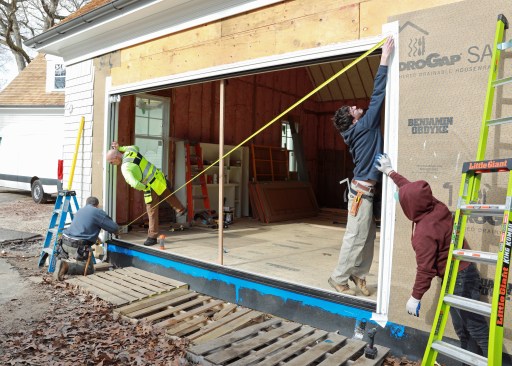
Checking the opening. With the doors on site, we organized the panels in the order of installation, as well as cleared the floor in front of the rough opening to allow for frame assembly. In preparation for the installation, we found the subfloor was about 1/8 inch high on one side. It turned out the sheathing was not fastened in the opening and some debris had gotten under the subfloor. That was a quick fix. Especially helpful for these installs is the biggest, most accurate level you can find. Mine is an 8-foot Stabila; on big runs, I use a laser. The 8-foot level settled in nicely after the correction.
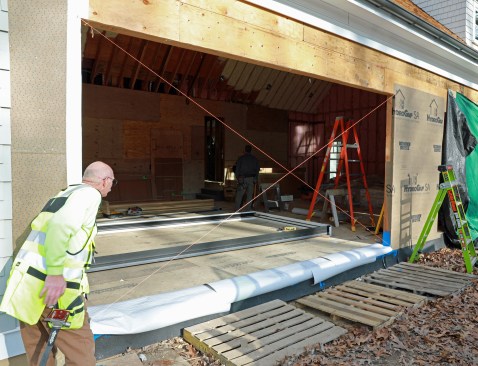
String lines run diagonally from corner to corner verify that the wall plane is flat.
We also cross-checked the large opening with a dry line, stretching it diagonally across from both sides to confirm that the opening wasn’t cross-legged. (This is often the case when, for example, a drywall cart slams into the bottom of a wall during construction.) On a huge opening like this, the wall must be a perfect plane; if it’s not, the doors will never close correctly. Kudos to the framers here: It was within 1/16 inch. It is critical to do this check and, if necessary, correct the problem before you hang the door.
Frame assembly. The trolley system that holds the glass panels comes preinstalled in the upper track. Do not take it apart. The sequence and direction are unique to the door. If you pull the trolley pieces out for some reason, you need put them back in correctly and in the proper order and direction, or you end up pulling out your hair.
The head track is also predrilled by the door maker for many 4-inch stainless steel lag screws. These lags must be driven into the header to support the door, which hangs from the trolley system.
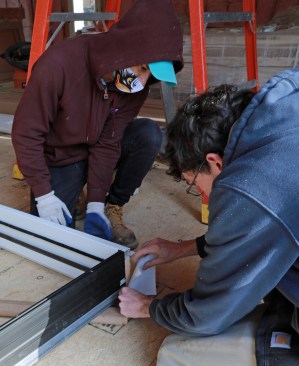
The frame assembly goes together pretty easily. The upper and lower corners of the frame get a sealant before the frame is screwed together.
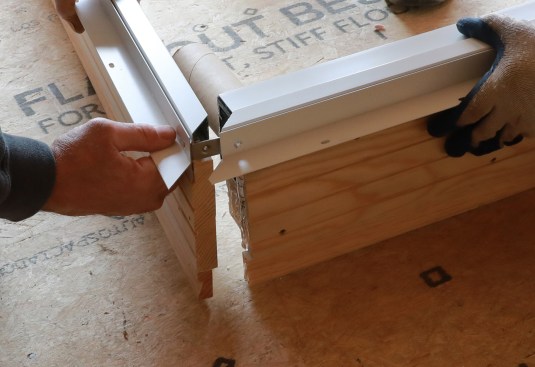
The frame’s upper corners are sealed with silicone before assembly. Once screwed together, this corner should be wrapped with a peel-and-stick flashing to ensure a tight water seal.

I was a little concerned about the bottom of the jambs: The bottom track is installed between the two jambs, and the end grain of the jambs is exposed on the bottom. The jamb exterior is aluminum but the bottom that rests in the sill pan is wood. I have seen doors rot from this, and I wasn’t sure if the wood was treated; therefore, out of an abundance of caution, we sealed up the end grain with flashing tape. The pan is a drainable assembly, so there was a slight chance water might make its way to that open grain. We did the same with the two outside corners, using flashing tape to seal up the corners on top, just in case.
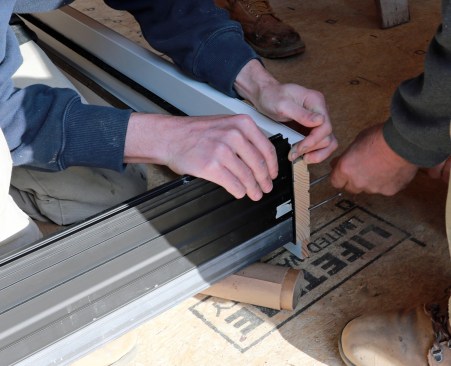
The threshold must be secured to the side jambs. Note the exposed end grain of the side jamb. This must be sealed. The crew seals it with flashing to stave off any potential rot.
After assembling the frame, installation of the frame in the rough opening was straightforward. We did a dry fit first, and since our sill was dead level, the frame sat in the opening perfectly. A little nudge on one side and we checked for plumb, then cross-checked the frame to make sure it was perfectly square.
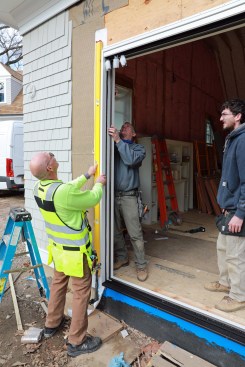
With the frame assembled, it is dry fit and checked to make sure it will sit plumb in the opening.
Once satisfied, the contractor applied sealant behind the frame of the door where the fasteners would come through the flange of the door frame. This started a discussion about the need for sealant. With all the taping and housewrap, what’s the point of sealant? The No. 1 reason is the manufacturer’s installation instructions call for it. If it is left out, and there is a warranty issue with the unit, the door maker can null the warranty. I leave no room for failure.
The crew tips out the frame so the flange can be caulked. Even though the flange will be flashed with a peel-and-stick flashing later, caulk is still required by the door maker.
The installation instructions say to use a sealant that is compatible with all associated surfaces. I recommended OSI Quad Max. It’s a Class-50 sealant compatible with just about everything out there (except my hands).
Once the flange has been sealed with caulk, the frame is again checked for plumb in all directions and the diagonals checked that they’re equal. When it's good, the crew screws off the side flanges.
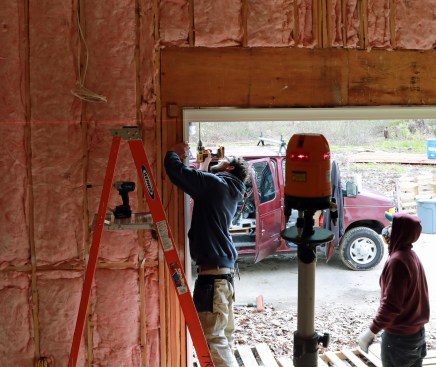
Before securing the track to the header, the crew sets up a laser as a guide when setting the lag screws.
Securing the head. Once the frame was secured, it was time to set up the head jamb. The contractor set up a laser that we could aim at the parting strip on the top of the door. The instructions say to shim the head level, install the lags, and then remove the shims. It’s very important to remove them or you’ll never be able to adjust the door if the header or framing ever settle. We opted to run the lags in until the laser line hit our mark, avoiding shims altogether.
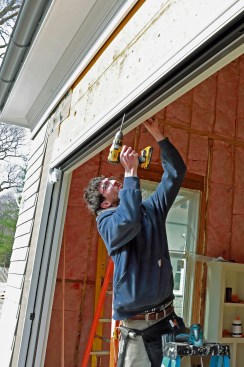
The door hangs from the top rail so it needs to be securely fastened to the header. This is a two-step process, beginning with predrilling the header for lag screws through the holes in the top rail provided by the manufacturer.
Next, drive the lags home with an impact driver. Note in this photo and in the one at left that the holes in the top track are angled toward the header. This slight angle must be maintained.
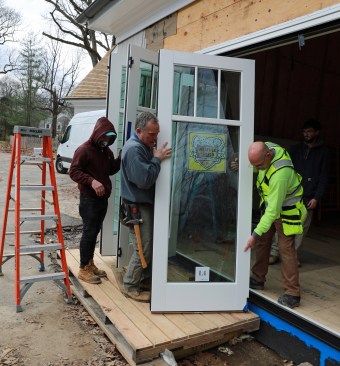
With all the lags in and the head laser straight, we were reader to hang (literally) the doors. The panels are labeled in the order they are to be installed. The first panel is a single panel that operates on a pivot hinge on one side, offering occupants an easy entrance or exit when they don’t want to fully open the folding panels. The other four panels are hinged together as folding panels that run across the track on the rollers.

The first panel the crew hangs is on the far left (from inside the house) of the opening – a single panel on a pivot hinge. The other four panels will hang from the track on rollers and fold to the right.
It’s fairly straightforward from here on: Install the doors on the predrilled and premortised hinges. We had plenty of hands on deck for this, and it was not too difficult to do. I had three glass cups in the truck but completely forgot to take them out; they would have made positioning the doors a little easier.
Each door panel is tilted to set the bottom guide into the track.
I typically build a small platform outside the door just for the install to make it easier to work outside. The contractor didn’t have time to set one up, so he used some pallets to create a higher stage out of the mud. I prefer a nice, level, flat surface, especially when the doors are really big. One tool I recommend is a door jack; it allowed me to set the door to the perfect height, just using my foot, and align the hinges for the carpenter to install.
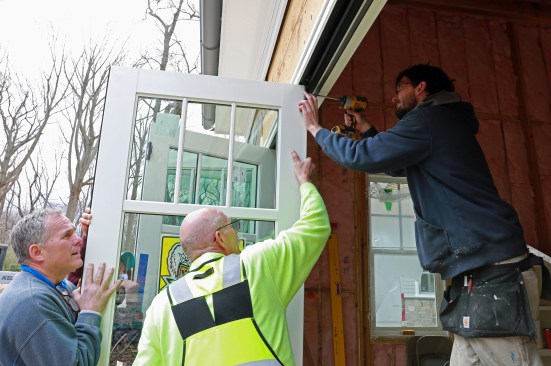
The carrier hinge at the top is secured to the door with the supplied screws.
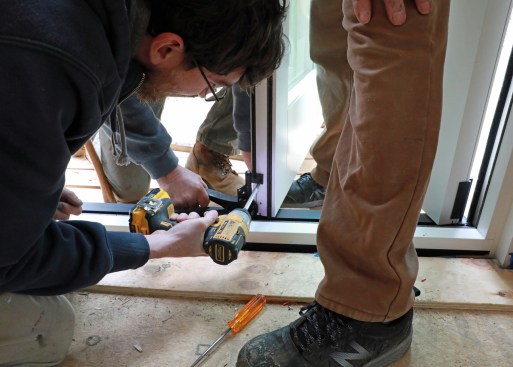
The bottom hinge is secured to the door and guide at the bottom of the panel. A door jack helps set the door at the right elevation.
Fine-tuning. When all the door panels are hung in place, we slowly close the assembly, checking clearances as it closes. To align the doors perfectly, there are four adjustments in the frame that allow a lateral adjustment of the tops and, independently, the bottoms. Also, height adjustment is built into each of the top trolley hinges. The instructions called for a long #2 Phillips screwdriver, which makes adjustments easy. One note: If you find a trolley hits one of your lag screws and prevents movement, make sure your lag is fully set. If it still hits, you need to lower the top hinge adjustments so they don’t collide.
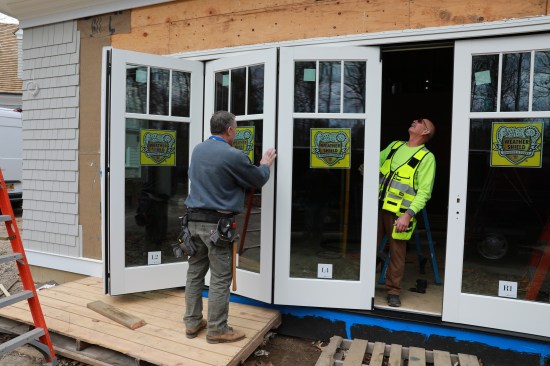
When all the panels are installed, the author (at right) checks the alignment and adjusts as needed.
While it looks like a complicated installation, with careful planning, it goes smoothly. Once the doors were adjusted, my job was done. According to the laser, our frame was well within the 1/16‑inch tolerance—probably closer to 1/32 inch.
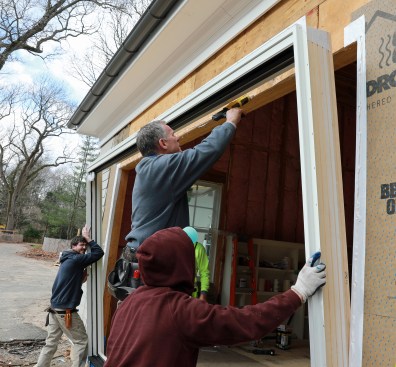
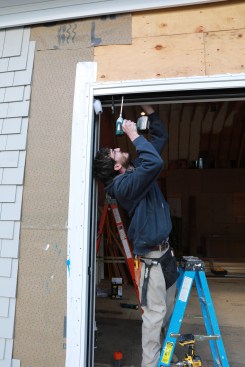
To finish off the installation, the crew screws off the head jamb, and then installs a peel-and-stick head flashing over the flange.
Final steps. I left the crew to finish up the exterior trim head flashing and siding, as well as install the twin sister to the door we did together. The contractor emailed me to let me know the second install went off without a hitch without me. I knew they had the skills to install it; just having previous experience made it go a lot faster. Dave from Morningstar now gives his clients the option of having me on site for the install, or they can hire the contractor that I work for part-time and I’ll come along for the install. It’s not so hard after all, especially when we read the instructions.