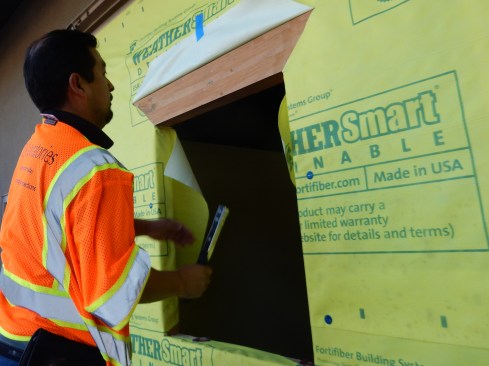
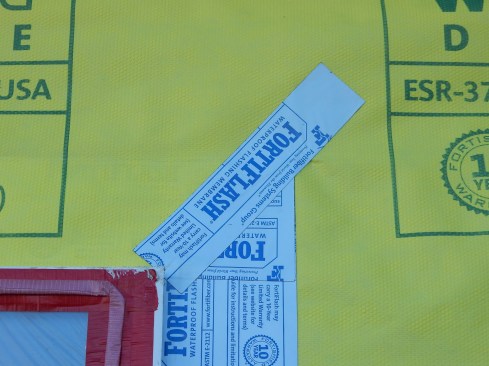
In my article last month, “Installing Flanged Windows: Two Strategies Compared”, I reviewed common window flashing defects I come across while inspecting and field-testing windows and doors. In addition, I stated my opinion that the AMAA “B” method is a more robust, reliable, and durable flashing option—showing a step-by-step, “B-1” method flashing installation.
Generally speaking, the Eastern half of the United States install windows using AAMA “A” methods and the Western states use the AAMA “B” methods. With the AAMA “A” methods (A & A1), the side flashing is applied on top of the side nailing flanges, while with the “B” methods place the side flashing on the rough opening before the window is set in place, resulting in the side flashing under the nailing flanges.
These may seem like meaningless details, but they are very different. I believe “B-1” offers a greater ability to inspect whether a window has been installed correctly, and, that it’s an easier method for the window installers to repeat in the field. Also, with the “B-1”, the side flashing gets compressed under the nailing flange when the window is fastened, making it more like a gasketed seal, therefore more effective and useful this way. That said; I believe both methods are valid, provided they are installed correctly and work to repel water away from the home. The following is what I would deem a proper “A-1” method flashing installation, gleaned from years of experience installing, inspecting, and performing thousands of tests on windows (and doors) in California and across the U.S.

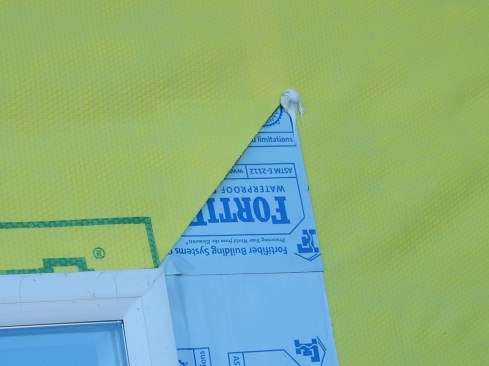
Step 1. Cut Housewrap/WRB.Properly measure, mark, and cut the housewrap at each rough opening. I recommend using the “Modified I-cut” method. Locate corners of the rough opening, then, draw lines indicating the centerline, bottom angle cuts, and cut along the RO’s top edge.
Step 1 (cont.). Cut Housewrap/WRB.Head laps should be cut at a 45-degree and to the width of the head and side flashing—no more, no less. A simple trick is to use a square, scrap piece of flashing as a template to help correctly mark outer edge of cut.
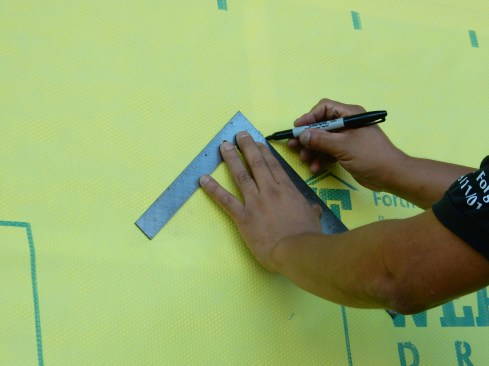
Step 1 (cont.). Cut Housewrap/WRB.Connect “outer” mark with top corner of rough opening, making a 45-degree line. It’s important to get this lap cut right, head laps are often sliced at different angles and lengths, which are harder to seal.
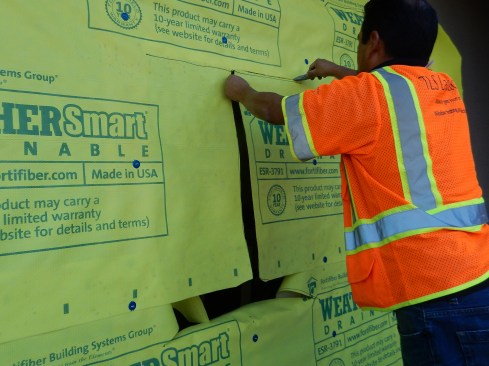
Step 1 (cont.). Cut Housewrap/WRB.Cut the housewrap. It is my experience that the “Modified I-cut” is the preferable method; an “I Cut” requires a fairly precise cut, cutting the housewrap flush with the sill. Installers usually work quickly and are more likely overcut the housewrap when cutting the sides and sill flush to the opening.
Step 1 (cont.). Cut Housewrap/WRB. Pull the resulting flaps into the RO. Secure flaps with a few staples, keeping the housewrap gently taut in the opening—do not over-pull the flaps. Cut a flap in the housewrap at the head at a 45° angle and to the width of the flashing, temporarily hold it up with tape.
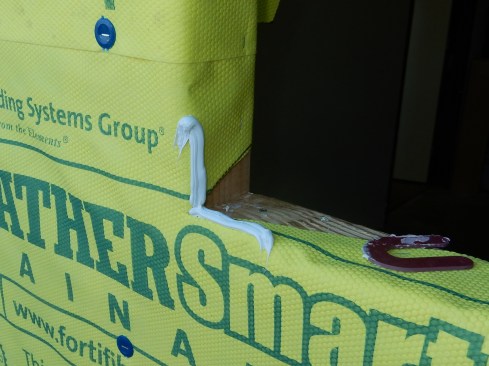
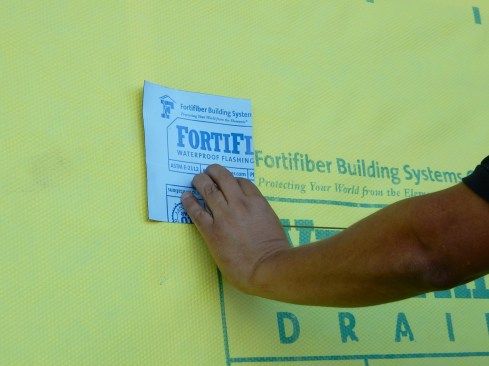
Step 2. Install Plastic Sill Corners. I highly recommend using plastic corner flashing pieces. Run a bead of sealant along the RO’s sill and jamb in preparation for the rigid-plastic flashing corners. This is especially important if a drainable housewrap is to be installed (as shown here). If using a flexible flashing product for sill, sealant is not needed.
Step 2 (cont.). Install Plastic Sill Corners.Staple the flashing corners in place at both sides of sill. The corners help seal the sill’s three-directional corner from pinhole openings in the membrane flashing, as well as providing protection in case the window is roughly slammed into to place.
Step 3. Apply Sill Pan Flashing. Install the self-adhered flashing (SAF), starting at the sill. Each end of the sill flashing should extend at least 9 inches (the width of the flashing material) beyond the opening so the side flashing can fully lap over it. Roll the SAF flat with a J-roller.
Step 3 (cont.). Apply Sill Pan Flashing.Cut the SAF and fold down on to the RO’s sill. Note: If a cementitious cladding, such as stucco, or brick or stone veneer, is planned for the house, install a through-wall flashing apron first under the self-adhered pan flashing. This will ensure that water drains to the exterior.
Step 3 (cont.). Apply Sill Pan Flashing. Roll the all peel-and-stick flat with a J-roller, being be careful not to create wrinkles. You’d be surprised, I don’t often see installers actually using a J-roller, but this tool helps improve adhesion of SAF, even in cold and wet conditions.
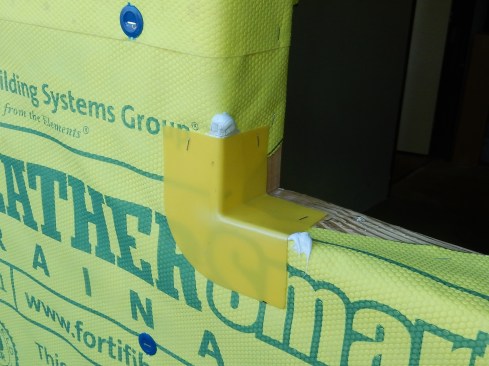
Step 3 (cont.). Apply Sill Pan Flashing. Install SAF sill-pan end-dam flashing at the sill’s three-directional corner, covering vertical leg of plastic flashing corner and lapping it a minimum 1 inch on to the sill. Slit patch in order to fold on to face of sheathing.
Step 3 (cont). Apply Sill Pan Flashing. Fold patch on to sheathing, J-roll patch legs. Note: for flexible sill flashing, apply without creating wrinkles; do not “over stretch” the material. Ensure the corners are tight to the RO if using a flexible product. The benefit to standard “rigid” or “straight” flashing corners is you can create tighter corners, avoiding wrinkles more easily.
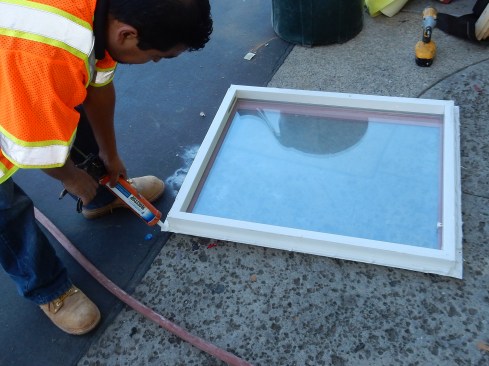
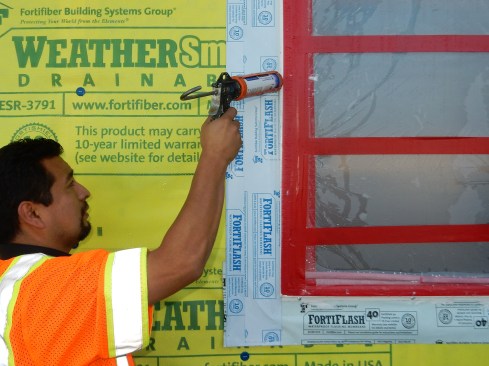
Step 4. Window Sealant Application.Apply 3/8- to 1/2-inch-wide fat bead of sealant to the rear of the nailing flange, on both sides and top of the window. A more precise sealant application is best, so I suggest applying the sealant to the nailing flange rather than around the RO’s perimeter. If applying the sealant to the flange is not practical, due to a window’s size or location, install it around the RO in a manner as to line up with the outer edge of the flange, allowing it to ooze through any pre-punched nailing holes (note: nailing fins shown here do not have pre-punched holes).
Step 4 (cont.). Window Sealant Application.At the lower fin, the sealant should be discontinuous. Either leave 3-4 inch gaps in sealant, or omit the sealant at the lower fin. Personally, I like leaving 3-4 inch gaps at the sides and under any vertical mulls. Regarding the sealant, make sure it’s compatible with membrane. I suggest using the same manufacturer for both the sealant and the flashing. Or use a butyl-based membrane, which is compatible with a wide range of sealants.
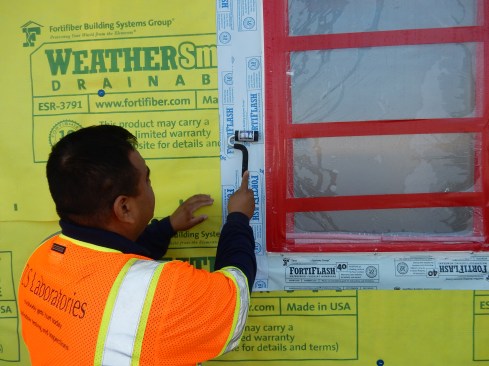
Step 5. Window Install.Set the window level, square and plumb. Shim as required. When installing, ensure that sealant “squeeze-out” exists everywhere sealant is used—along the edge of the nailing flange and at all the pre-punched holes. Proper squeeze-out confirms that the window is adequately set in sealant. Use exterior-grade, self-tapping pancake screws, 8 to 12 inches on center; the compression from the fasteners help "gasket" seal window fins to the WRB and sheathing at head.

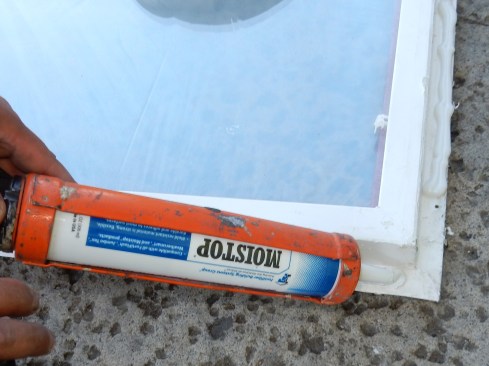
Step 6. Buttered Sealant.Ensure the sealant squeeze-out is buttered flat before it gets hard—I cannot emphasize this enough. The next layer of flashing will need to lie correctly upon it. Not buttering your squeeze-out flat in an A1 installation method is a recipe for disaster. Note: the window shown here is masked off with plastic and red tape for future water testing.
Step 6 (cont.). Buttered sealant. Ensure your sealant and your SAF flashing are compatible; they will be in permanent contact. It’s worth noting, for the “A” Method, no extra sealant should be applied for a cap bead (see B-1 Method’s buttered “enhancement”). Just the squeeze-out is buttered flat.
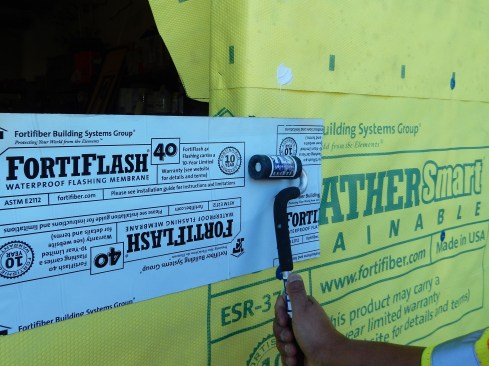
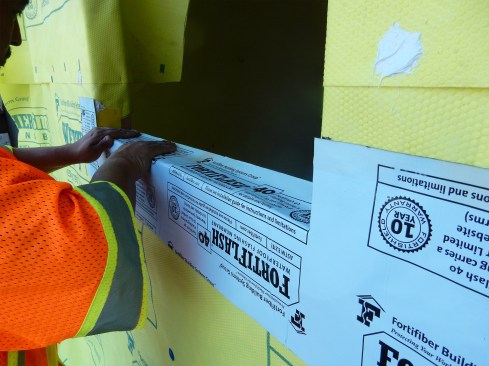
Step 7. Side Flashing. Install the self-adhered side flashings. If you are using a drainable housewrap product, as shown here, use at least 9-inch-wide material. Otherwise, I suggest using a minimum 6-inch-wide SAF. Apply the SAF material carefully. Use a J-roller to ensure adhesion and eliminate wrinkles. If adhesion is difficult due to weather conditions, use a primer.
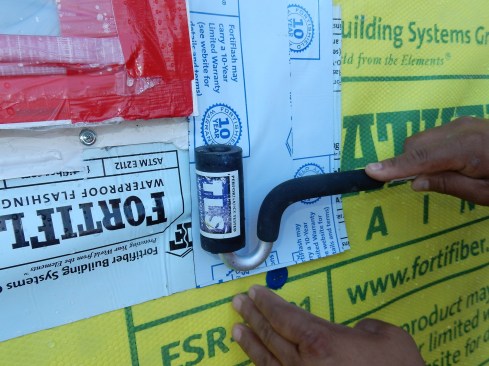
Step 7 (cont.). Side Flashing. Pay special attention where the side flashing laps on to the sill flashing; J-roll the lap to ensure adhesion. Nailing flanges typically have mitered corners, which are “welded.” The resulting welded seams often create raised surfaces, which cause the SAF to bubble and wrinkle at this critical juncture. Ideally, the SAF should lay flat on the fin, transitioning to the sill flashing without fish mouthing. This is an area I suggest sealant be applied at the edge of the membrane to prevent water from passing under the SAF. See steps 10 and 11.
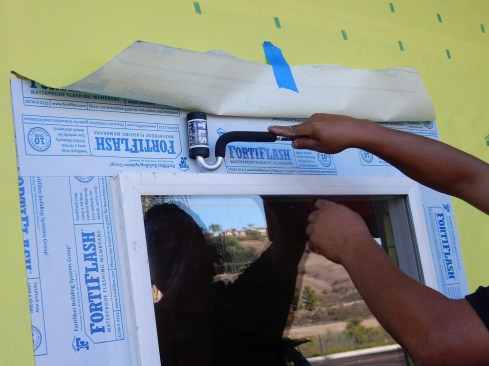
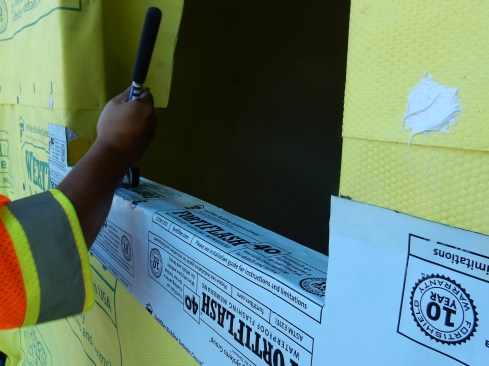
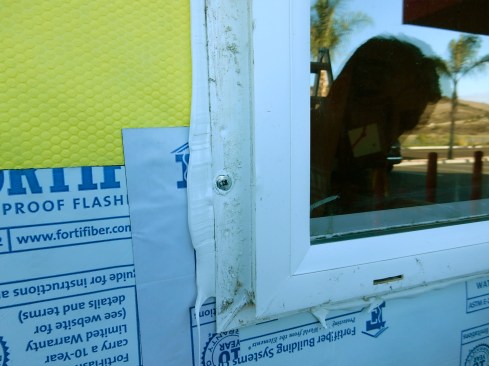
Step 8. Head Flashing. Install the head flashing last. Here, the installer flushed up the side and head flashing, but it’s preferable to extend each end past the side flashing. J-roll the peel-and-stick flat to fully adhere the membrane.
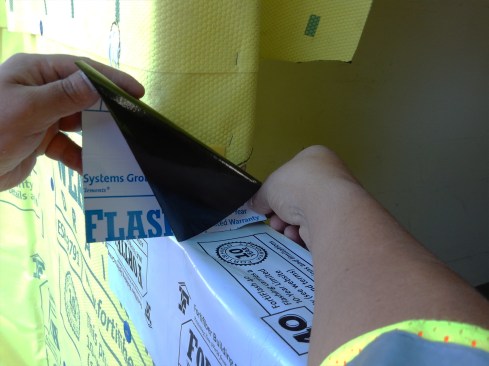
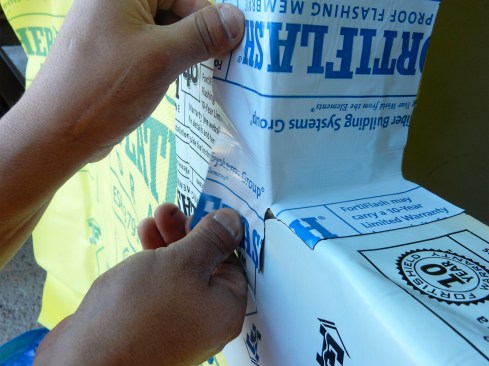
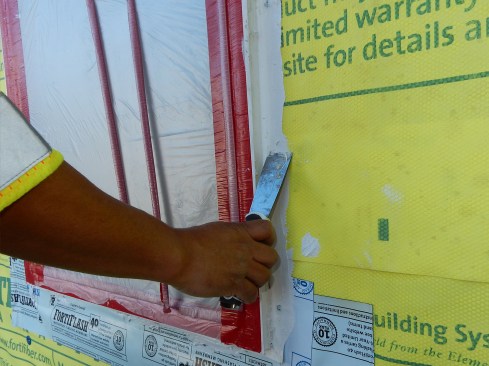
Step 9. Tape off head flap. Drop the head flap down. Prior to taping off, apply a dab of sealant at the top of the 45-degree cut. This may seem innocuous, but this little dab is important, particularly for drainable housewraps. Water can potentially get behind the tape at this juncture.
Step 9 (cont.). Tape off head flap.Tape the head lap closed at the ends. Strips of SAF membrane are an improvement over flashing tape products, but the tape will work, too. If the flap needs to be taped along the bottom edge, use short pieces with gaps between them so if any water gets behind there, it can drain out.
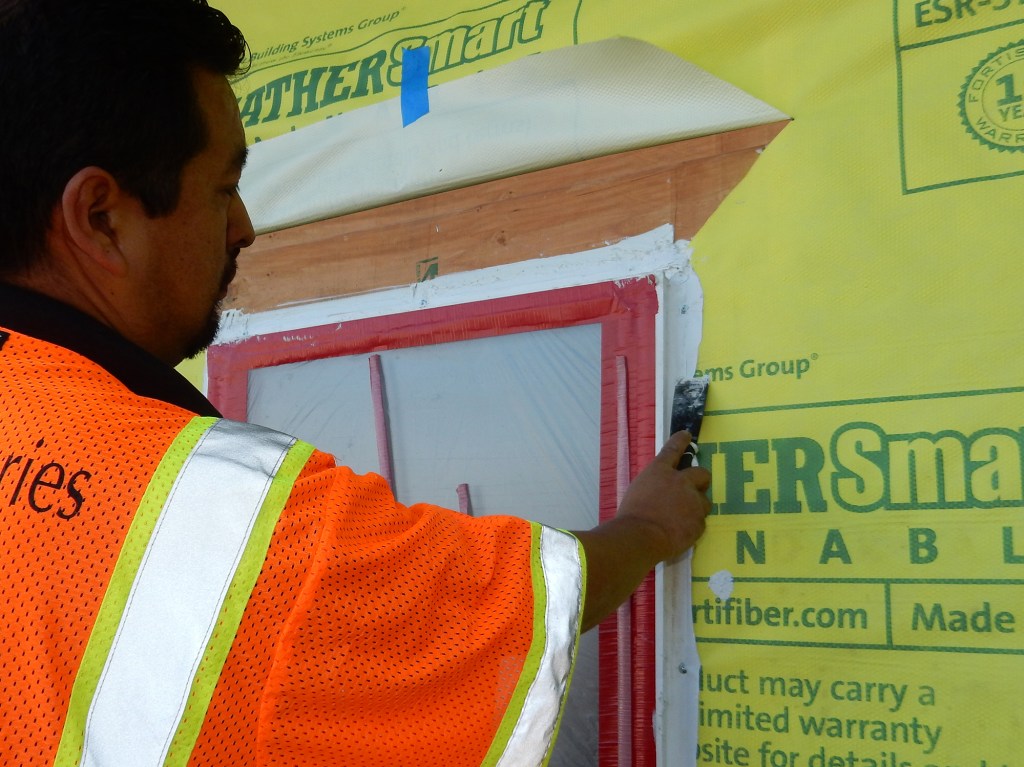
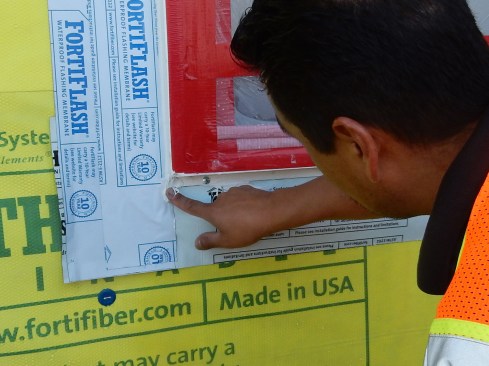
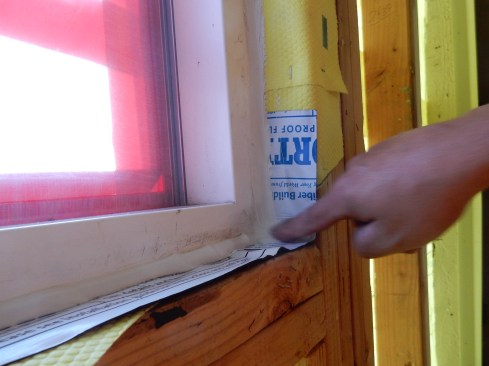
Step 10. Seal side-flashing edge. For added protection, apply a bead of sealant along the edge of the side flashing where it butts into the window frame. This will help if the SAF does not adhere properly to the nail fin due to dust, cold, or moisture.

Step 10 (cont.). Seal side-flashing edge.Tool the sealant bead with finger. The sealant helps mitigate potential moisture entry points from wrinkles in the side flashing.

Step 11. Sealing gap at sill. Also, I always recommend applying a bead of sealant along the seam below the window. J-rolling cannot always be relied on to seal this troublesome, “lumpy” spot and fish mouthing easily occurs here.
Step 11 (cont.). Sealing gap at sill. Tool the sealant with finger. Sealing this juncture is important, if water migrates behind the SAF, it’ll find the path of least resistance, working its way into the interior. Even if the flashing installation is executed perfectly, as illustrated in this story, there is a potential for water to get in, most likely through the pre-punched holes or cracked nailing fins.
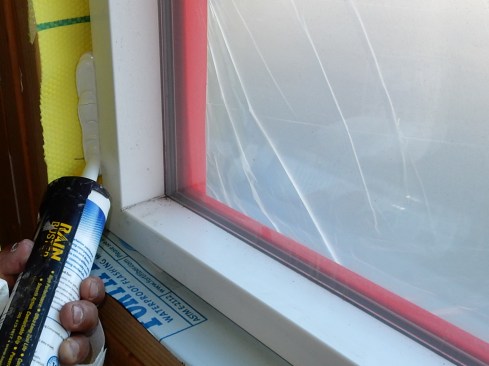
Step 12. Sealing the Interior. On the inside of your window, apply a bead of sealant 6 to 8 inches down each side and all the way across the bottom.
Step 12 (cont.). Sealing the Interior. Tool the sealant into place. This will stop any unintended water from reaching inside the building. Apply low expansion foam around the rest of the rough opening as an air seal.

Water testing. After many years of water testing windows in the field I am certain that 80% or more of the water intrusion we observe is due to flashing and sealant errors. Here is a recent AAMA 502, ASTM E 1105 water test we’ve preformed where we’ve isolated the window out of the test—only the flashing method, sealant, and WRB were being evaluated. The “window leaks” we get called to investigate are usually not window leaks, but flashing and sealant leaks. All of these leaks may be easily avoided by following the steps in this article.


