
Our company, Great Lakes Builders, was recently called in to widen a door opening in an exterior wall of a masonry home by 4 feet. The area outside the opening was to be roofed over and weathered in to expand a finished basement.
The walls of the house were concrete block with a brick veneer, and we had to support the wall before installing a new header beam for the expanded opening. To make matters worse, the floor of the house above the opening was supported by web trusses that we’d have to work around as we set up our shoring for the wall. With limited space in front of the opening, we’d have very little room once the shoring was in place. So we had to position the beam that would support the expanded opening on the concrete floor just outside the opening before we could set up the shoring.
Shoring Up the Wall
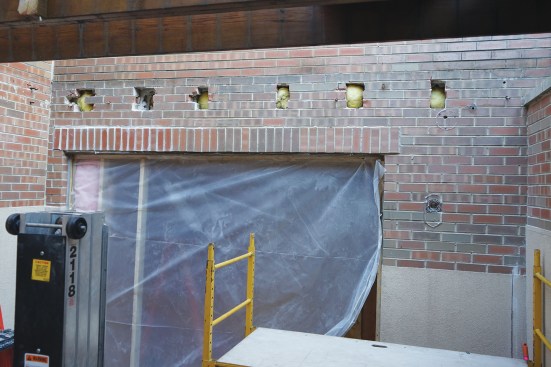
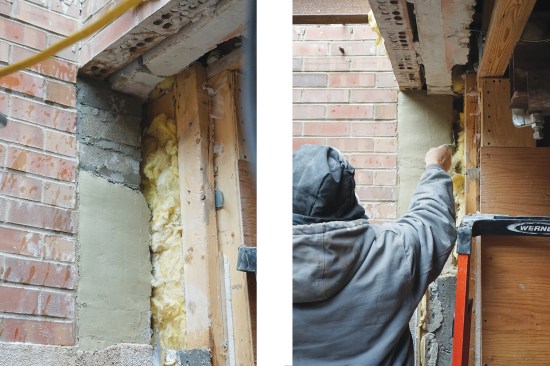
Working from engineered drawings, we began by cutting six openings through the brick veneer and the concrete block wall (above).
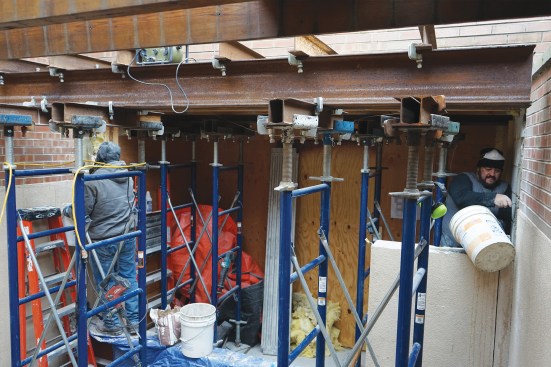
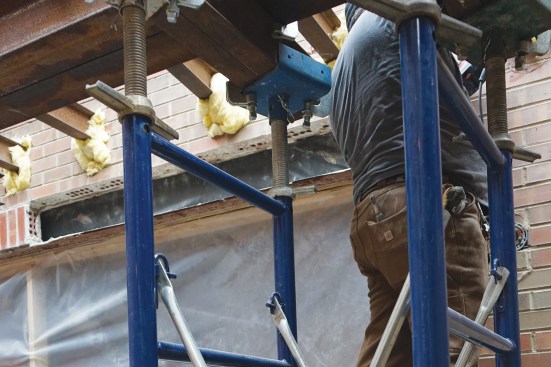
Next, we installed four shoring towers, two on each side of the wall, to support the masonry wall.
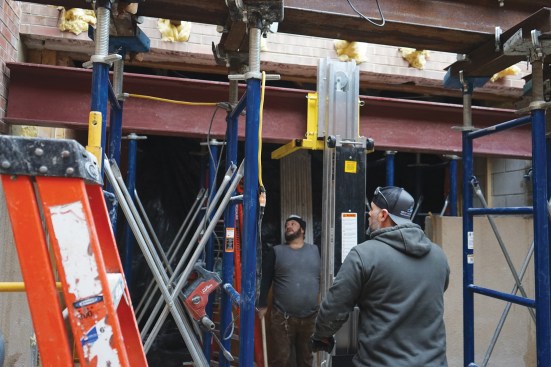
The shoring towers were outfitted with adjustable-length U-heads that we used to hold pairs of short S5x10 beams running perpendicular to the wall (above).
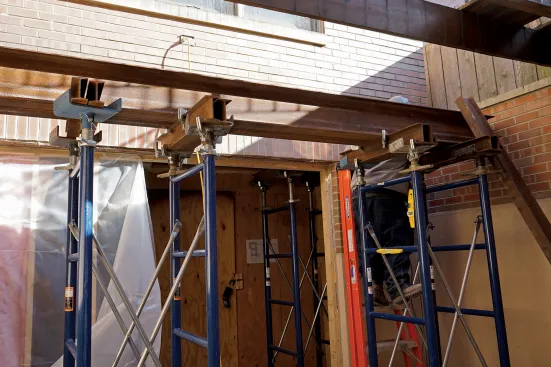
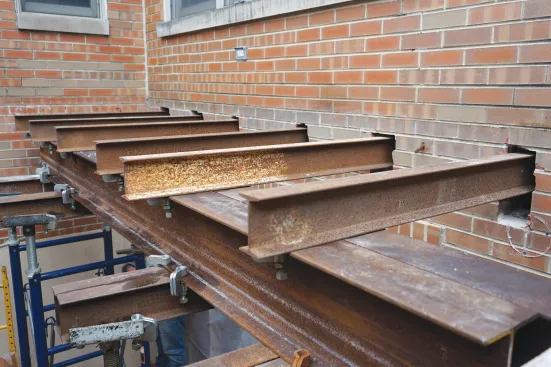
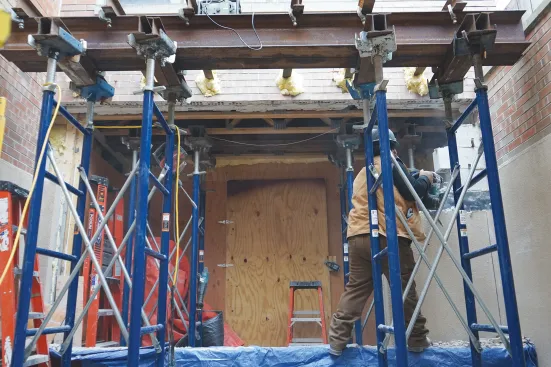
On top of those smaller S5x10 beams, we placed a pair of W10x22 spanner beams, one on each side of the wall. These in turn supported six needle beams that we had inserted through openings cut through the masonry wall (above).
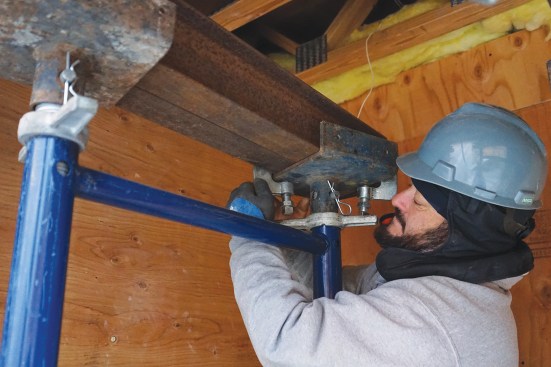
Using the adjustable heads on the shoring towers, we snugged the short beams up against the floor trusses inside the wall and raised the outside towers to the same level (above).
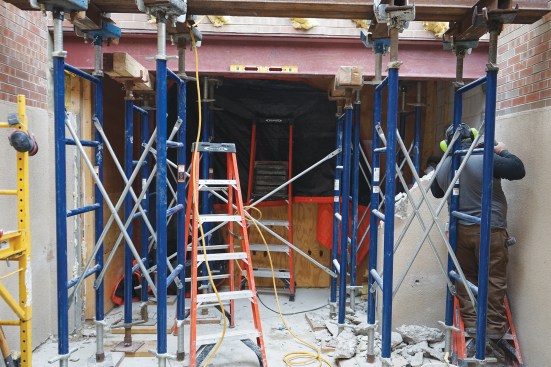
We secured the needle beams with beam clamps (above).
With the needle and spanner beams level (above), the gaps between the needle beams and existing masonry were ready to be packed with non-shrink grout.

We first sprayed water on the existing masonry to ensure good adhesion (above left), then packed in the non-shrink grout (above right).
Prepping for the New Beam
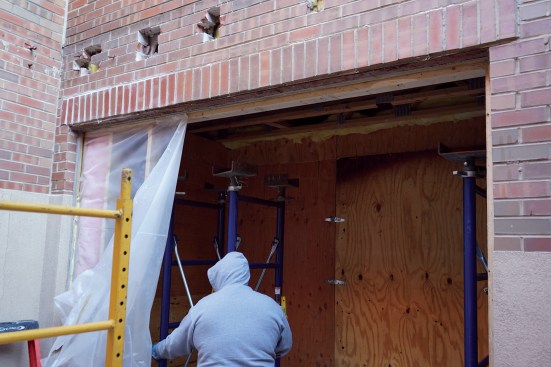
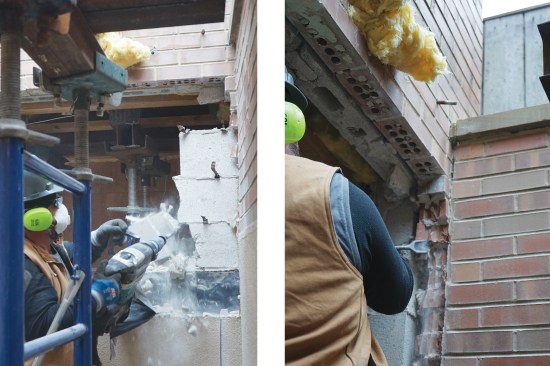
With the grout cured, the wall was fully bearing on the shoring assembly. We stuffed the needle-beam holes with insulation and then began removing the masonry across the width of the opening, exposing the existing lintel beam (above).

We removed the original lintel beam with a crank lift, and cut it in half for easier disposal (above).
With the entire width opened up, we began prepping the masonry on both sides to support the new beam (above). The masonry detailing differed on each side of the original opening; the right side had a stem wall, and the brick veneer extended farther down than on the left side.
On the right side, we removed the concrete block down to the brick-veneer line—note the vertical saw cut for the concrete section that will remain in place to support a column on that side (above left). Next, we cut back the end of the old brick veneer as well (above right).
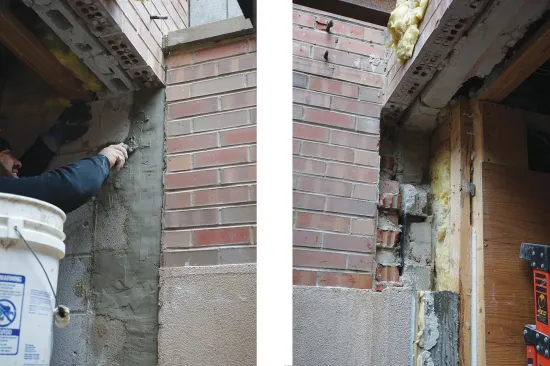
We then parged the entire surface with mortar (above left). On the other side of the opening, the lintel beam removal left a void in the masonry, which needed to be structurally supported (above right) …
… with a layer of flat concrete blocks (above left). The infill masonry was later finish coated with grout (above right).
Installing the New Beam
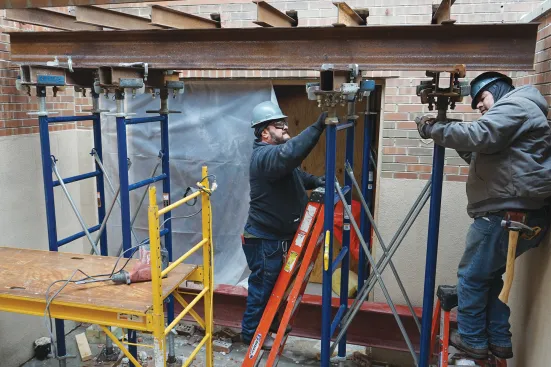
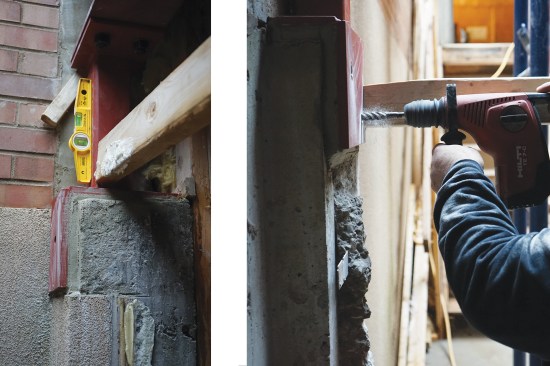
We placed the new W12x35 support beam into the opening with the crank lift, which was on rollers (above). The beam was rolled into position directly under the masonry wall and then raised into place.
We temporarily supported the beam in the opening using a shoring tower with wooden cribbing. The existing brick coursing was out of level, so we filled the gap with structural mortar before the supports were removed. With the beam in place and properly supported, we began removing the remaining the right-hand-side masonry stem wall to our saw cut line (above).

After preparing the masonry on each side, we began installing the custom-fabricated steel columns to support the beam. Starting on the right side, we dry fit the column base over the remaining section of concrete wall (above left). We removed a section of the existing stucco to allow the column to fit tight against the wall (above right).
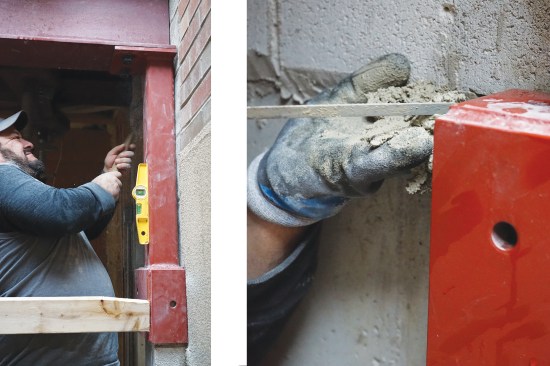
The column was braced back to the shoring tower with a length of 2×4 and tapped level with a hammer (above left). The void between the column base and the remaining masonry support wall—or pilaster—was tuck pointed with structural mortar (above right).
On the left side of the opening, the column base wrapped over the masonry support below (above left). As with the column on the opposite side, a 2×4 brace kept the column plumb and stationary while the structural mortar under the base cured. Once the structural mortar cured, we drilled holes for 5/8-inch attachment bolts, which were epoxied in place per the engineer’s specifications (above right).
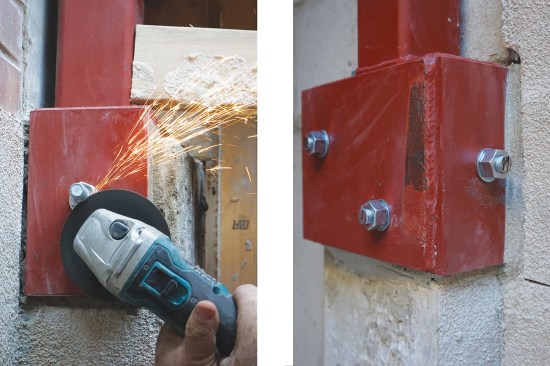
Nuts were threaded onto the bolts after the epoxy cured, and the bolt ends cut with a grinder (above left). Three bolts secure the right-side base (above right).
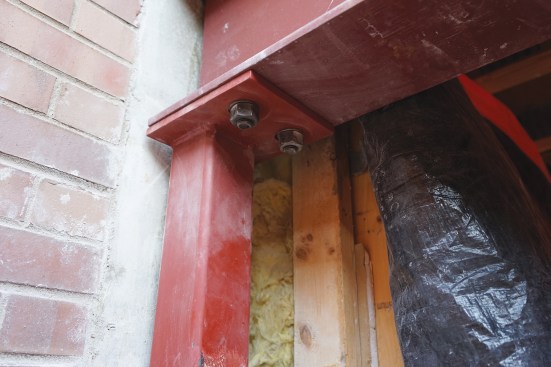
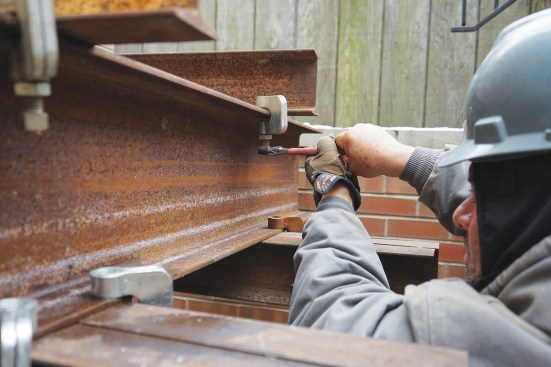
The tops of the columns were attached to the support beam with hardened steel bolts (above).

After we installed the columns, the weight of the masonry wall was loaded onto the new beam. The shoring that supported the beam and wall was dismantled and the area was cleaned (above). The space was ready to be roofed and weathered in to expand the basement living space.
Photos by Jake Lewandowski


