


Being a vinyl-siding contractor as well as a deck builder, I'm i…
Over 20 years ago, on a vinyl siding job, I screened in a deck that had a shed roof. I used wooden screen doors for the panels and framed out openings to fit them. Several years later, I went back to the same house to install some windows, and the vinyl siding looked great – but the screens didn’t. The frames hadn’t been painted in some time; what was left of the paint was peeling, and the frames had started to rot. I see a lot of wood trim that’s been neglected, just like the screen-door frames on that porch. Being a vinyl-siding contractor as well as a deck builder, I’m interested in low-maintenance alternatives, so now I use storm doors made of aluminum instead of wood for the panels. They last for decades with only seasonal cleaning, as the finish doesn’t peel and the aluminum doesn’t rot.
Aluminum storm-door panels aren’t just durable; they’re also versatile. The screens can be swapped for glass, extending the seasonal use of the porch considerably. Even in winter, the porch can be comfortable for parties and holidays, with the help of a space heater.
I buy the panels in custom sizes up to 42 inches in width. My supplier, Harvey Industries (800/942-7839, harveyind .com), also sells everything needed to join the panels into a screen system: upper and lower track, F-channels to attach the panels to the support posts, and H-channels for joining the panels to each other. I can get the panels in three colors and four styles, along with matching coil stock for trimming the posts. Harvey distributes in the Northeast, but there are probably similar products available in other parts of the country.
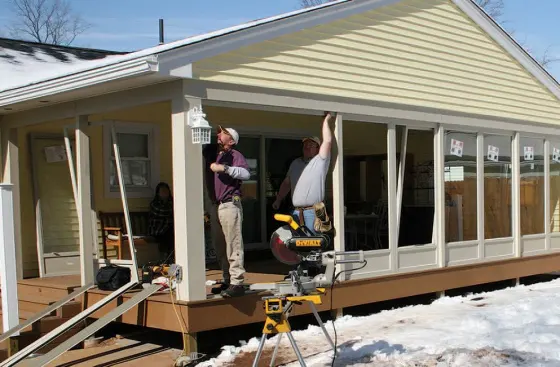
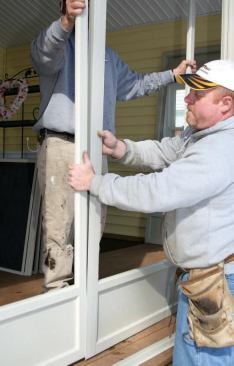
Installing the panels is straightforward. Note that there are typically two panels between each pair of support posts. On the job shown here, my helper and I had already wrapped the wood posts in coil stock.
Upper and lower tracks, F-channels for the sides, and H-channels used to join storm-door panels together and to the framing are supplied long. We cut them to length using a chop saw; a standard trim blade works well.
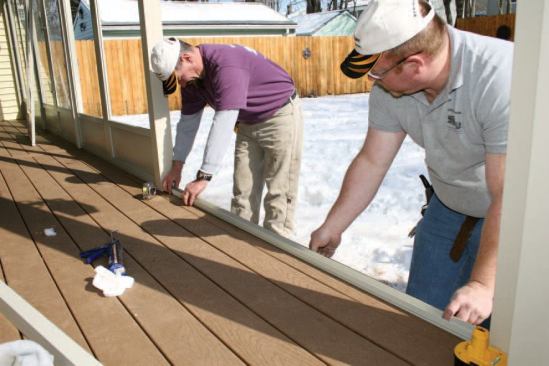
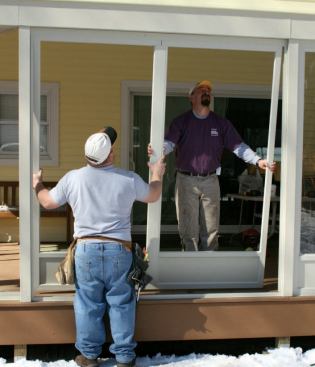
After bedding the base track in caulk, we screw it to the decking, then drill weep holes 3 inches from the ends and 16 inches on-center. After carefully measuring to make sure the panels will be plumb, we attach the top track in the same way. The top track has a deeper profile than the bottom track to allow the door panel to be lifted up and then dropped into place.
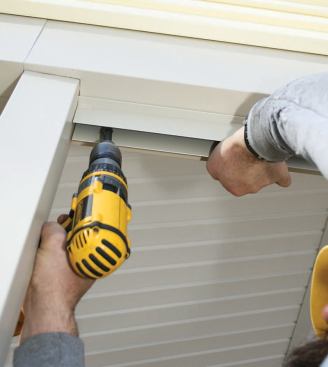
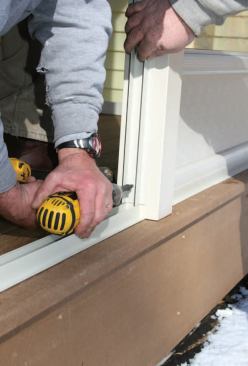
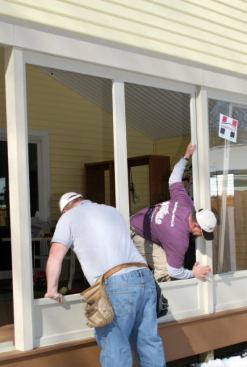
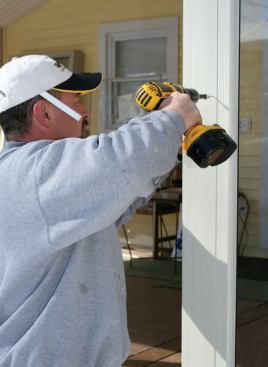
Next I install F-channels along the posts, again checking to make sure that the top and base tracks are perfectly aligned. With the glass or screens removed to lighten the load and reduce the risk of damage, we join each pair of panels with an H-channel that’s cut to fit between the top and bottom tracks. We slide the joined pair of panels up into the deeper top track until they clear the bottom of the opening, then drop the panels into the base track. After adjusting the fit around the perimeter, we screw the panels to the F-channels and the H-channel. Finally, depending on the season, we install the glass or screens in the panels.
Paul Mantoni owns Exteriors Plus in Terryville, Conn. This article first appeared in Professional Deck Builder magazine.


